
Overview
You will learn
- How to connect your app to SAP S/4HANA Cloud
- How to perform all the CRUD actions
- How to build and navigate to additional app pages


Prerequisites
Prerequisites
- You have enabled SAP Build Apps on your trial tenant, as described in Set Up SAP Build Apps (with Booster) on SAP BTP Trial Account.
- You have created a destination to your SAP S/4HANA Cloud system’s Business Partners API. See the documentation for destinations being used in SAP Build Apps. The service URL should be in the form:
https://{host}:{port}/sap/opu/odata/sap/API_BUSINESS_PARTNER - To get started, you can create a destination to the APIs on the SAP Business Accelerator Hub (see Access Demo SAP APIs for SAP Build) and build the entire UI, but you will not be able to update the data.
Steps
Intro
The point of this tutorial is to show you how you would perform all the CRUD operations, and how you would handle some of the complexities of the SAP backend APIs (e.g., nested entities or strict requirements for the data).

You will create an app with 3 pages:
- Page 1: Display all business partners
- Page 2: Display all addresses for a business partner
- Page 3: Create or update an address
As for complexities of the API, here are a few:
- You cannot delete an address if it is labeled as the default address (AddressUsage = XXDEFAULT).
- Whether an address is the default is determined by the AddressUsage nested entity, which you will need to expand.
- If you add an address to a business partner that has no addresses, that address must be labeled as the default address, but if you are adding an additional address, that address CANNOT be labeled as the default address.
- There are all types of conditions for the data. For example, if you add an address from the United Kingdom, it must include a postal code (Postal codes are not needed for the US or Sweden). Or, you cannot delete the default address.
The tutorial will handle the complexities listed above. You can learn about the API on the SAP Business Accelerator Hub .

In the lobby of your SAP Build Apps, click Create.

Select Build an Application.
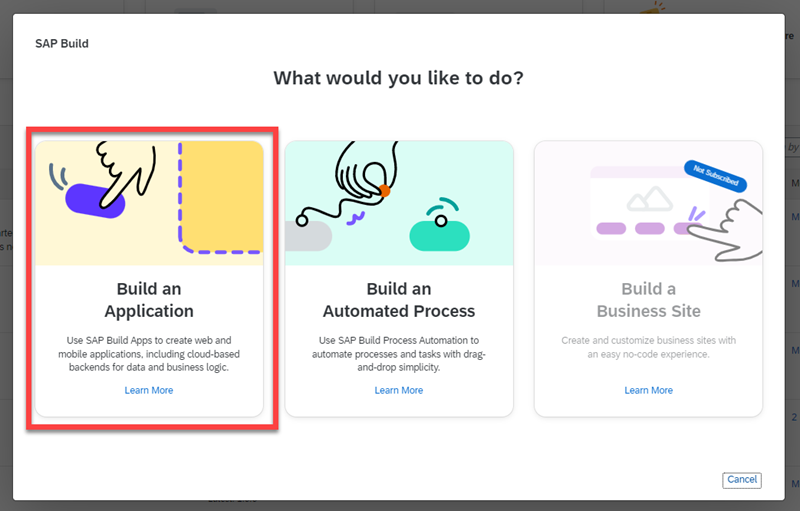
Select Web & Mobile Application.

For the project name, enter S4HANA CRUD, then click Create.
In order to connect via SAP BTP destinations, you need to enable SAP BTP authentication for your app.
Go to the Auth tab.
Click Enable Authentication.

Auth Select SAP BTP Authentication.
On the confirmation popup, click OK.
In this step, you will make a connection to the Business Partner API of your SAP S/4HANA Cloud system. You will enable 2 entities: A_BusinessPartner (the header for a business partner) and A_BusinessPartnerAddress (contains all the business partner addresses).
IMPORTANT: This tutorial assumes you have access to an SAP S/4HANA Cloud system, and you have a user with permission to call the Business Partner APIs. If not,you can still do most of the tutorial by using the read-only API on the SAP Business Accelerator Hub (see Access Demo SAP APIs for SAP Build), though you will not be able to update the data.
Go to the Data tab.
Click Add Integration.

Add integration Click BTP Destinations, and then select the destination to your SAP S/4HANA Cloud Business Partner API.

Select destination The destinations in the screenshot are just examples; your destination will have a different name.
Click Install Integration (upper right).
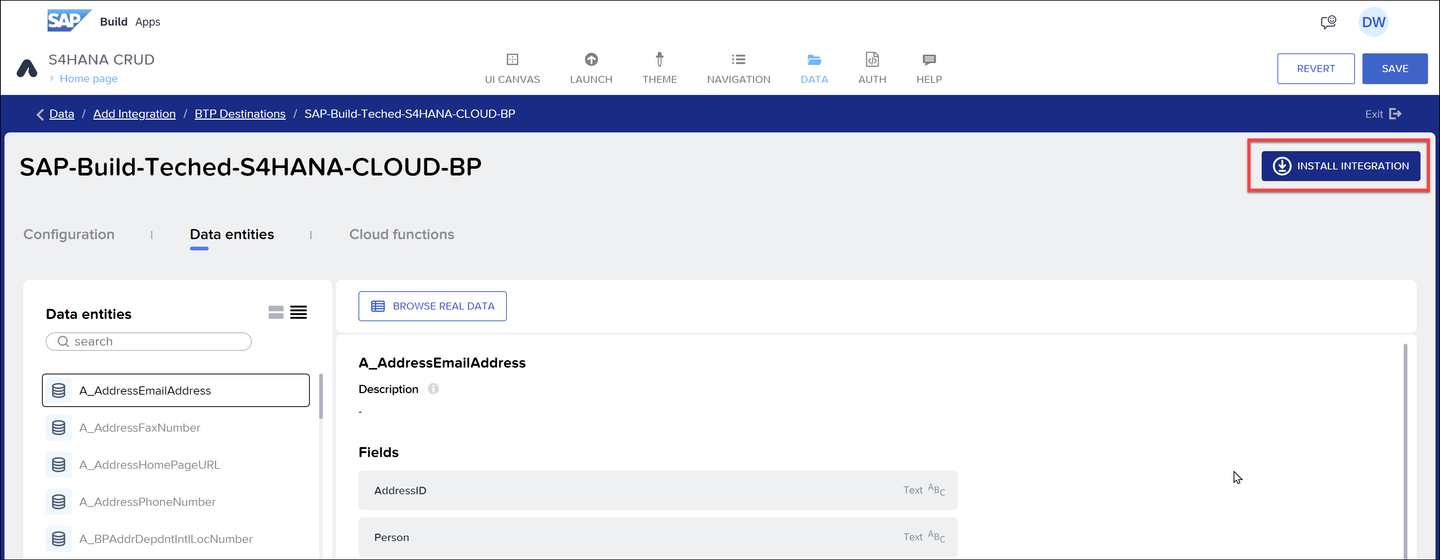
Alt text Under Data Entities, scroll down so you can see both A_BusinessPartner and A_BusinessPartnerAddress. For each, select it and click Enable Data Entity.

Entities added You can now select an entity and click Browse Real Data to see live data from SAP S/4HANA Cloud.

Browse real data 
Browse real data Close the data browser, select A_BusinessPartnerAddress. Scroll down to the Expand area, and enable to_AddressUsage.

Expand to_AddressUsage is a nested entity indicating if the address is the default address. When you get your addresses you will want to know if they are the default, so you need to expand this nested entity. Of course, you could have enabled the *A_AddressUsage entity and made another API call, but expanding is easier.
Click Save (upper right).
You will create a page for creating/updating an existing address. You will only specify 4 fields.
You are creating the pages in reverse order because the later pages have page parameters that must be sent to the page when navigating to it. These page parameters must be created before you can specify the navigation, so to avoid going back and forth between pages, you simply build the pages in reverse order.
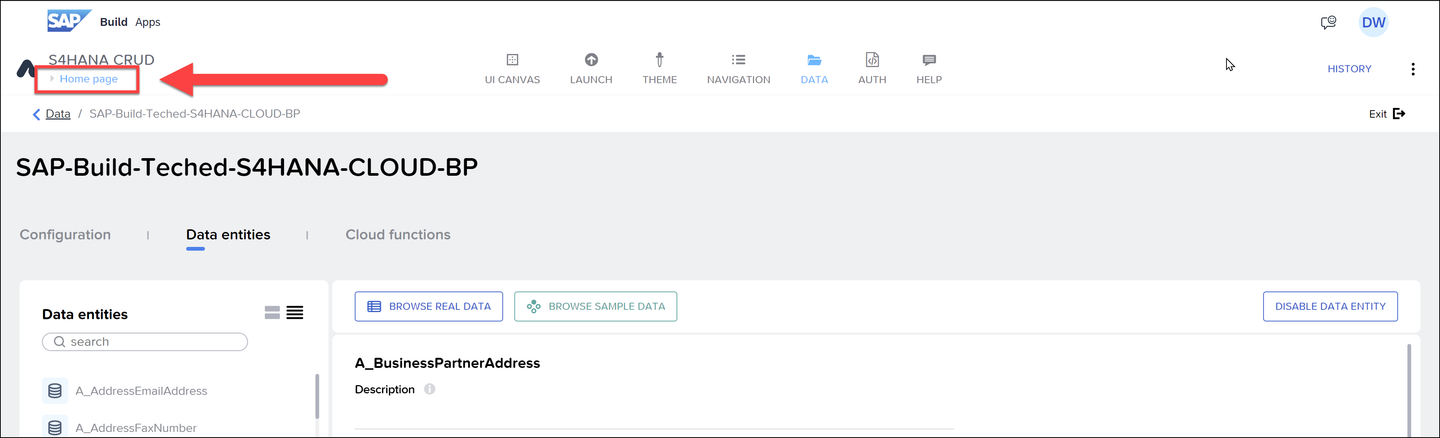
Click Home Page in top left.
New page Click Add New Page, enter
BP Address Details, and click OK.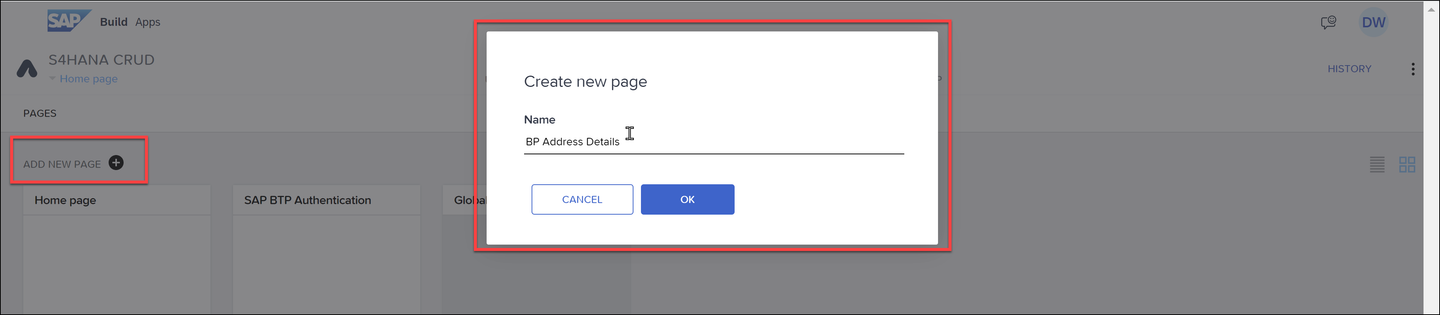
Name of page Remove all existing components from the page (select each component and click the X), and then drag the following components in this order:
- Icon
- Title
- 4 input boxes
- Button

UI components Click Variables, then Page Parameters, and create the following 4 page parameters (all of type text):
Parameter Purpose AddressID The ID of the current address, if you are updating an existing address BPID The current business partner BPName The current business partner name XXDefault Indicates if the current address, whether or not it is new or existing, should be considered the default address for this business partner. A value of XXDEFAULTindicates a default address; otherwise the value is blank.
Page parameters Click Data Variables, and create a data variable based on A_BusinessPartnerAddress.
Set the data variable type to New data record.

Create data variable Click View to return to the UI canvas, and configure the properties for the components as follows:
Component Property Value Icon Icon Fiori Icons → sys-back-2 Title Content Use the following formula: "Address for: " + params.BPNameInput box 1 Label House Number Input box 2 Label Street Input box 3 Label City Input box 4 Label Country Button Label Save For each of the input boxes, bind the value field to the following data variable fields:
Input Box Data Field Input box 1 data.A_BusinessPartnerAddress1.HouseNumber Input box 2 data.A_BusinessPartnerAddress1.StreetName Input box 3 data.A_BusinessPartnerAddress1.CityName Input box 4 data.A_BusinessPartnerAddress1.Country Click Save (upper right).
In this step, you set up the payload or body of the API request because the page is being used for both new addresses as well as updates to existing addresses.
You also must adjust the payload, with a nested entity, based on whether the address is a default or not.
Click Variables → Data Variables, and select A_BusinessPartnerAddress1.
Open the logic canvas.

Data logic canvas Set up the following logic flow:

Logic flow Configure the flow functions as follows:
If condition: This condition checks if you are updating an existing record. Set the condition to the following formula:
JavaScriptIS_EMPTY(params.AddressID)Set data variable (top, new record)
Data variable name: A_BusinessPartnerAddress1
Record properties: Set to the following formula:
JavaScript{AddressID: params.AddressID, BusinessPartner: params.BPID }
Set data variable
Get record
Resource name: A_BusinessPartnerAddress
Set the BusinessPartner and AddressID to the corresponding page parameter.

Get record
Set data variable (bottom, update record)
Data variable name: A_BusinessPartnerAddress1
Record properties: Set to the following formula:
JavaScriptPICK_KEYS(outputs["Get record"].record, ["HouseNumber", "CityName", "Country", "StreetName"])
Now add another If condition and Set data variable flow functions, and connect as follows:

Check default address These are used to check if the address is a default address, and adds the needed nested entitty.
Configure the new flow functions as follows:
If condition: Set the condition to the following formula:
JavaScript!IS_EMPTY(params.XXDEFAULT)Set data variable
Data variable name: A_BusinessPartnerAddress1
Record properties: Set to the following formula:
JavaScriptSET_KEY(data.A_BusinessPartnerAddress1,"to_AddressUsage", [ {AddressUsage: params.XXDEFAULT} ] )SET_KEYtakes an object and adds or updates a specific attribute, while keep the other attributes unchanged.
You need logic for saving changes to the data, and must take into account whether the save is a new address or an update.
Click View to return to the UI canvas.
Click the Save button and open the logic canvas.
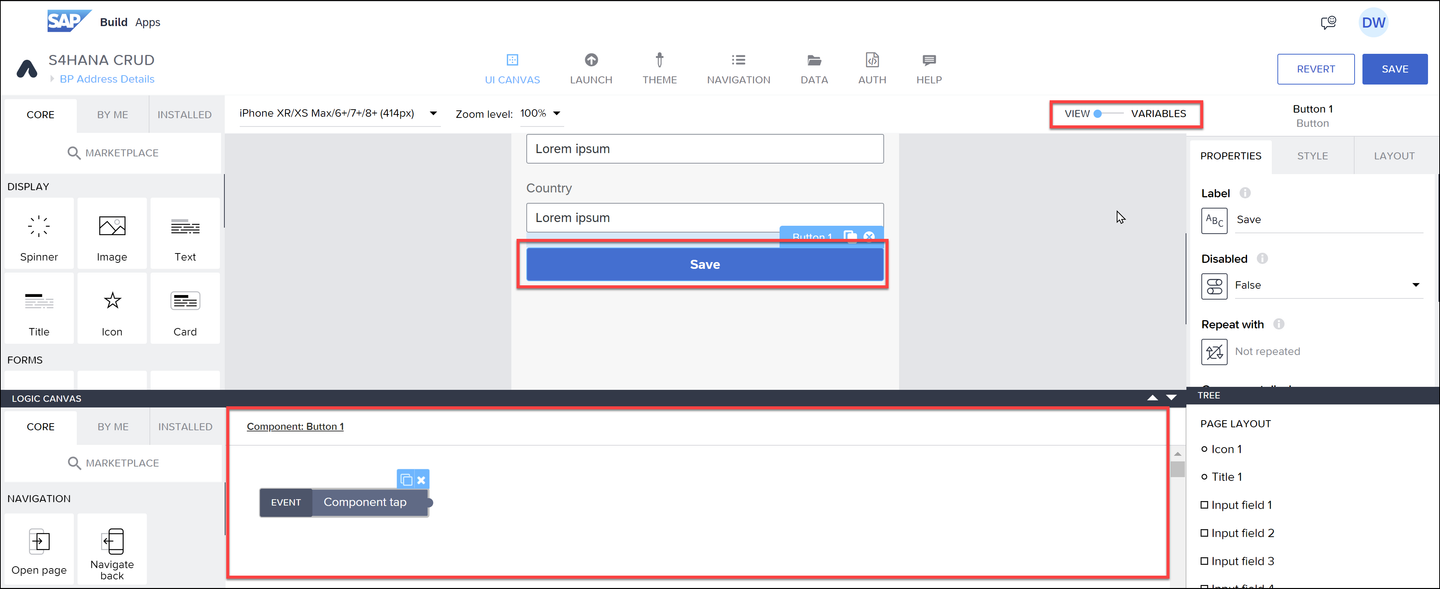
Open logic canvas Set up the following logic flow:

Logic flow Configure the flow functions as follows:
If condition: Checks if this is a create or update. Set the condition to the following formula:
JavaScriptIS_EMPTY(params.AddressID)Create record
- Data variable name: A_BusinessPartnerAddress
- Record: Set to data variable A_BusinessPartnerAddress1.
Update record
Resource name: A_BusinessPartnerAddress
Set the BusinessPartner and AddressID to the corresponding page parameter.
Record: Set to the following formula:
JavaScript{Country: data.A_BusinessPartnerAddress1.Country, CityName: data.A_BusinessPartnerAddress1.CityName, HouseNumber: data.A_BusinessPartnerAddress1.HouseNumber, StreetName: data.A_BusinessPartnerAddress1.StreetName}
Click the back icon at the top of the page, open the logic canvas, and connect a Navigate back flow function to the Component tap event.

Back
You will create a page for displaying the addresses for a specific business partner.
Click BP Address Details (current page, in the top left).
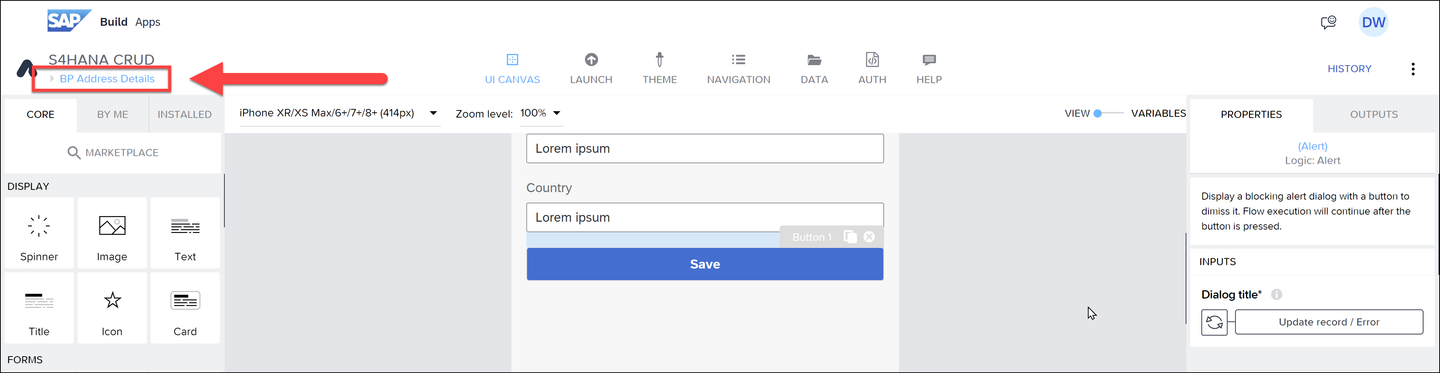
New page Click Add New Page, enter
Business Partner Addresses, and click OK.
New page name Click Variables, and then Page Parameters, and create a page parameter called
BPIDand of type text.
Page parameter Click Data Variables, and create 2 variables, one for A_BusinessPartner and one for A_BusinessPartnerAddress.

Data variables Configure the data variables as follows:
A_BusinessPartner1
Make it a Single data record, and set BusinessPartner to the BPID page parameter.

Configure single data record A_BusinessPartnerAddress1
Keep this Collection of data records.
Set the Filter condition to Object with properties. Add a filter condition so BusinessPartner equals the BPID page parameter.

Filter
Click on A_BusinessPartnerAddress1, and open the logic canvas. Connect the Page focused event to the rest of the logic flow.

Page focus Click View to return to the UI canvas, and remove all the default components.
Add the following components in this order:
- Icon
- Title
- Button
- Container, and inside the container add:
- Icon
- List Item

UI Configure the following components:
Component Property Value Icon Icon Fiori Icons → sys-back-2 Title Content Set to formula "Addresses for: " + IF(IS_EMPTY(data.A_BusinessPartner1.BusinessPartnerFullName), "", data.A_BusinessPartner1.BusinessPartnerFullName)Button Label New Address Configure the container as follows:
Set Layout → Layout to Horizontal and Align to middle.

Container Set Style → Layout Container → Edit, then edit Background color by clicking Transparent → New Palette

Local palette Click Formula, and then click the current formula (probably
#f7f7f7) to get the formula editor.
Color formula Replace the formula with the following:
JavaScriptIF(IS_EMPTY(repeated.current.to_AddressUsage.results),"","rgba(196,63,63,0.3)" )The formula editor may show errors, but you can ignore them.

Conditional color Click Submit, and then Convert.
Set Style → Padding, and click the left box, and set it to Theme → 12px.

Padding Under Prperties, set Repeat with with the data variable A_BusinessPartnerAddress1.
Configure the icon in the container by setting the Icon property to Fiori Icons → delete.
Configure the list item in the container by setting the following:
Primary label to the following formula:
JavaScriptrepeated.current.HouseNumber + " " + IF(IS_EMPTY(repeated.current.StreetName),"",repeated.current.StreetName)Secondary label to Data item in repeat → current.CityName.
Click the button, open the logic canvas, and attach an Open page flow function to the Component tap event.
Configure the Open page flow function as follows:
Property Value Page BP Address Detail page BPID BPID page parameter XXDEFAULT Use the following formula: IF(COUNT(data.A_BusinessPartnerAddress1)==0,"XXDEFAULT","")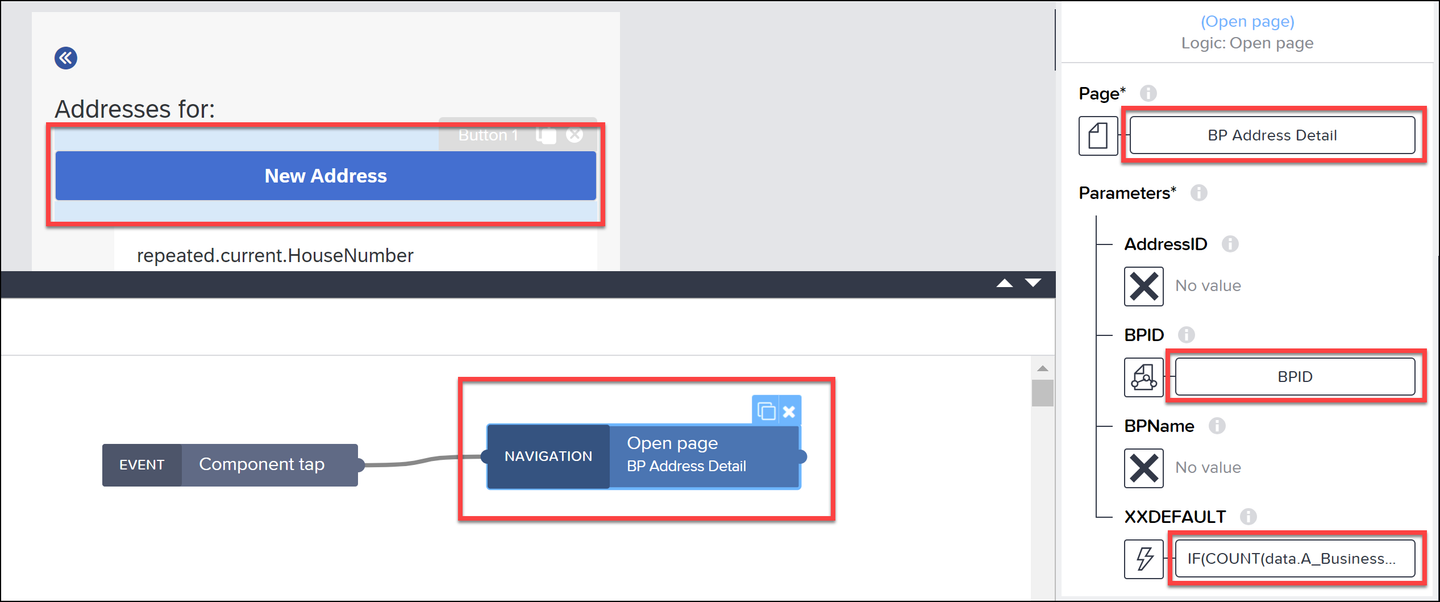
New address Click the list item, open the logic canvas, and attach an Open page flow function to the Component tap event.
Configure the Open page flow function as follows:
Property Value Page BP Address Detail page AddressID data item in repeat current.AddressID BPID BPID page parameter BPName data variable field A_BusinessPartner1.BusinessPartnerFullName XXDEFAULT no binding Click the back icon at the top of the page, open the logic canvas, and connect a Navigate back flow function to the Component tap event.

Back
You need to add the flow functions for deleting a record. But you must first check if the address is the default address; if it is, you alert the user they cannot delete the address.
Click the delete icon, and open the logic canvas.
Set up the following logic flow:

Delete flow functions Configure the flow functions as follows:
If condition: Set the condition to the following formula:
JavaScriptrepeated.current.to_AddressUsage.results[0].AddressUsage === "XXDEFAULT"You will see errors for the formula, since the nested entity exists but is not part of the schema. Ignore the error and save the formula.
Alert: Set the text to
You cannot delete the default address.Delete record: Set the condition to the following formula:
- Resource name: A_BusinessPartnerAddress
- BusinessPartner: BPID page parameter
- AddressID: data item in repeat current.AddressID

Configure flow functions To show the update, you will want to retrieve the list of addresses again.
Go back to the data variable A_BusinessPartnerAddress1, open the logic canvas, and copy the Get record collection and Set data variable flow functions (you’ll need to unselect the event).
Now paste them into the ur delete flow.

Retrieve data again Click the Set data variable flow function, and set the Record collection to Output value of another node → Get record collection → Collection of records.

Configure set data variable Add an alert flow function in case the delete fails, and set the text to Output value of another node → Delete record/Error.

Alert
Now you will create the home page that displays a list of business partners, for which the user select one to maintain its addresses.
Click Business Partner Addresses (current page, in the top left).
You will already have a Home Page. Click on it.

New page name Click Variables → Data Variables, and create a data variable based on A_BusinessPartner.

Data variable Configure the filter or paging of the data variable so that you do not get 1000s of business partners – this will freeze your app.
As an example, I created a filter that returns only records where the SearchTerm1 field has a certain flag (using the Object with properties binding).
To do this, I clicked Filter Condition → Custom Condition.
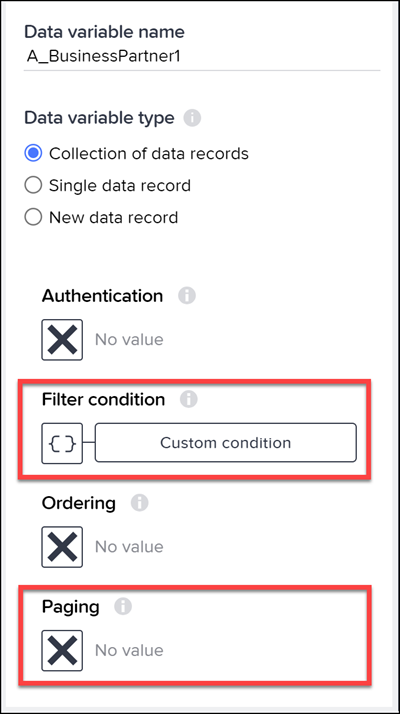
Filter Then I selected the property SearchTerm1 and set it to
DBW. Use whatever filter works for you on your system.
Search term Click View to return to the UI canvas.
Remove the text component and add a list item component.
Change the Content property of the title to
Business Partners.
UI components Click the list item, and configure it’s properties as follows:
Property Value Repeat with data variable A_BusinessPartner1 Primary label data item in repeat current.BusinessPartnerFullName Secondary label data item in repeat current.BusinessPartner 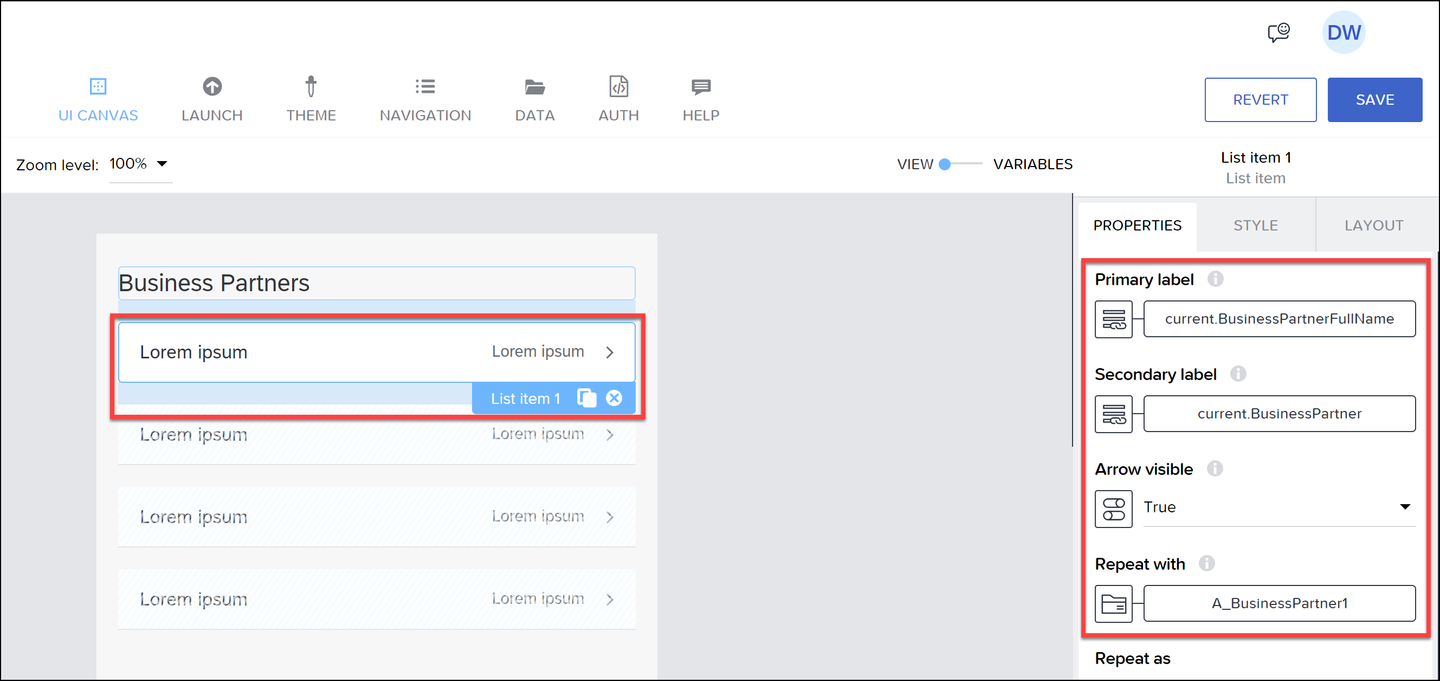
List item configuration With the list item selected, open the logic canvas.
Add an Open page flow function, and configure it as follows:
Property Value Page Business Partner Addresses Parameters → BPID data item in repeat current.BusinessPartner 
Navigate
Now you can test the app.
Go to the Launch tab, and then click Open preview portal.

Preview Open up your SAP Build Apps preview app on your mobile device.

Preview app Either click SAP Build Apps (for EU10) or Other login options (for other landscapes) to get a code.

Preview code Enter the code in the preview portal, and press Enter.

Enter code This will update the preview app, and show all your apps in the current tenant.

Apps Click S4HANA CRUD to open the app.

Alt text
Now use the app, and try out the following:
- Click on a BP with addresses, and see if you see the addresses.
- Click on a BP with addresses, and try to add an address.
- Click on a BP with no addresses, and try to add an address.
- Click on a BP with addresses and try to update an existing address.
- Click on a BP and try to delete the default address.
- Click on a BP and try to delete a non-default address.
- Try to add an address with country =
GB(you should get an error since there is no way to add a postal code).
Resources
Discussion
Share feedback on this tutorial or join the conversation in SAP Community.