
Get your Use Case Buddy started
This tutorial is for BTP Admins or CoE teams who are responsible for managing the pipeline of low-code use cases and the low-code solution portfolio. Start this tutorial to learn about how to build a "Use Case Buddy" which will give you a structured method to manage and review ideas of your users in the low-code realm. It will help IT departments avoid redundant requests and determine complexity of unique ideas and projects, preventing the risk of shadow IT.
Overview
You will learn
- How you can ideate, collect and differentiate ideas from your users
- How to build your own Use Case Buddy for your organization
- How to connect SAP Build Apps, SAP Build Process Automation and SAP Build Work Zone Advanced Edition
- How to customize contents, logics and workflows in the SAP Build portfolio


Prerequisites
Prerequisites
- You have an account in SAP BTP (Check out Free Tier Service Plans in case you want to start fresh)
- Your IAS tenant runs in the same landscape as your BTP account with the openID protocol. (Important: SAML cannot be used as protocol)
- You have activated Boosters for SAP Build Apps and SAP Build Process Automation.
- You have configured an SMTP Destination to send mail notifications.
- You have created a Destination to trigger a process from any service.
- [optional] You have activated SAP Build Work Zone Advanced Edition and you set it up in your BTP account.
Steps
Intro
The Use Case Buddy uses straightforward and practical questions to assess the project complexity during the ideation phase of low-code development. As a result of this, you’ll understand what each new idea will demand from your team and its resources, and determine whether it should be developed. Having a Use Case Buddy enables you to gather ideas from your users, translate them into requirements and technical descriptions for IT, let IT review them and establish a foundation of transparent low-code development and collaboration among all participants!
Objective of this tutorial: Take over the content packages, give it your own branding, customize it according to your needs and ideas & you’re already good to go!
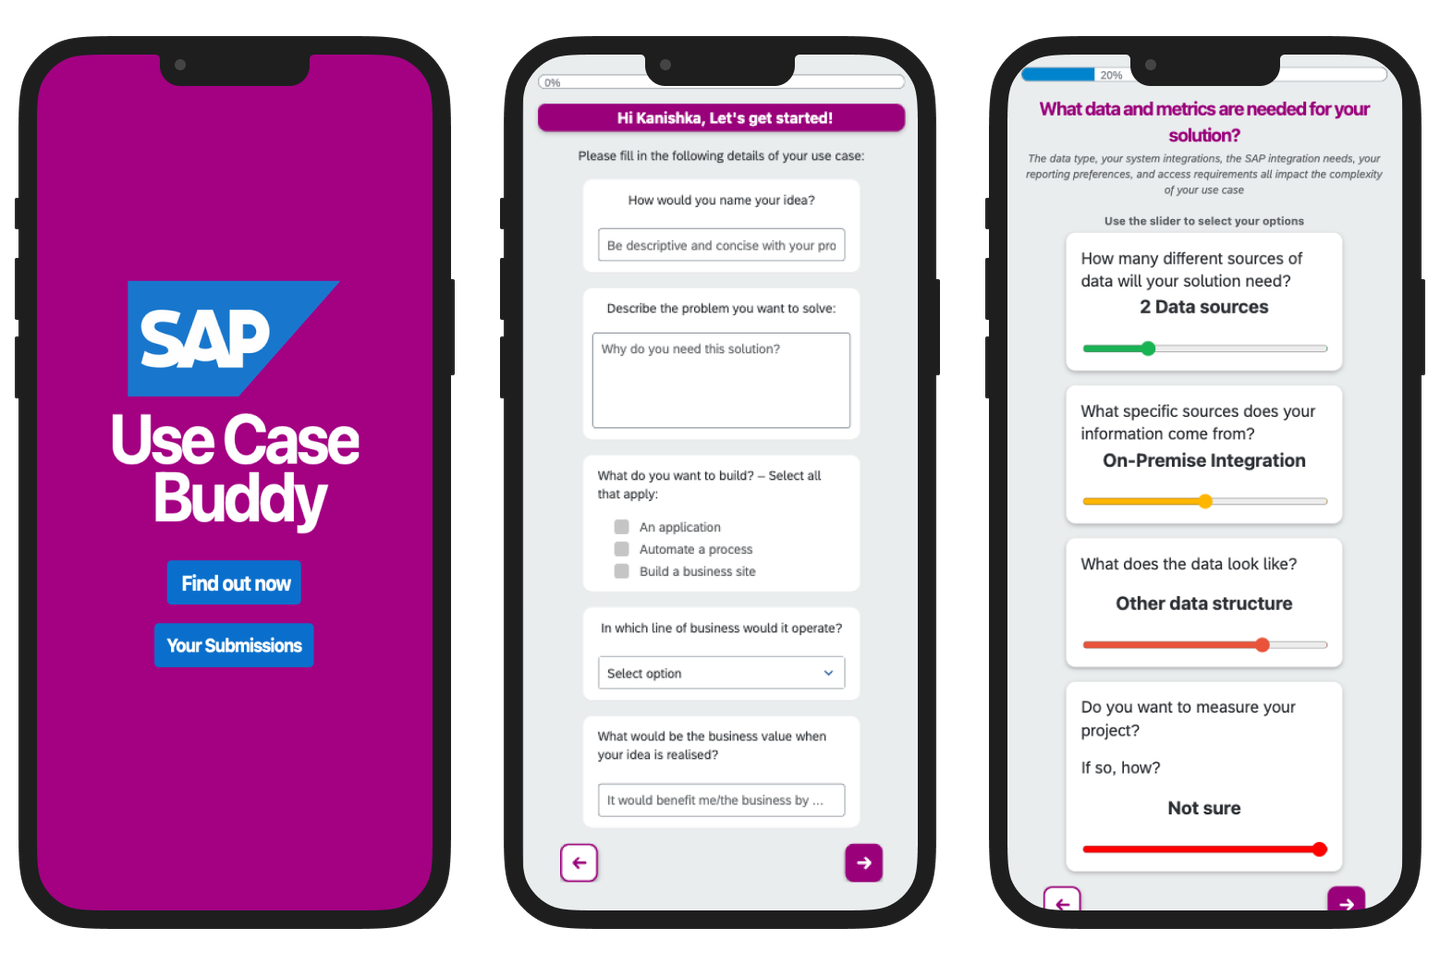
Building the Use Case Buddy and making it work for your organization will bring huge benefits! But to be able to do this, it helps to understand the intended setup.
Take a look at this 📷 demo video to see how it could look like at your organization.
Go over the solution diagram for the Use Case Buddy setup including the respective roles. This is our target for this tutorial.

SignUp Users input the details of their use case idea, and the app calculates its complexity. IT admins can then review and approve or deny the idea. Approved use cases are listed in a repository to further collaborate on.
Ready to move on? You’ve got all you need now!
The templates are available on the SAP Build Governance Resource Center. If you’re not already signed up for the SAP Build Governance Resource Center - sign up to get access. Please fill in your email, so that you can be added.
You will get an email invitation afterwards. Please accept the invitation. Note: Access requests may take up to some hours to verify and trigger the email, so kindly be patient.

SignUp You will need to create a SAP universal ID account - or you can use your existing account if you have one. Then you have access to the resource center.

SignUp In case you don’t receive an invitation mail after 24 hours, use this link and then create an SAP universal ID account or use your existing one. Afterwards when you’re logged in, look for the invitation in the notifications (bell button) and join the workspace from there. This will only work when you signed up with your email before.

SignUp Scroll down in the SAP Build Governance Resource center until you reach the widget for the Use Case Buddy. Click on Click here to get the templates and download the templates on the next page.
Extract the templates for the Use Case Buddy from the file you just downloaded. You will use them on their own later on.
Open your SAP Build Lobby and if necessary log-in with your credentials or SSO.

Import Click on the Import symbol.

Import Click on Browse Files. Choose the first template you downloaded previously.
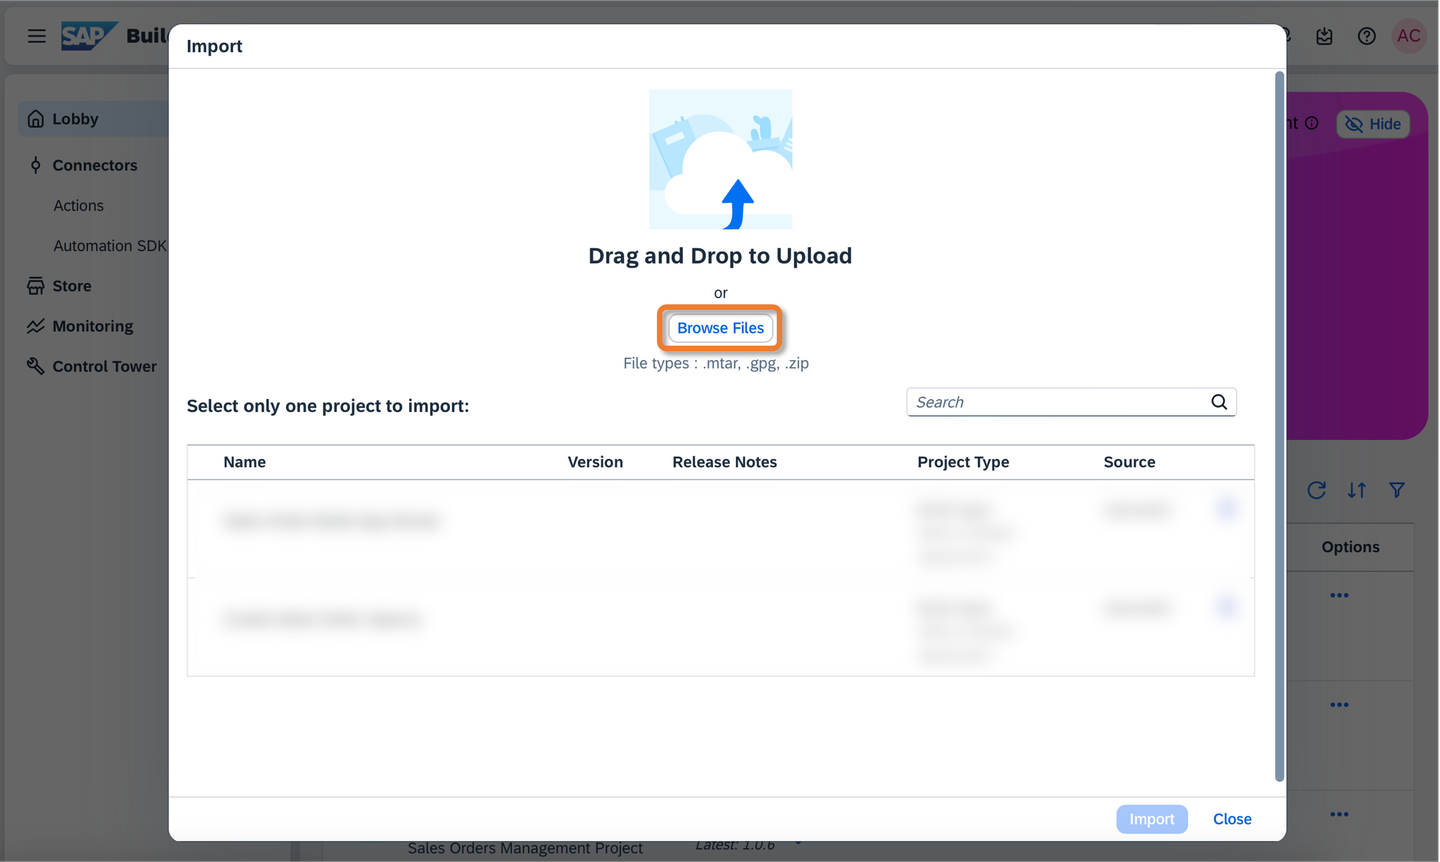
Import Select the template you just uploaded and click on the Import button.

Import In case you receive an error due to missing roles at this point, it may be that you lack the right roles in your BTP cockpit setup. A quick role assignment should fix that. Please refer to this guide and use the mentioned roles.
Repeat the steps with the other templates you downloaded.
All done! Now you can see your imported projects.

Import
If you want to follow the recommended approach for the last part of the Use Case Buddy and present submitted ideas in a Work Zone site, you can use the “Digital Center of Exellence” Toolkit. This is a template for a workspace which is already pre-filled. The following step is all about importing the template site for this project. ⚠️ You can also integrate any other workspace / Work Zone site built with SAP Build Work Zone Advanced Edition - in this case you can skip the next steps and just have your site ready.
- Follow along the first and second step from this tutorial to import and build your “Digital Center of Excellence”. Of course you can later on finish the tutorial for yourself, but for the Use Case Buddy you only need to have the site built up.
Let’s start setting up your Use Case Buddy with the first connection. As the Use Case Buddy will later forward the submitted ideas to a Work Zone page via SAP Build Process Automation, you will now connect SAP Build Work Zone and SAP Build Process Automation. We will later use an Action Project in SAP Build Process Automation to do this. To prepare the Action Project and the connection, we will now set up the required Destination.
For preparation: let’s do Destination Setup first. Open SAP BTP Cockpit and navigate to Destinations section.
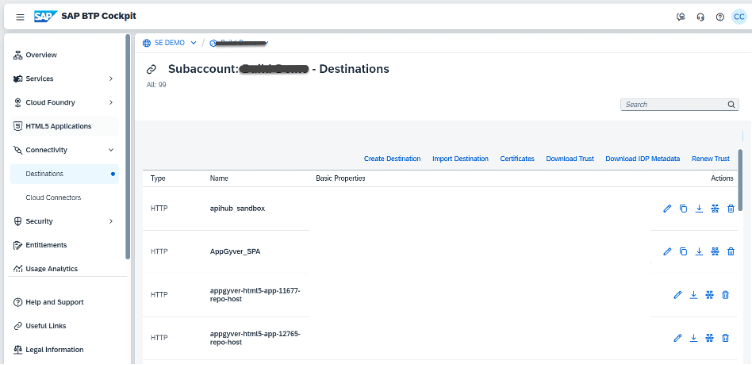
Destination Search for JAM destination and click on Clone Icon to create a duplicate of the JAM Destination.
JAM destination will be created by default when subscribed to the SAP Build Work Zone.

Destination In order to use this destination for the action project, change the following parameters in the cloned destination destination.
- Give a different destination Name: JAMForActions Please note: We will refer to this new destination “JAMForActions” later in Action Project.
- Add few Additional Properties as below:
- sap.applicationdevelopment.actions.enabled : true
- sap.processautomation.enabled : true
- sap.build.usage: odata_gen
- Click on SAVE

Destination Please take a note of the JAM URL. It’s the Work Zone domain URL of your BTP account.
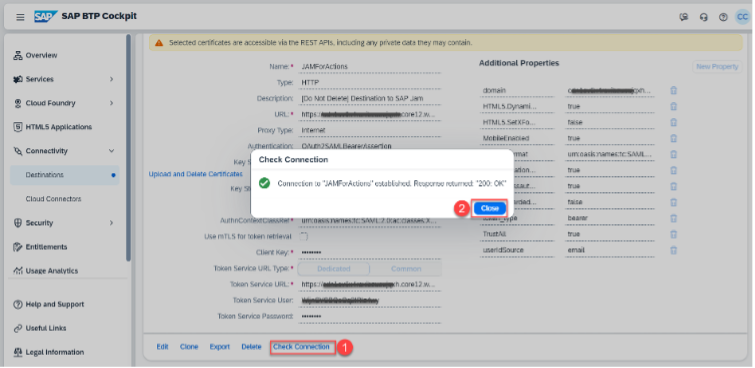
Click on Check Connection on newly created destination and verify the connection. You should get “200: OK”.
Destination To add the ideas in the forum, you will need the forum id of your workspace. Log into SAP Build Work Zone site (Advanced Edition) and navigate to your workspace, where you want to setup the Forum.
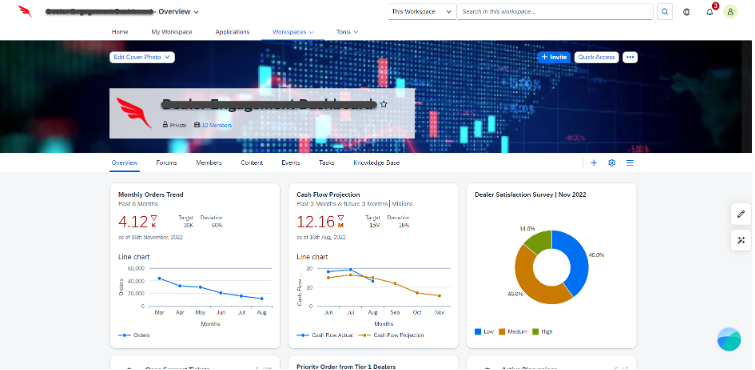
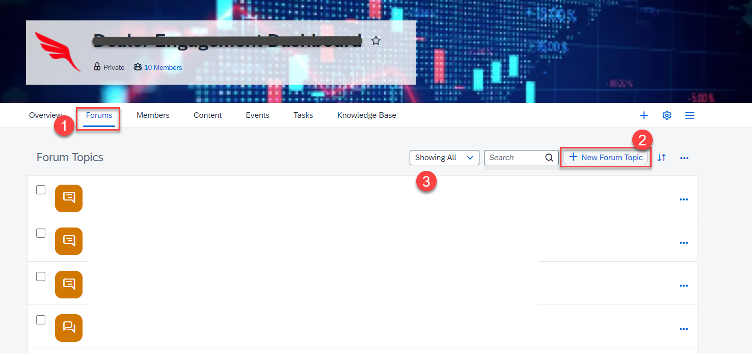
Destination Click on Forums and click on New Forum Topic.
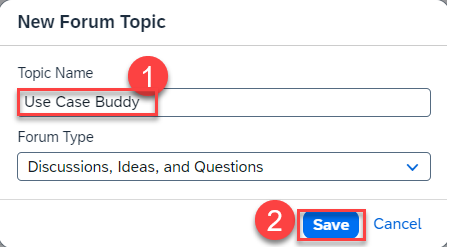
Destination Enter the Topic Name (For example “Use Case Buddy”) and click on Save.
Destination You will see that new Forum got added to the existing forum topics.
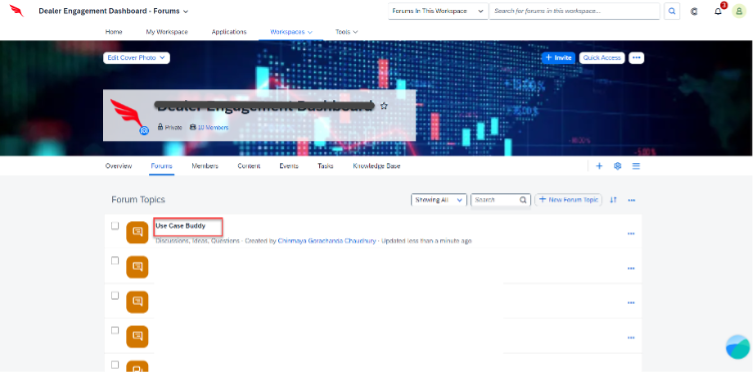
Destination Click on the new Forum topic, to navigate to see the ideas available. At this point, you will find zero ideas for the newly created forum.
Please write down the folder_id for the forum topic, you just created. You can see the forum id as marked in the URL. It will be used while creating the Action project later.
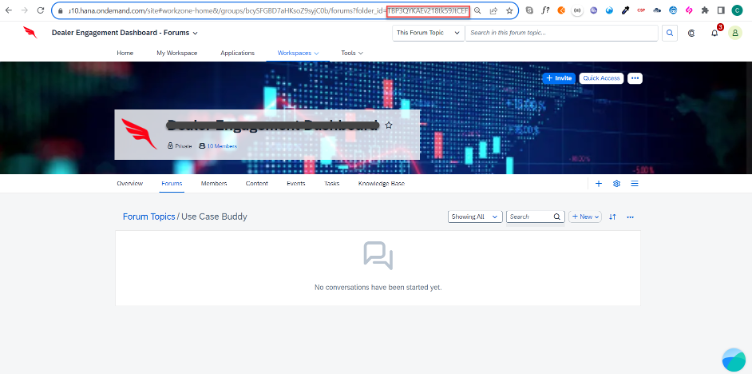
Destination Create an action project using the open API specification (API Spec). Download the specification from this git repository: APISpec
Please note that this is the custom API specification created for this particular use case. The complete Work Zone Forum API specification can be found in the SAP Business Accelerator Hub.
Open the downloaded API spec using a text editor, and change the following value.
In Servers>url, include JAM host URL (refer to the Step 3)

APISpec Please note the requestBody and response of the API Spec. These are the properties we need to execute the Action Project.
Refer the Post Path URL. The “id” is an input path parameter, we will configure while creating Action Project.
- Name: This is input Body parameter for Idea Title
- Content: This is input Body parameter for Idea Content
After you’ve setup the destination you are now ready to create an action project. This will enable your Use Case Buddy to create new ideas in the Forums of your workspace in SAP Build Work Zone based on the submitted information.
Open SAP Build Lobby and navigate to Actions section. Click on Create.

APISpec Click on “Upload API Specification”

APISpec Browse the API Spec which you have downloaded in previous section and click on Next.

APISpec 
APISpec Enter the Project Name (For example “Workzone_Adv_Forum_Create_Idea”) and Description.
Click on Create. It will open the Action Editor, with the option of selecting the Actions, which we have preconfigured in our APISpec file.

APISpec Choose the Post Action ("/api/v1/OData/Forums(’{id}**’)/Ideas"). Click on Add

APISpec Now, you can see the Action Project in Action Editor with prefilled Input and Output section.

APISpec You can see that “id” as path parameter is missing as Input parameter. Let’s create it.
In the Input Tab, click on Add.

APISpec Select New Field and enter all the required fields as followed.
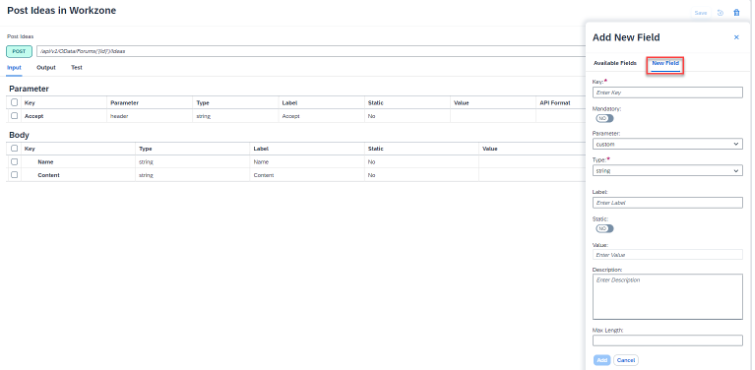
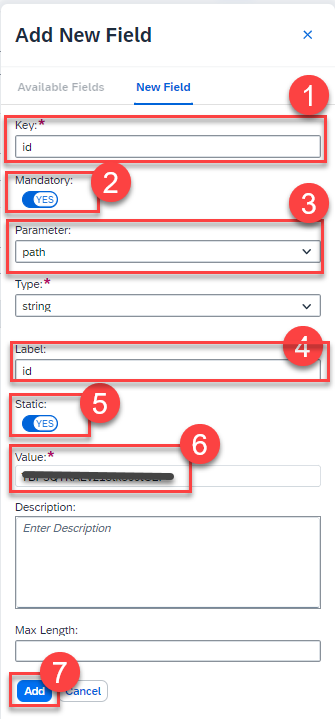
APISpec Enter the values of New Field as follows:
- Key: id
- Mandatory: Yes
- Parameter: Path
- Label: id
- Static: Yes
- Value: Forum folder id (your id which you have created in Step 8 in the previous section)
Click on Add.
APISpec You can see that the mandatory path parameter (id) is now appearing in Input parameter section.
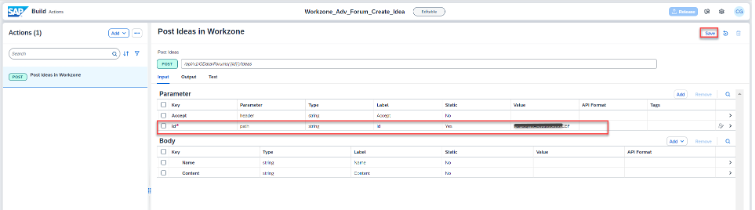
APISpec Select the parameter action. In the value field enter application/json. Click on Save.

APISpec Navigate to Test tab. And select the JAM destination (Say “JAMForActions”) from Destinations dropdown, which we have created in previous section.
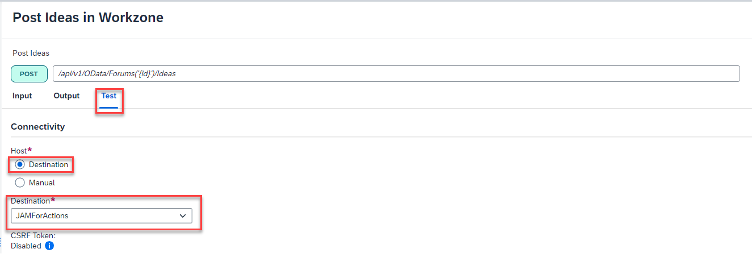
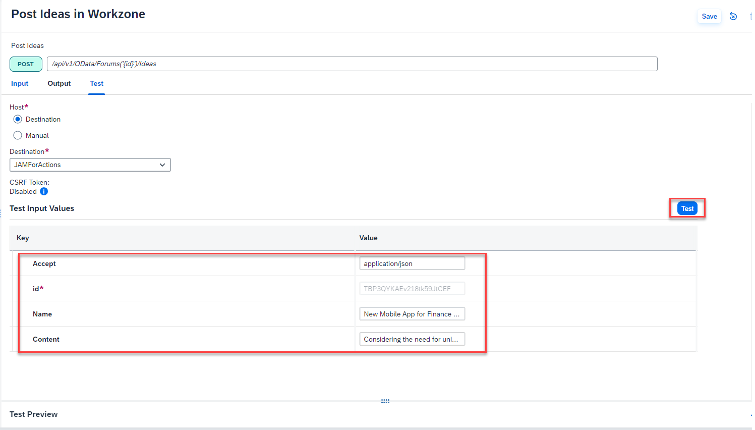
APISpec Enter the following Input values and click on Test.
- Name: New Idea Title (For example: “New Mobile App for Finance Dept”)
- Content: New Idea Content (For example: “Considering the need for universal access, I propose developing a new mobile application for the team.”)
- id and Accept fields should be prefilled.
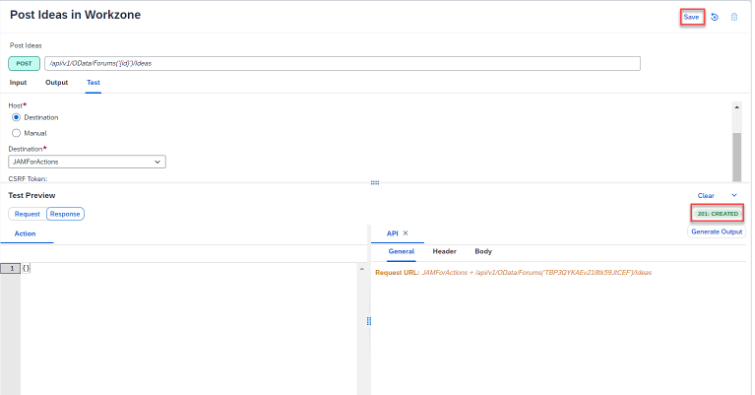
APISpec You can see that now the execution is successful with 201 status code.
Click on Save to save the Action Project.
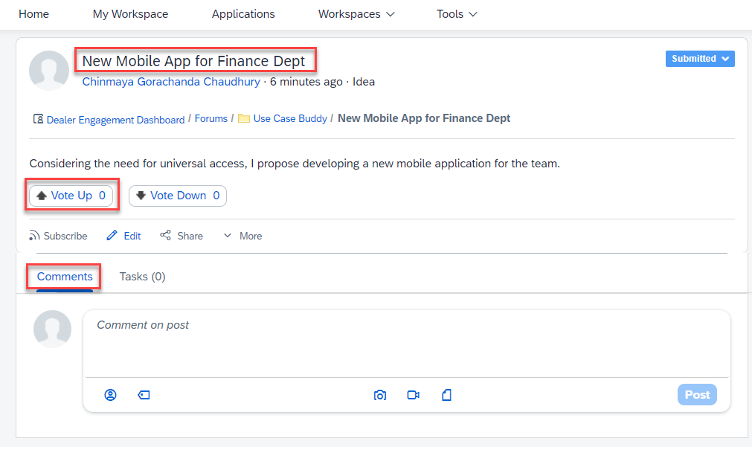
APISpec Lets verify the created Idea in Work Zone! Navigate to your Work Zone site’s Forum, which you created in the previous steps. You can see the idea posted from Action Project now appears under the Forum.
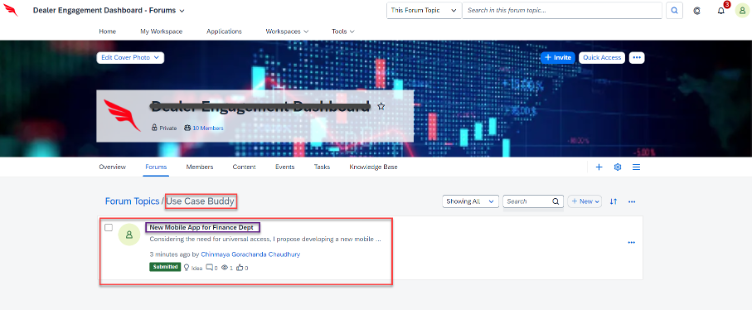
APISpec You can click on the Idea Title to navigate to the Idea detail. Where you can find various options for Vote Up/Down and Comments.
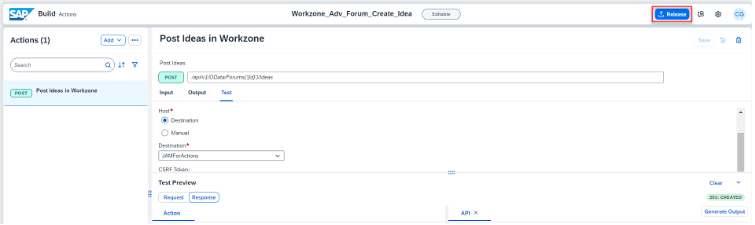
APISpec Go Back to Action Editor to Release and Publish the Action Project.
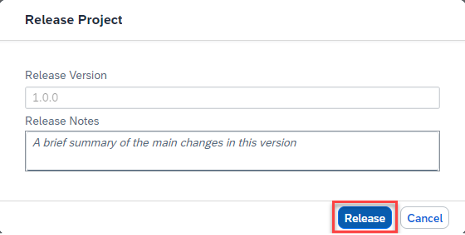
APISpec Enter Summary for Release Note. Click on Release
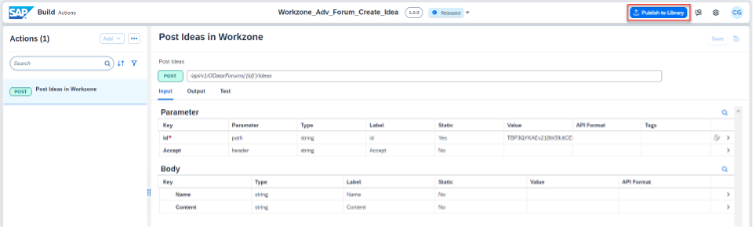
APISpec After Successful Release, click on Publish to Library.
APISpec Click on Publish on Confirmation Dialog.
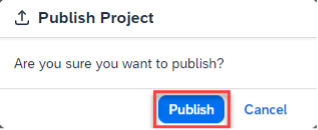
APISpec On successful publish, you can see the status of the Action project as Published.
We have seen the process of creating an Action Project that can post an Idea to the Workzone Forum. With the Action Project now prepared, we can proceed to incorporate it into the SAP Build Process Automation - Process Artifact in the next steps.
✅ You just imported templates for SAP Build Apps, SAP Build Process Automation and SAP Build Work Zone Advanced Edition.
✅ You prepared an action project and destination to connect your process to your Work Zone site.
You successfully implemented content packages for SAP Build Apps, SAP Build Process Automation and SAP Build Apps Work Zone Advanced Edition! Your Use Case Buddy is now setup.
Now you will need to further connect your process and the app as well as modify some process steps. This will happen in the next tutorial of this group: “Modify the process of your Use Case Buddy and connect it to your Work Zone site and app” of the Use Case Buddy. See you there!
Resources
Discussion
Share feedback on this tutorial or join the conversation in SAP Community.