
Overview
You will learn
- How to create a Dev Space in SAP Business Application Studio
- How to create a Project using the CAP Project template
- How to develop a sample service using CAP and Node.js
- How to run your service locally


Prerequisites
Prerequisites
- Get an Account on SAP BTP to Try Out Free Tier Service Plans
- You are subscribed to SAP Business Application Studio
- The following prerequisites are optional, on trial accounts the space and role should have been created by default
- Under Cloud Foundry Create a Space if you don’t have one already
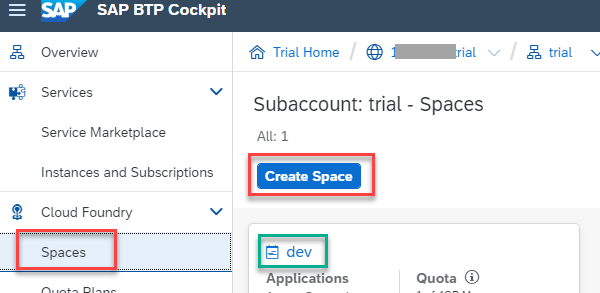
space - Make sure your user has a Space Developer Role

developer
Steps
Overview
Find more information on SAP Cloud Application Programming Model Welcome to CAP.
In this tutorial group you will learn all the steps to finally consume a CAP Service in a process of SAP Build Process Automation.

The Use Case
In this series of tutorials, you will implement a CAP Service with very easy functions like converting a String to a number, converting a list of ids to a comma separated String and finally consume the CAP Service API functions in SAP Build Process Automation Process.
Open SAP Business Application Studio.
Choose Create Dev Space.

Create DEV Space Use name
demofor your dev space and select kindFull-Stack Application Using Productivity Tools.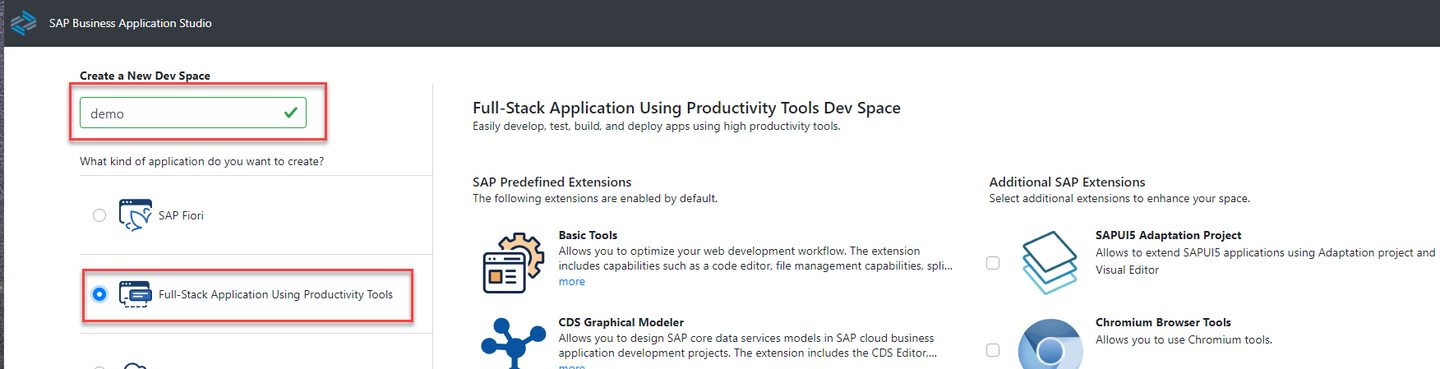
name By selecting Full-Stack Application Using Productivity Tools, your dev space comes with several extensions out-of-the-box that you need to develop CAP services.
Choose Create Dev Space.

create The creation of the dev space takes a while. You see that the status for your dev space will change from STARTING to RUNNING.
Once the dev space is running, click the dev space name to open it.

open Opening the dev space and starting the Application Studio takes a while.
Use the File menu to create a New Project from Template.

file menu Choose CAP Project from the templates and choose Start.
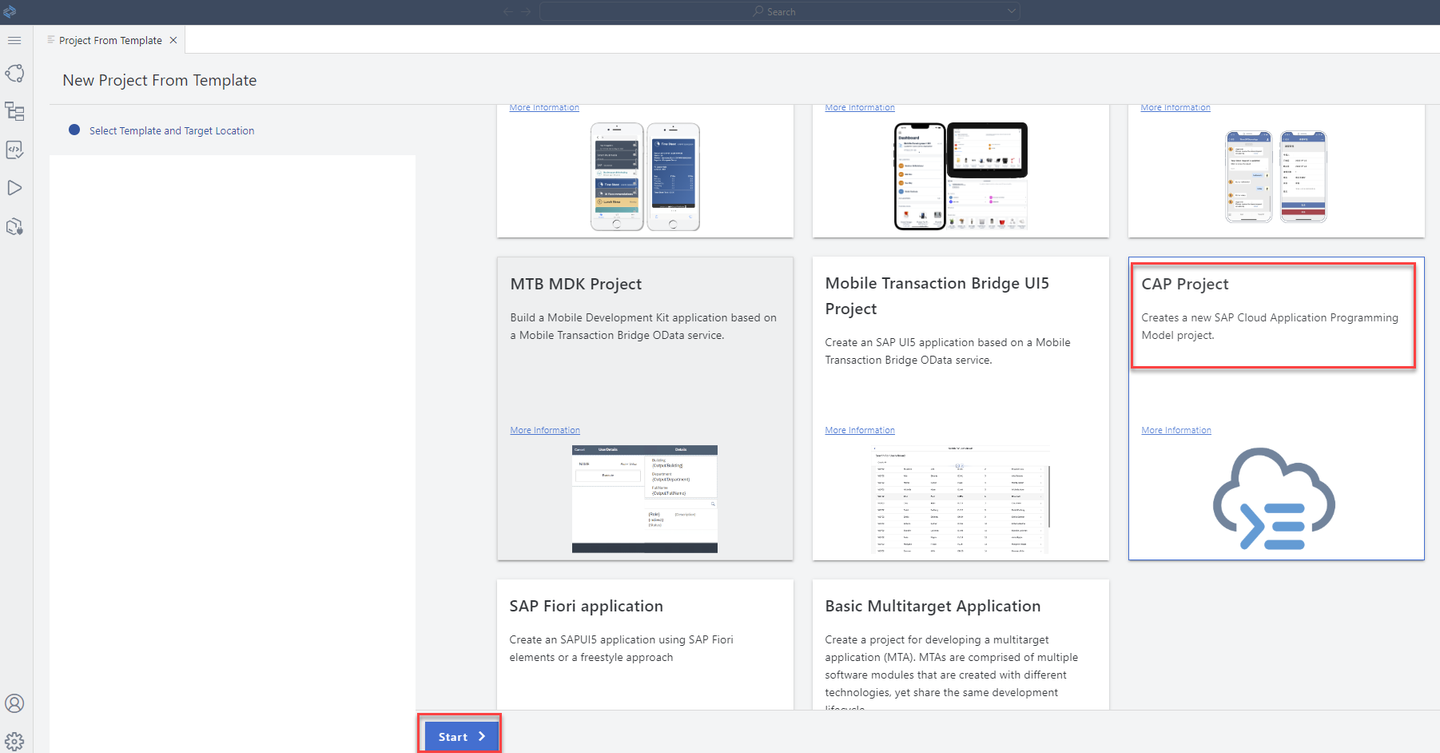
cap project Enter the CAP Project Details, use name
sap-build-cap-sample-library, selectCloud Foundry: MTA Deploymentand choose Finish.Runtime Node.js is already selected.

finish Change the view from Project Explorer to Explorer, choose View > Explorer.
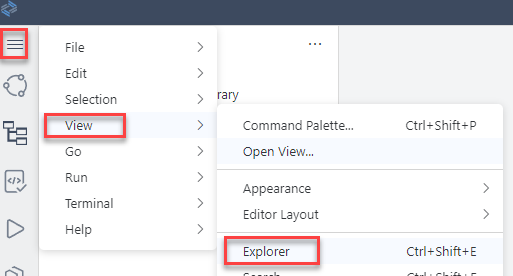
guidedHome The Explorer view will show all files of your project.
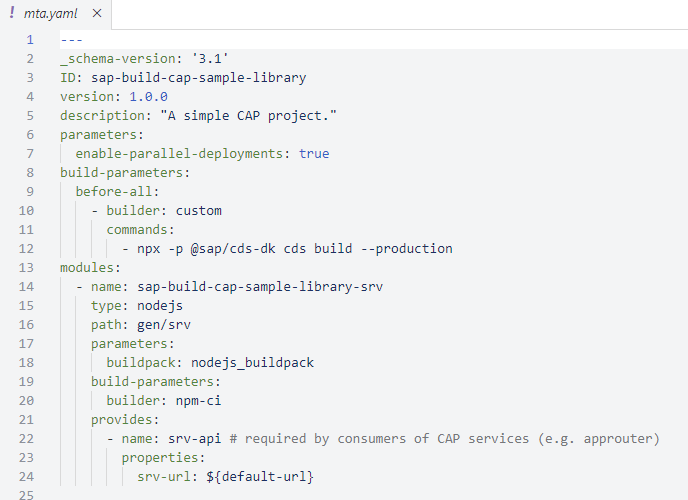
In the Explorer view you will find the file
mta.yamlin the root folder of your projectsap-build-cap-sample-library.
project Check the file in a text editor, right-click > Open With… > Text Editor default.
mta In the
srvfolder, create a new file calledservice.cds.In the same folder, create another new file called
service.js.Select the file
service.cdsand copy the following code into the editor.Contains the definition of data types and function headers. Functions and actions will make the API of your service.
Simple functions like converting a String to an Integer, a list to a CSV String or getting the list of Todos.
CDS@Capabilities.BatchSupported : false service sap_build_cap_sample_library @(path : '/api/v1') { define type DataString { value : String; } define type DataInteger { value : Integer; } define type DataNumber { value : Double; } define type DataList { id : Integer; title: String; userId: Integer; completed: Boolean; } define type DataListArray { responseArray : array of DataList; } @Core.Description : 'toInteger' function toInteger(value : String) returns DataInteger; @Core.Description : 'toNumber' function toNumber(value : String) returns DataNumber; @Core.Description : 'toString' function toStr(value : Double) returns DataString; @Core.Description : 'addQuotes' function addQuotes(value : String) returns DataString; @Core.Description : 'listToString' action listToString(responseArray : array of DataList, field : String) returns DataString; @Core.Description : 'get list of dodos' function getListOfTodos() returns DataListArray; }Select the file
service.jsand copy the following code into the editor.The JavaScript implementation for the API of your service.
JavaScriptmodule.exports = srv => { srv.on('toInteger', req => { const {value} = req.data; return { 'value' : parseInt(value) }; }); srv.on('toNumber', req => { const {value} = req.data; return { 'value' : parseFloat(value) }; }); srv.on('toStr', req => { const {value} = req.data; return { 'value' : value.toString() }; }); srv.on('addQuotes', req => { const {value} = req.data; return { 'value' : "'" + value + "'"}; }); srv.on('listToString', req => { var values = req.data.responseArray; var resultList = []; var field = req.data.field; if (values) { for (var i = 0; i < values.length; i++) { resultList.push(values[i][field]); } } return { value : resultList.toString() }; }); srv.on('getListOfTodos', req => { return { responseArray : [ { "id": 1, "completed": false, "title": "delectus aut autem", "userId": 1 }, { "id": 2, "completed": false, "title": "quis ut nam facilis et officia qui", "userId": 1 }] }; }); }
This step describes how to test the service locally using a file that contains the Service Endpoints.
On the
sap-build-cap-sample-libraryfolder, create a new file calledtest.http.Select the file
test.httpand copy the following content into the editor.Samples for HTTP requests for the services of your API.
HTTP### call toInteger GET http://localhost:4004/api/v1/toInteger(value='20') ### call toNumber GET http://localhost:4004/api/v1/toNumber(value='20.2') ### call toString GET http://localhost:4004/api/v1/toStr(value=20.2) ### call addQoutes GET http://localhost:4004/api/v1/addQuotes(value='abcd') ### call getListOfTodods GET http://localhost:4004/api/v1/getListOfTodos() ### call listToString POST http://localhost:4004/api/v1/listToString Content-Type: application/json { "field" : "id", "responseArray": [ { "id": 1, "title": "delectus aut autem", "userId": 1, "completed": false }, { "id": 2, "title": "quis ut nam facilis et officia qui", "userId": 1, "completed": false } ] }From the Terminal menu, select New Terminal.

open terminal On the
sap-build-cap-sample-libraryfolder, run the following command in the Terminal window:This will start a local server with your service that will allow you to test your API calls.
Shellcds watchChoose Send Request, you will get the response in a separate window.

send Choose Ctrl - C to terminate the Server session.
Select the package.json file and copy and paste the following code after
scripts:JSON, "cds": { "requires": { "auth": { "kind": "dummy" }} }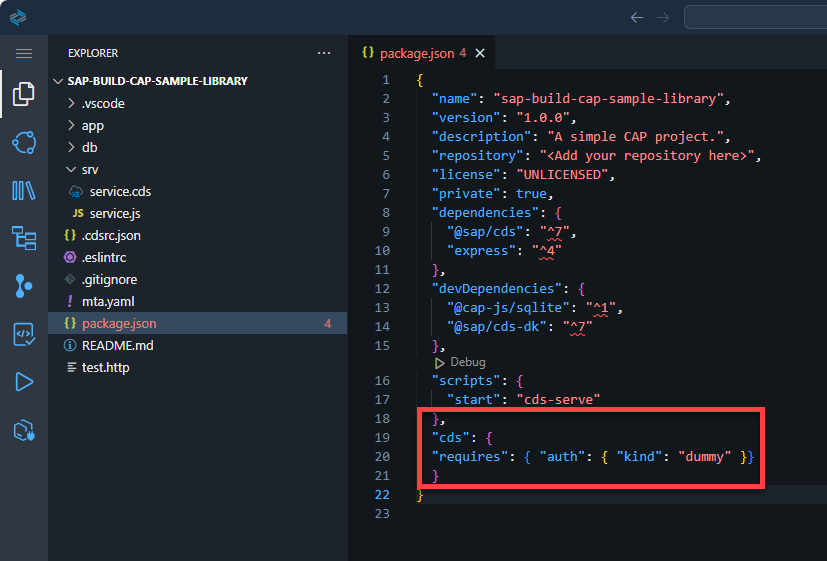
Update package json Run the following command in the Terminal window:
Shellnpm installRight click on the file mta.yaml and select Build MTA Project.

Build MTA Project The service gets built, wait until the tasks are completed.
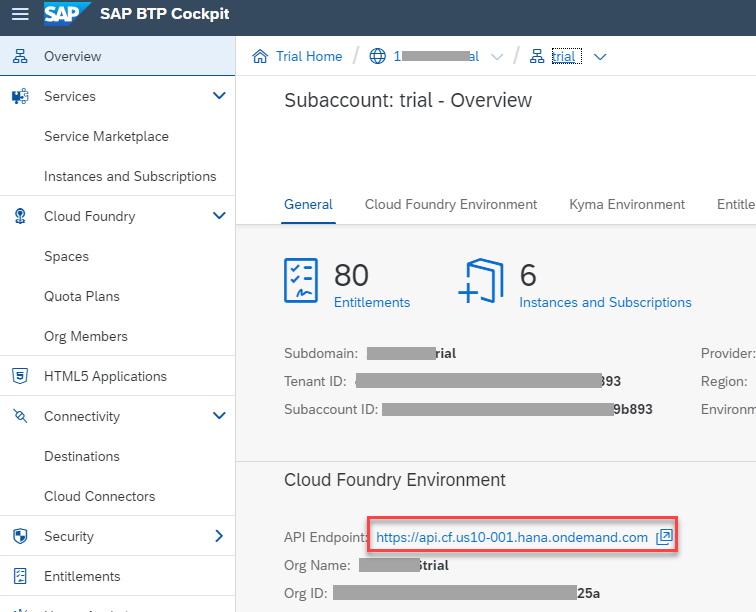
Check your API endpoint definition.
Check in BTP Cockpit, if the API Endpoint of your Cloud Foundry environment is matching the information you used for the script https://api.cf.us10-001.hana.ondemand.com
endpoint Under
mta_archives, right click onsap-build-cap-sample-library_1.0.0.mtarand select Deploy MTA Archive.
Deploy MTA Archive You will provide your login information to sign in to the Cloud Foundry environment.
Validate the Cloud Foundry Endpoint and enter your username and password.
In case you are using two factor authentication, you need to append the One-time password code to your password.
If you select the SSO Passcode authentication method, SAP Business Technology Platform will grant you a temporary authentication code to sign in.

Cloud Foundry Sign in Select Cloud Foundry Organization and Space.
On trial, dev is created as default Cloud Foundry space

Cloud Foundry Target Your service should be available and running in your Cloud Foundry space.
In the BTP Cockpit you can check if the service is running:

service started
Resources
Discussion
Share feedback on this tutorial or join the conversation in SAP Community.