
Overview
You will learn
- How to add an approval step
- How to bind values to step inputs
- How to work with the Inbox


Prerequisites
Prerequisites
- You have completed the previous tutorial for the event-based processes CodeJam, Capture Event in SAP Build Process Automation.
Steps
Intro
One of the most basic steps you can create is an approval step, which sends an approval form to the recipients Inbox (in SAP BTP) and lets them approve or reject a request.
In this tutorial you will create an approval form and assign it to a recipient (you). You will also be introduced to the Inbox, where such forms are sent for execution by the assigned parties. The Inbox has many featured to enhance the approval flow, such as:
Warnings when the due date approaches or passes
Hides completed tasks
Ability to send to multiple parties and have one claim the task
Ability to approve / reject tasks via API
Go back to your process project, and make sure you are working in the Editable version by clicking the dropdown at the top of the page and selecting Editable.
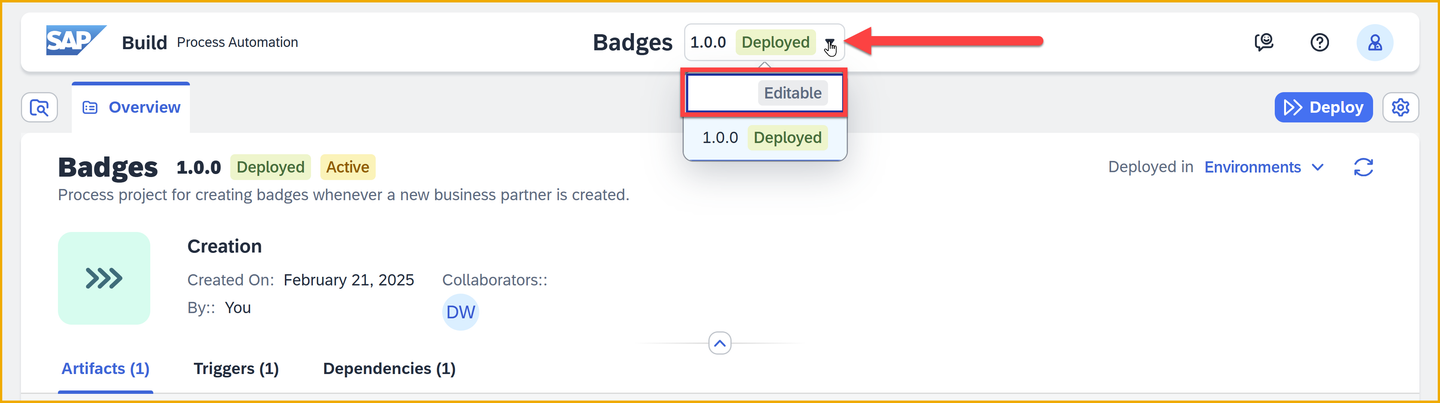
Editable version With the Badge Process process open, click the plus sign, +, between the trigger and the end.

New step Select Approval.

Approval step Select Blank Approval.

Blank approval form Enter the following (the identifier is automatically generated):
Field Value Name Badge Approval Description This is the form in which the main approver will indicate approval or rejection of the badge. Click Create.

Approval form name You will see the form add to the process, with different paths for approval and rejection.
There will be a red error, but this is expected and you did nothing wrong. The error is just an indicator that you need to add some settings, like to whom to send the form.
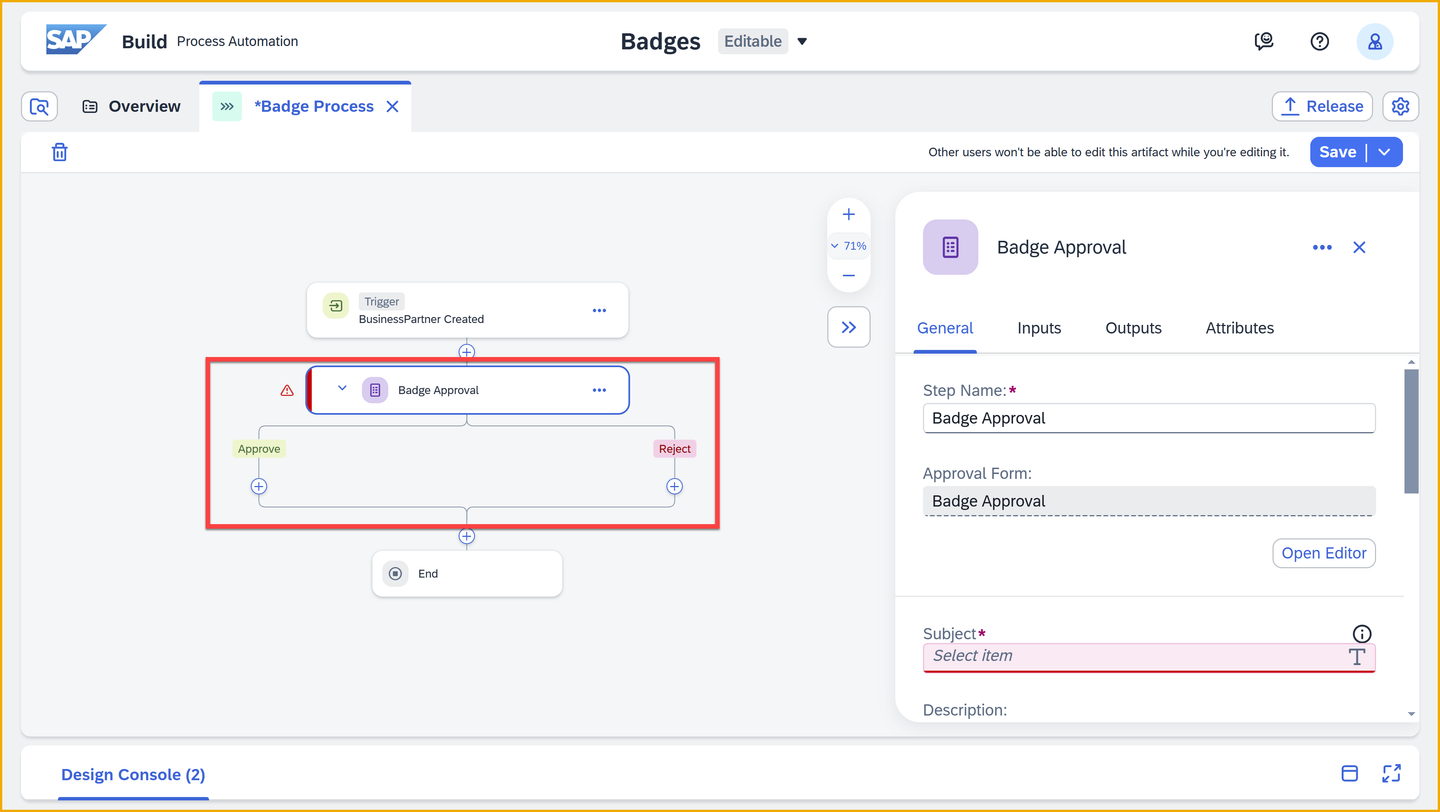
Click the 3 dots on the side of the approval form, and select Open Editor.
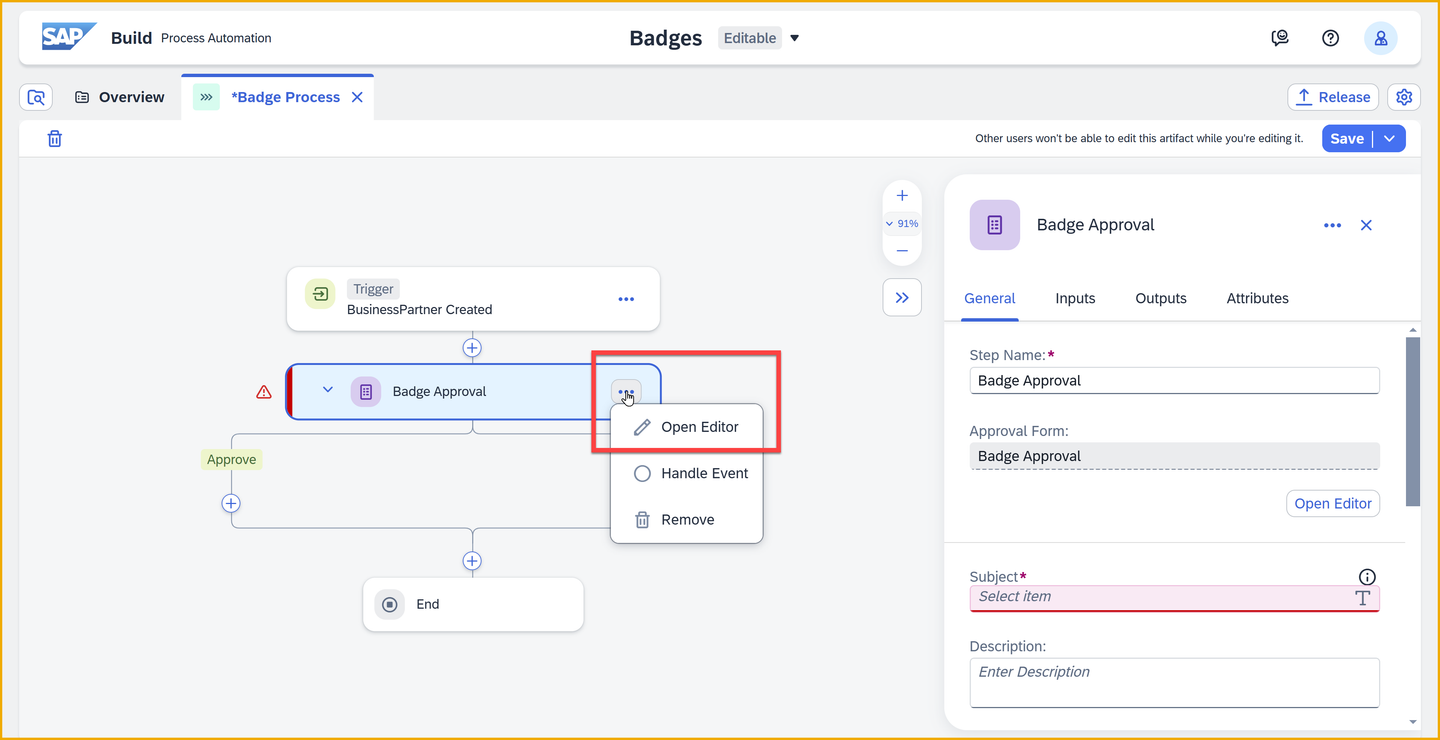
Open editor Add the following fields, just by clicking the corresponding square on the left:
- Headline 1
- Text
- Text
- Text
- Text

Add fields On the form, click each field and set its label to the following:
Field Value Headline 1 Badge Request Text First Name Text Last Name Text BP ID Text Community ID 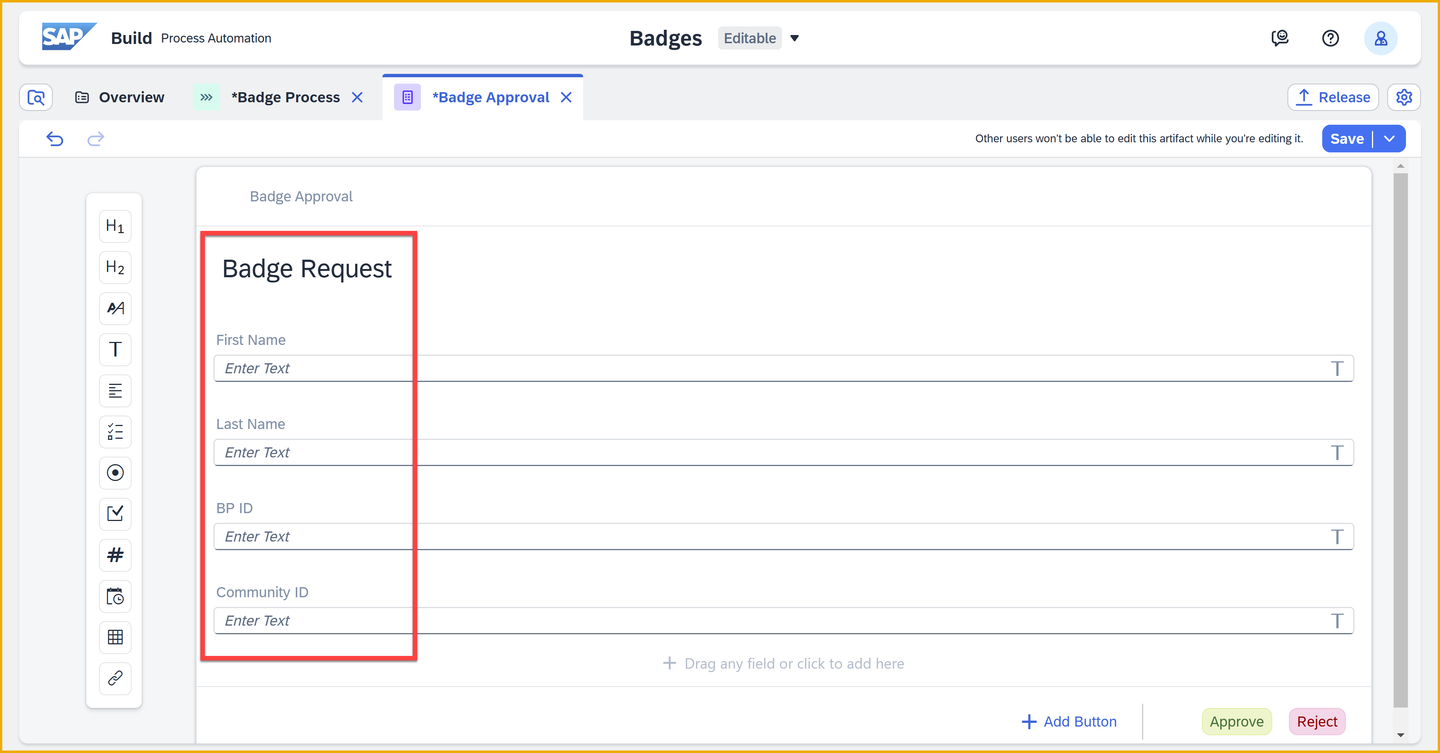
Name fields On the form, select each Text field and set it to Read Only.
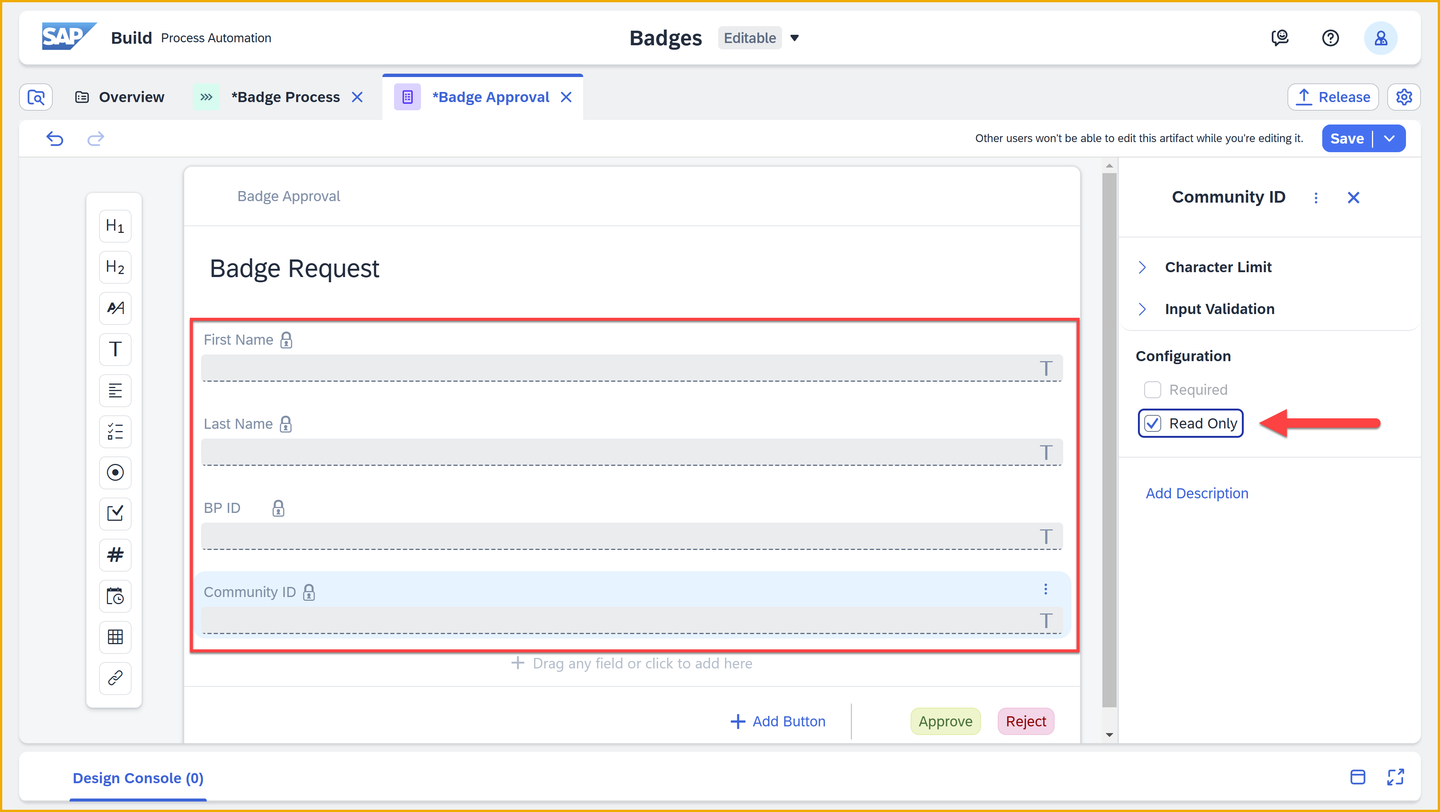
Make fields read only Click Save (upper right).
You can configure the buttons for forms. You can have up to 10 buttons, and they can be named whatever you want.
In addition, for each button, your process will have a different output. So an approval can have up to 10 different paths, not just two.
For each step in a process, you must bind its properties and inputs to the appropriate values. For example, for a form you must say to whom to send the form.
The binding step enables you to reuse steps, for example, to send the same approval form at different points in your process to different stakeholders.
Back in the process, select the Badge Approval form and make sure the process panel is open.
The side panel is where you set the bindings for the selected step, or for the entire process if no step is selected. There is an icon to open and close the side panel.

Open side panel For the Subject field, enter the following (including trailing space):
TextBadge Request -
Add text to subject Click at the end of the field twice. Then, with the cursor still at the end of the field, select Process Inputs > data > BusinessPartner.

Add field to subject The field should now look like this:

Subject field bound Under Recipients, click inside the Users field, and enter the email address you used to create your SAP BTP trial.

Recipients Under the Inputs tab, bind the following fields:
Field Value BP ID Process Inputs > data > BusinessPartner Community ID Process Inputs > data > YY1_SAPCommunityDisplayName First Name Process Inputs > data > FirstName Last Name Process Inputs > data > LastName 
Bind inputs Click Save (upper right).
Click the plus sign, +, under Approve.
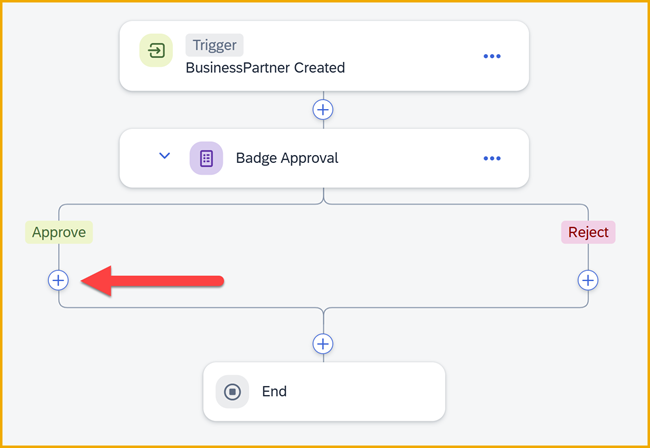
Add notification form Select Form.

Select form Select Blank Form.
Enter the following (the identifier is automatically generated):
Field Value Name Notification Description This form notifies the approver that the badge is ready and to indicate if it has been picked up. Click Create.

Select form Open up the editor.
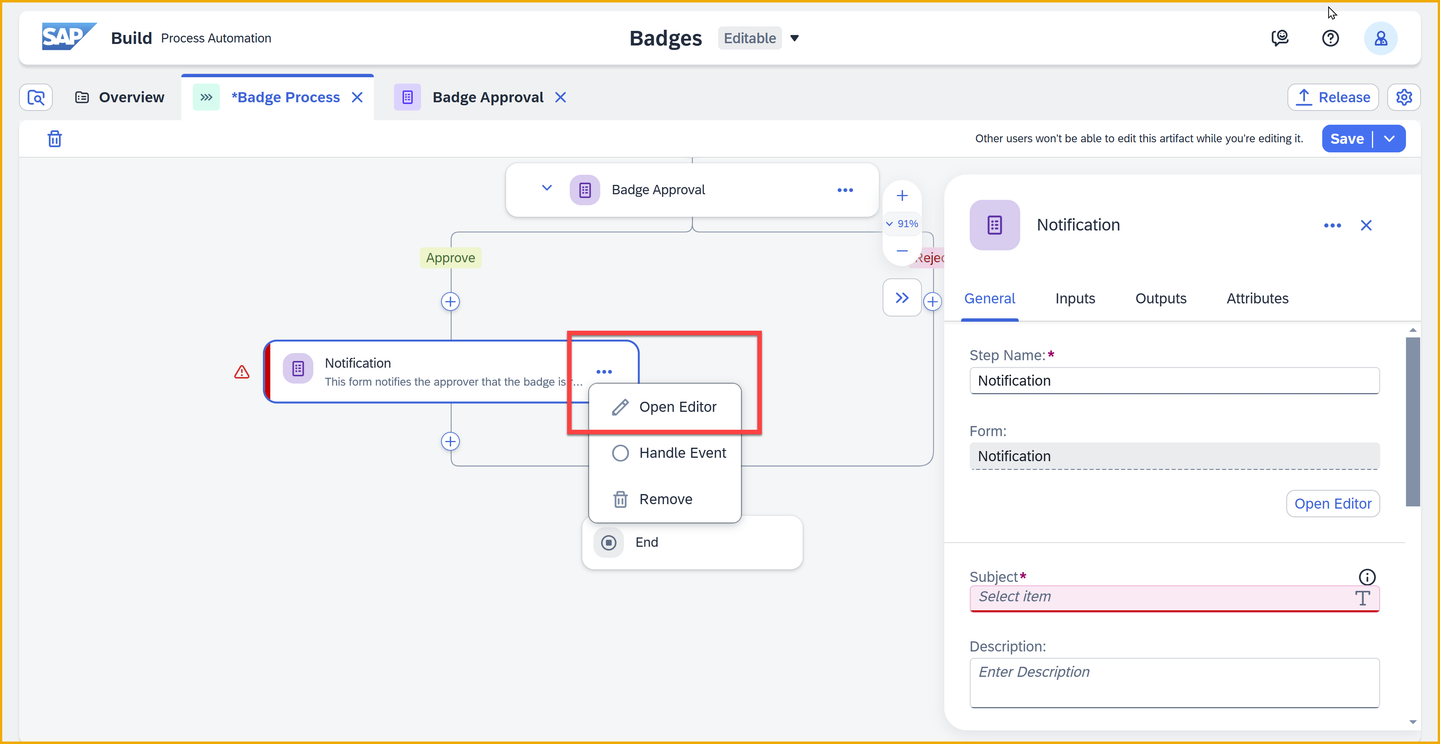
Open editor Just click H1 to add a Headline 1 field, and type into the field Badge Ready for Pickup.
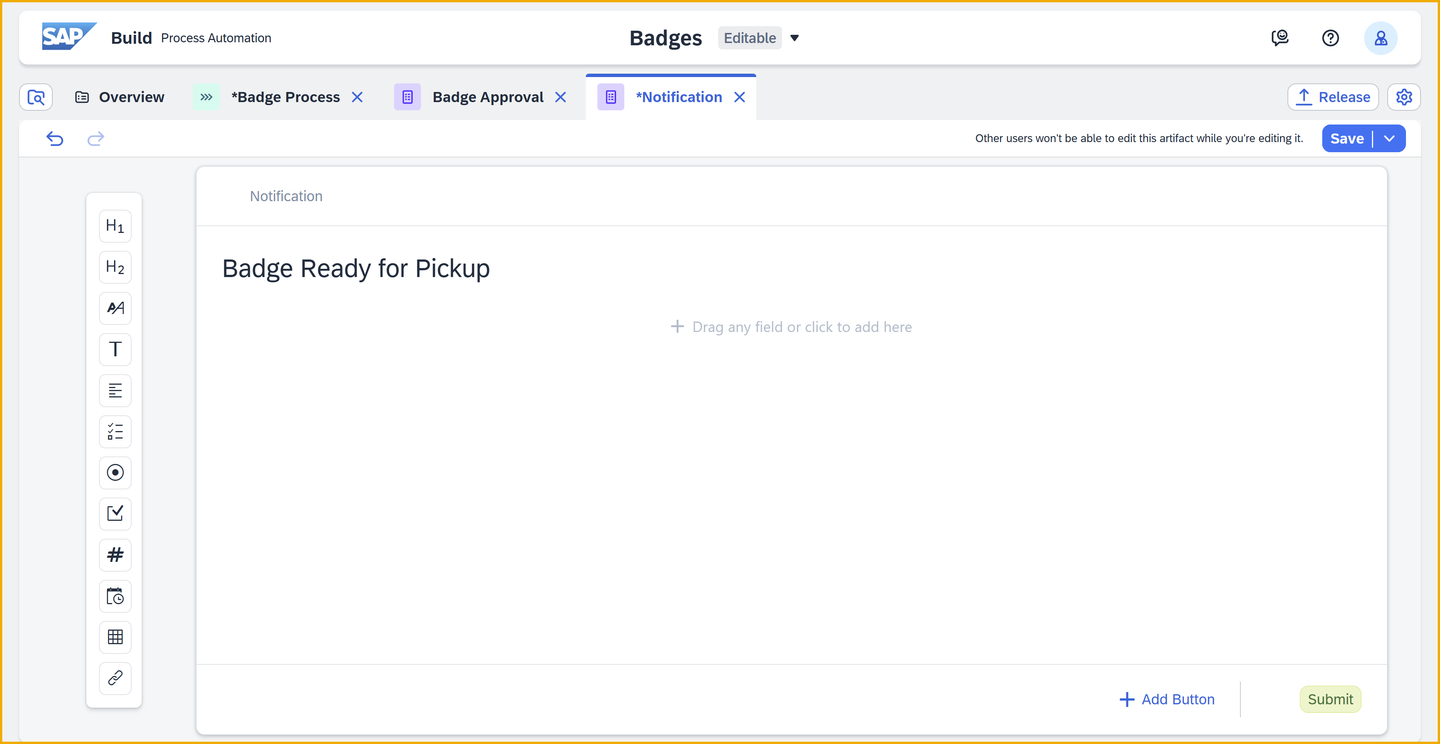
Design form Click Save.
Back in the process, select the Notification form and make sure the process panel is open.

Open side panel For the Subject field, enter the following (including trailing space):
TextBadge Request Approved -
Add text to subject Click at the end of the field twice. Then, with the cursor still at the end of the field, select Process Inputs > data > BusinessPartner.

Add field to subject The field should now look like this:

Subject field bound Under Recipients, click inside the Users field, and enter the email address you used to create your SAP BTP trial.
Recipients Click Save.
Click Release.

Release This time, since it’s not the first release, you can specify what type of change you made, as well as provide release notes.

Click release Keep all the settings the same.
Click Release.
Note that after releasing, you are still inside the editable project, not the released version.
Click Show project version (upper left).

Released version This will take you to the released version of your project, so you can deploy it.
You can navigate between the versions of your project at the very top using the dropdown (assuming there is more than one version).
Click Deploy.
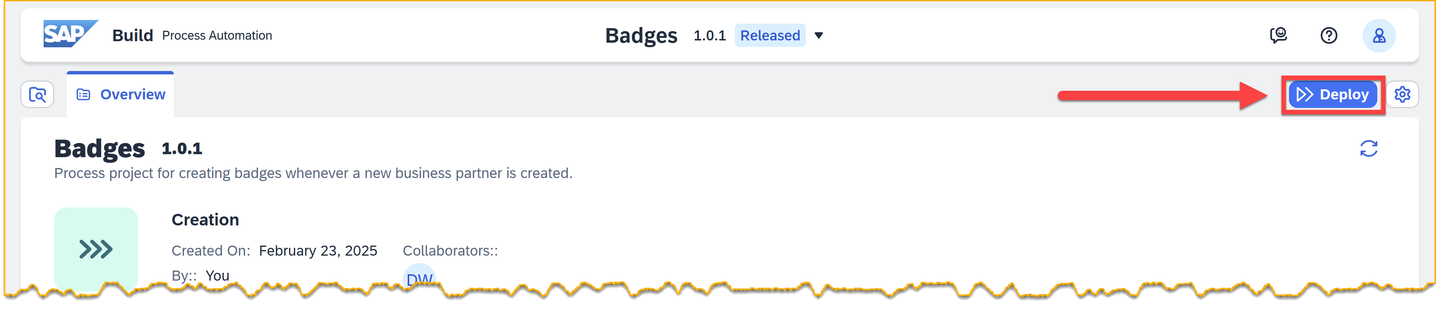
Deploy Select the Public environment.
Select Upgrade – as you already have a version deployed.
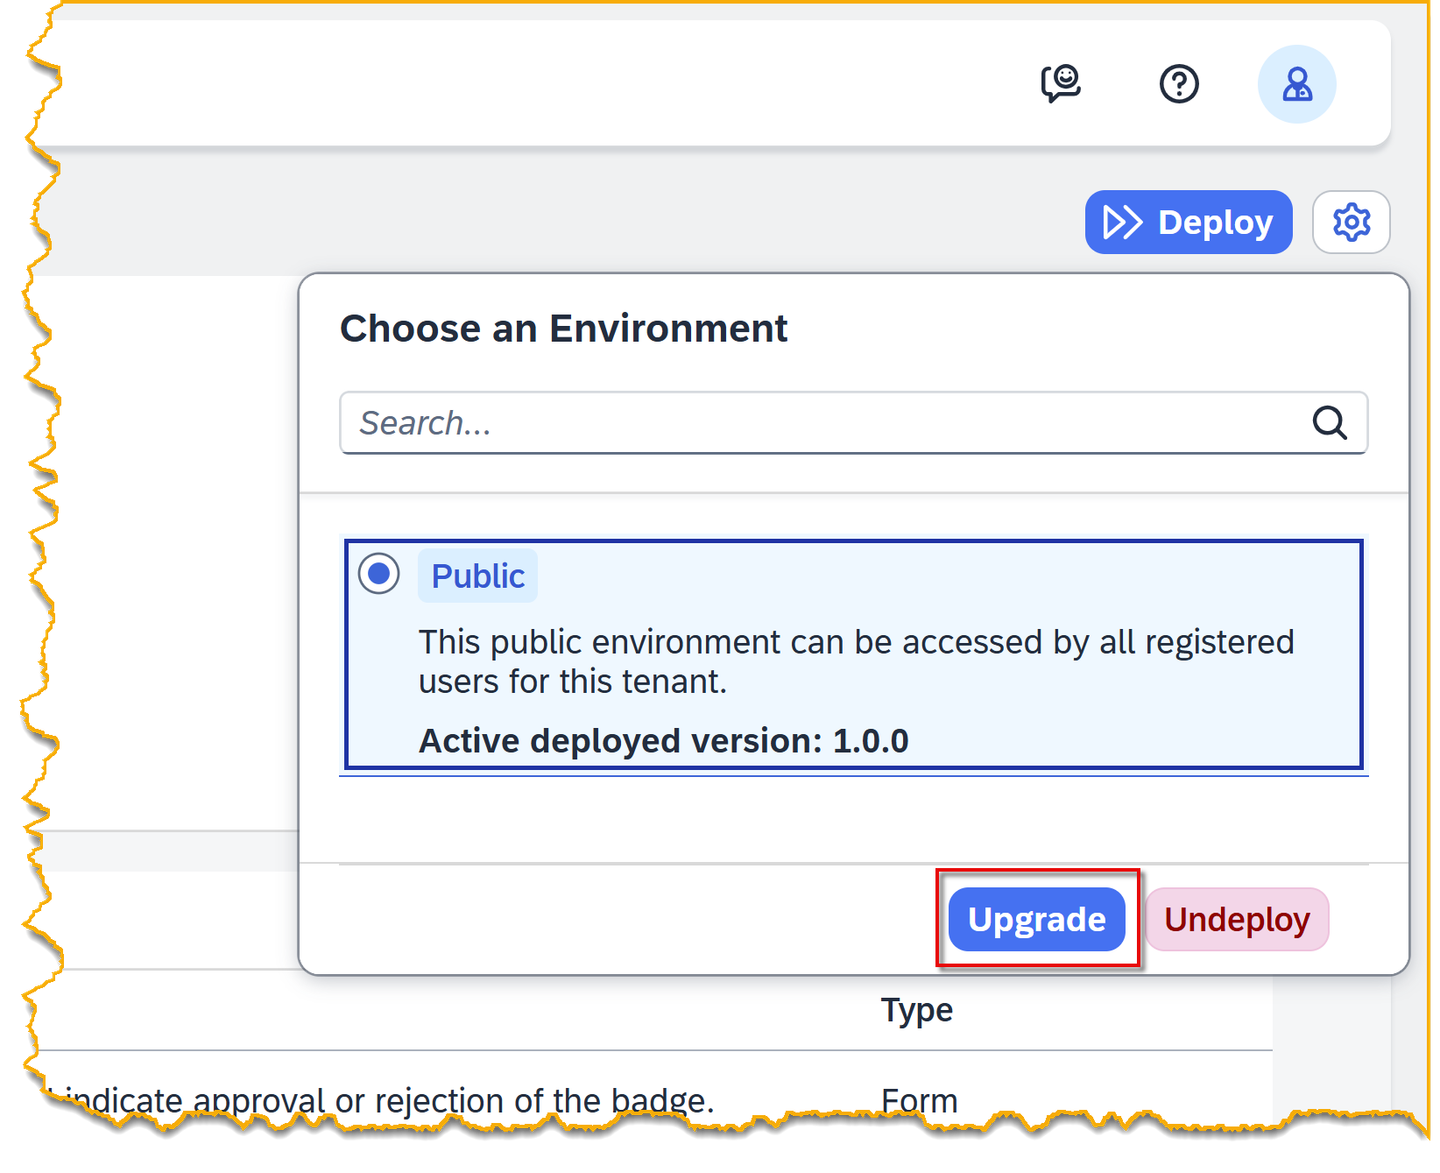
Deploy You get a message that your deployment will update the existing trigger.
Click Deploy.
This step is an exciting moment. Here you will trigger your process from your real event (not manually like you did before). This is the crux of the entire CodeJam – to be able to trigger processes from S/4HANA or other SAP events.
Go to the Create Business Partner app we provided to you.

Business partner app Enter the following:
Field Value First Name Anything you want Last Name Anything you want Country Select one of the countries SAP Community Username Your user name in the SAP Community IMPORTANT: You set up your REST Delivery Point to publish only events that contain your community user. So you need to provide your user in order for the event to be delivered to your SAP BTP tenant and to trigger your process.
Click Create.
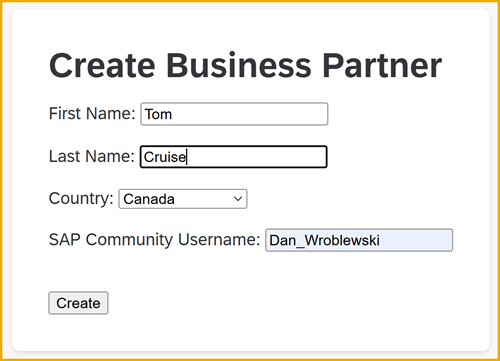
Add business partner Your business partner is created.

Business partner created Check that the event was received into SAP Build by going to Monitoring.
Click Acquired Events.

Acquired events Click Business Events. You should see an event created for your new business partner, including the business partner ID that you saw when you created it.

Acquired events 😺🙃
Now that we know the event arrived into SAP Build Process Automation, let’s check if our process was triggered and the approval form was created.
From the SAP Build header, click the Inbox icon.
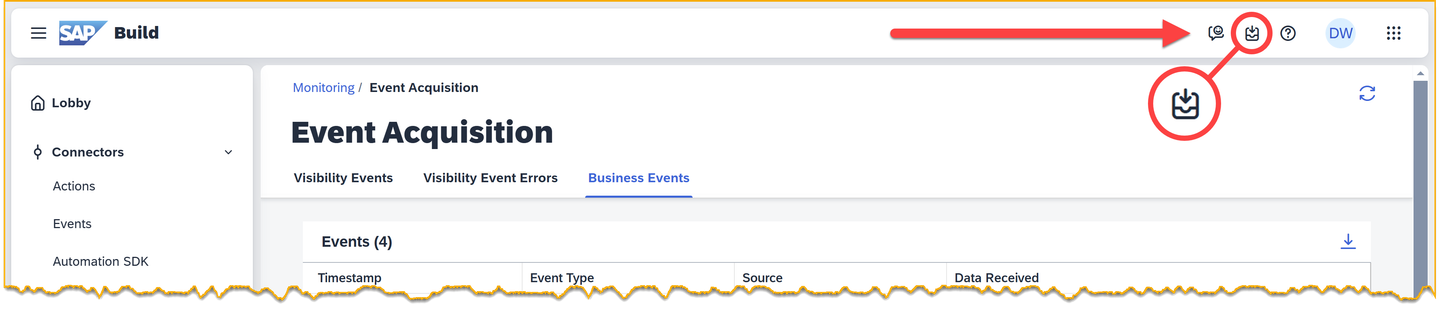
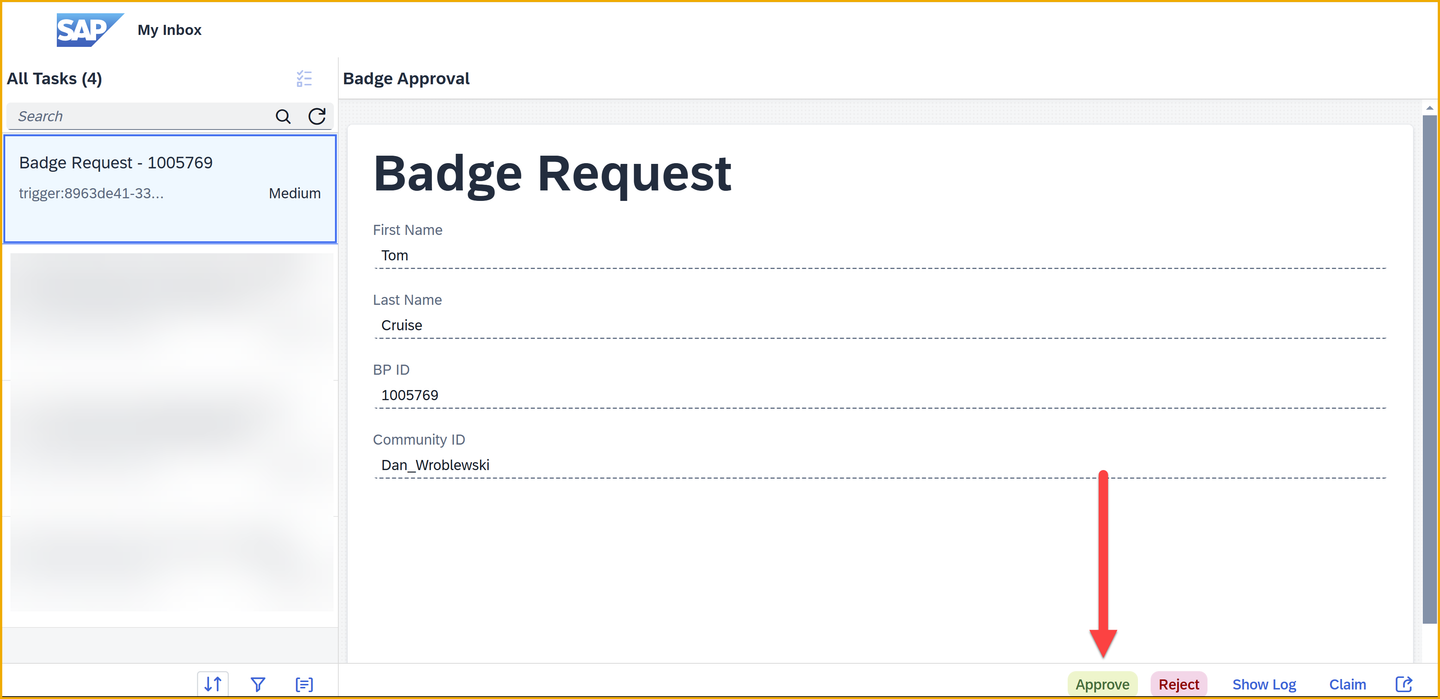
Open Inbox This opens the Inbox, and you will see the approval form, with all the data from our simulated event that we pasted in. Notice that the form has the ID of the business partner you created.
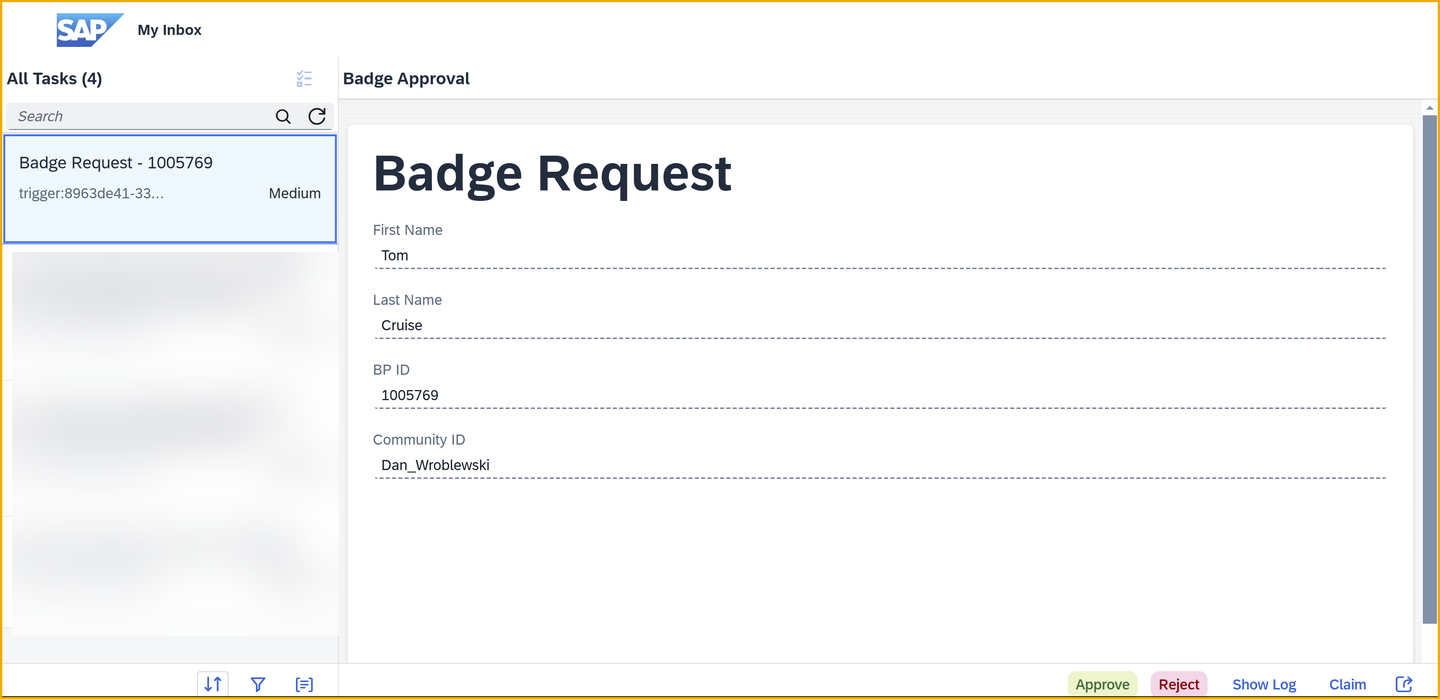
Approval form Before acting on the form, go back to the browser tab with SAP Build’s main page.
Go to Monitoring.
Go to Process and Workflow Instances.
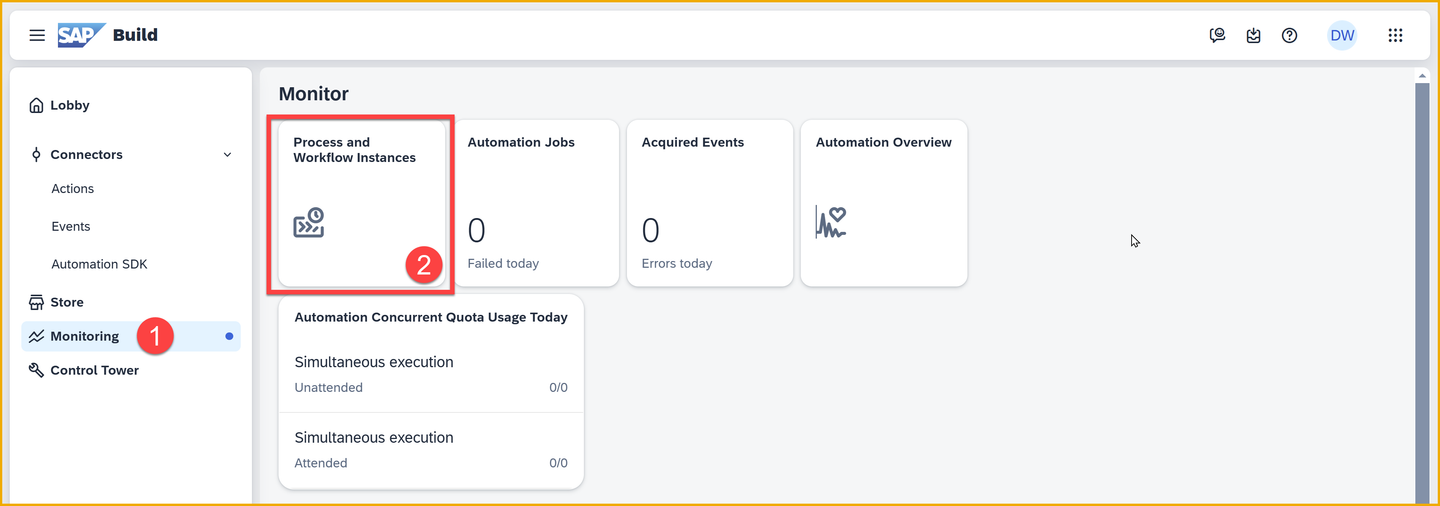
Monitoring At the same time, from the SAP Build main page, go to Monitoring > Processes and Workflow Instances.
This time, you do not have to change the filter because the process instance has not completed and instead stopped for the response to the approval form.
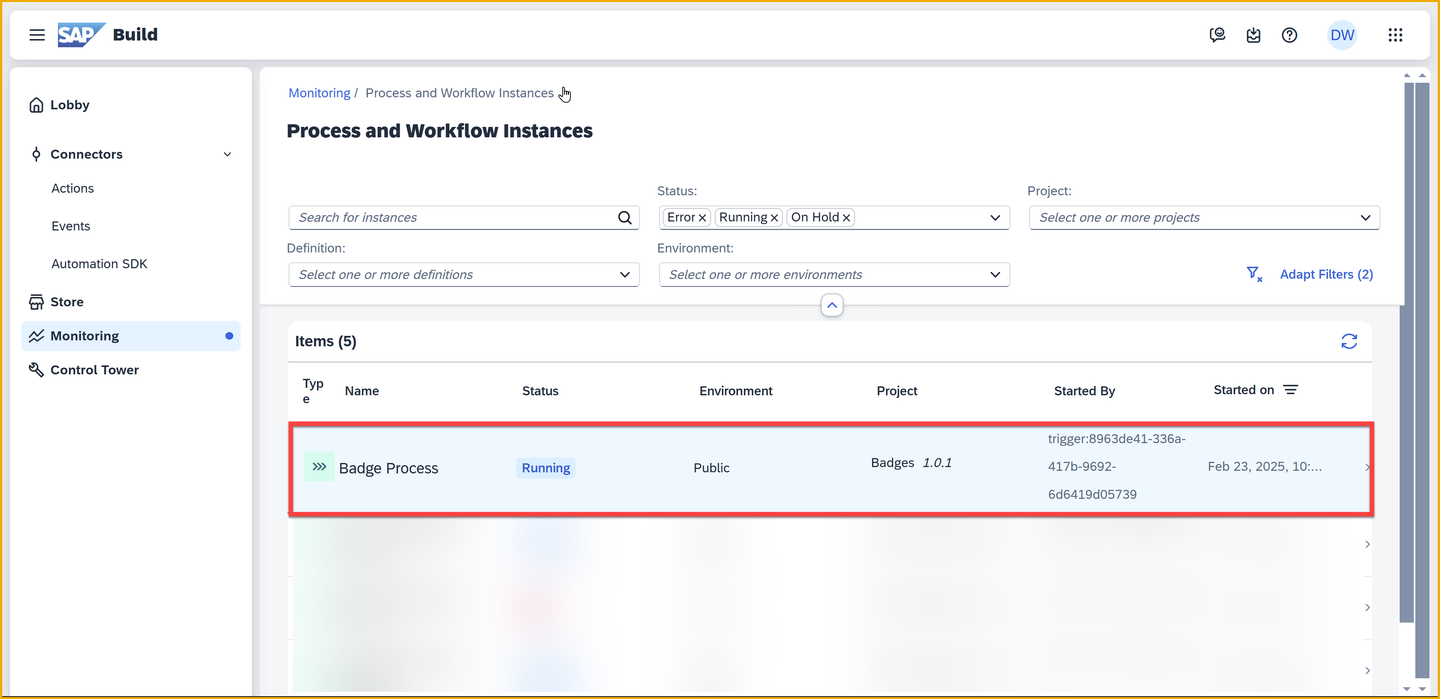
Triggered process Click on Badge Process, and you will see the header info, logs, and context for the process instance you just started.
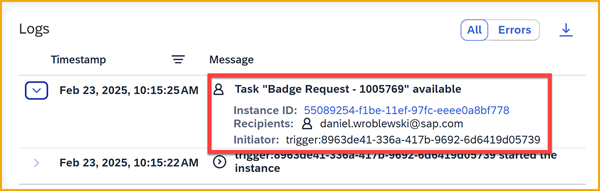
In the logs, notice Task “Badge Request” is available – this is the approval form waiting for your action.
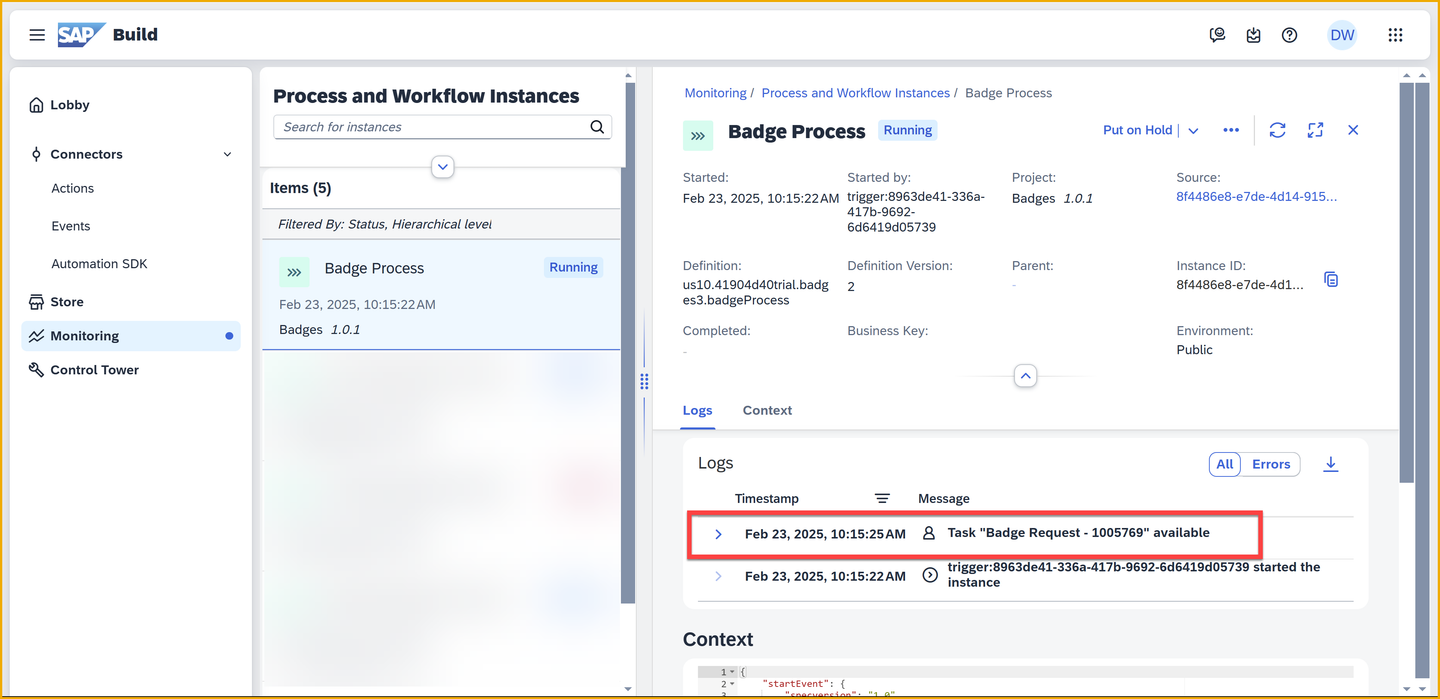
Process instance info Expand the Task “Badge Request”. You’ll see the recipients (you) as well as an ID for that specific task instance (there are APIs for manipulating that specific task, which use this ID).
Task info Go back to the Inbox and approve the badge by clicking Approve on the bottom right.
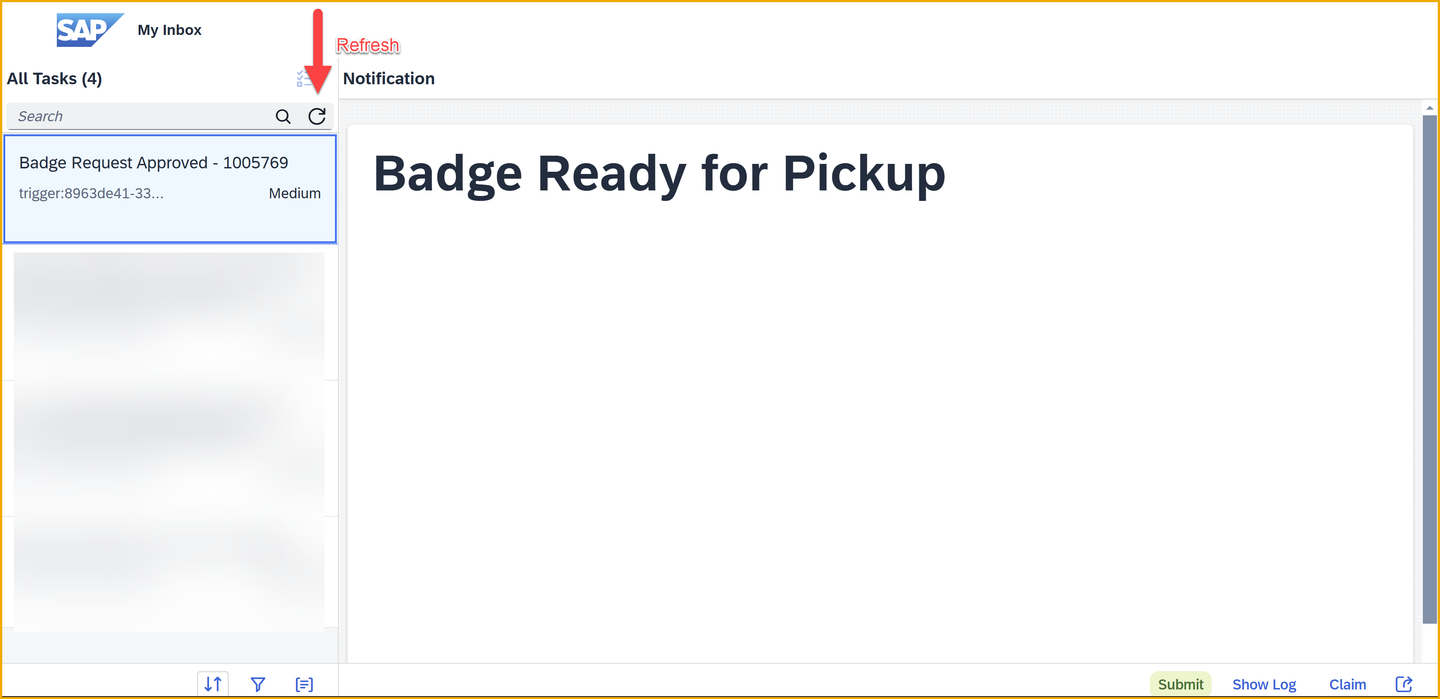
Approve badge The task in the Inbox disappears. But refresh the Inbox and the notification will be shown – you’ll have to scroll up.
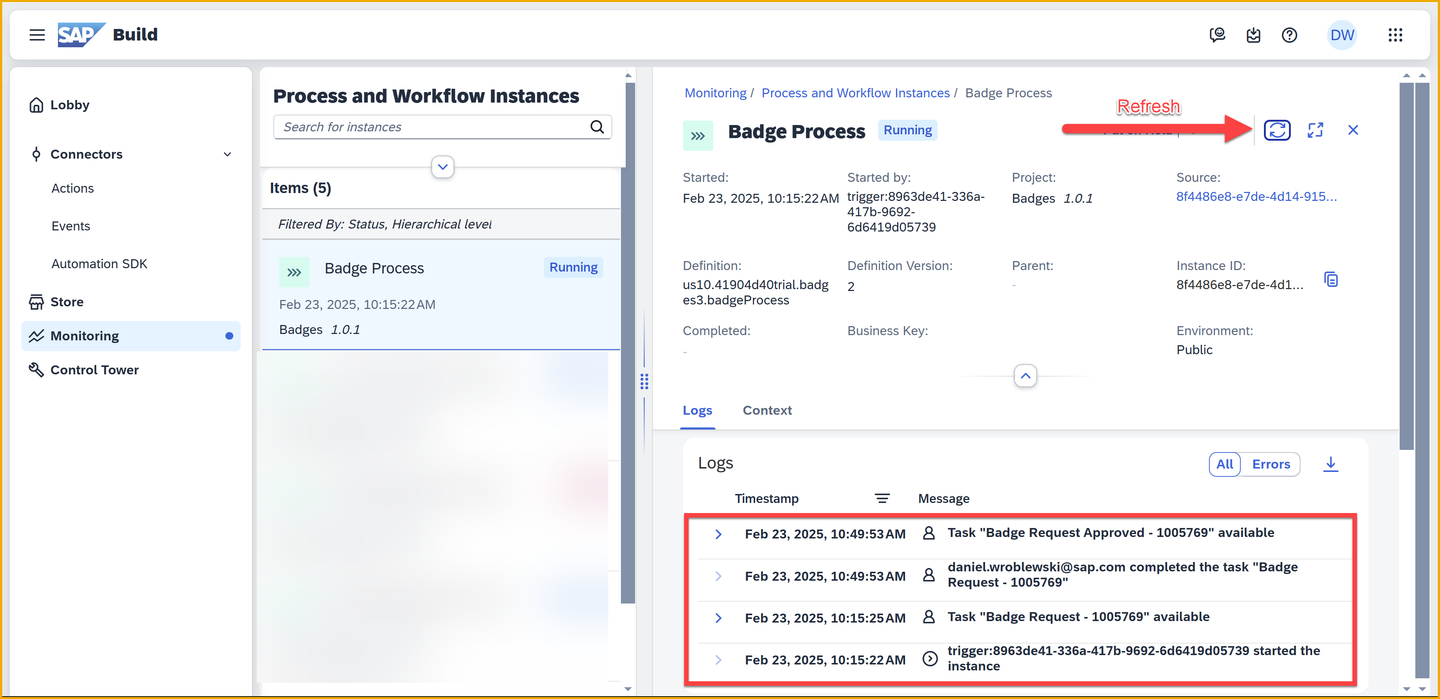
Notification received Now go back to the Monitoring area and refresh the view of your process instance.
You now see that you completed the approval step and now a second task is awaiting you, the notification.
Approval completed
You can go back to the Inbox and click Submit on the notification form, then return to the Monitoring area and see that the process instance completed.

Things to Ponder
What advantages does creating releases and deployed versions of your process give you? (Look at your project in the lobby under ‘Versions’.)
What is binding and what is its purpose?
What values can be bound?
How can you handle more complex data types, and how would you display them in a form?
Resources
Discussion
Share feedback on this tutorial or join the conversation in SAP Community.