
Overview
You will learn
- How to create an action (for calling APIs)
- How to add an action into your process
- How to configure an action
- How to work with the data returned by the action


Prerequisites
Prerequisites
- You have completed the previous tutorial for the event-based processes CodeJam, Add Approval Step and Use Inbox.
Steps
Intro
IT administrators can create “actions” to expose backend APIs to developers of processes or apps (using SAP Build Apps).
From within a package of APIs, actions let the admin expose only the APIs that are meaningful to the developers, and to select a subset of the input and output parameters to make complex APIs easier to use.
Actions specify the details of the API call, but do not specify a backend system. The developer of the process or app will later – during design time – assign the appropriate destination to the action.
Open SAP Build, and click Actions.

Open Actions Click Create.
Scroll down and select SAP Business Accelerator Hub.
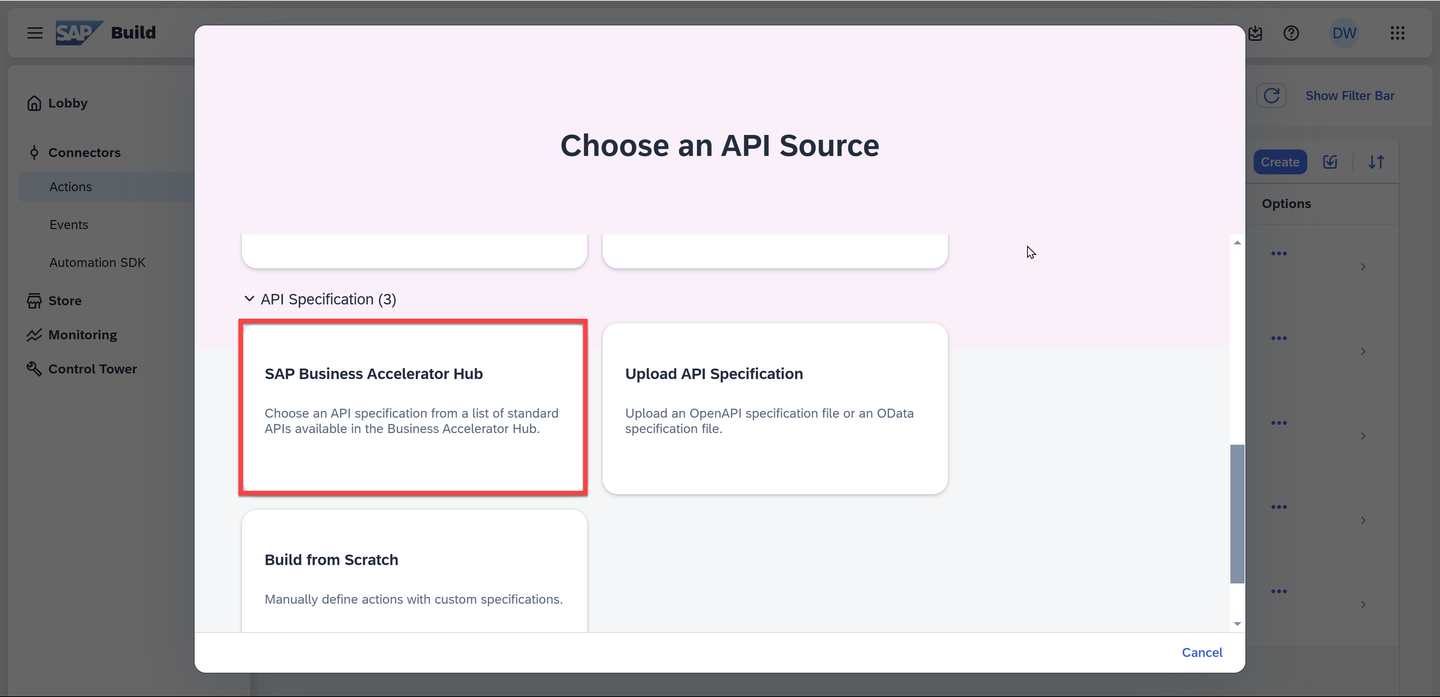
SAP Business Accelerator Hub Enter BusinessPartner in the search.
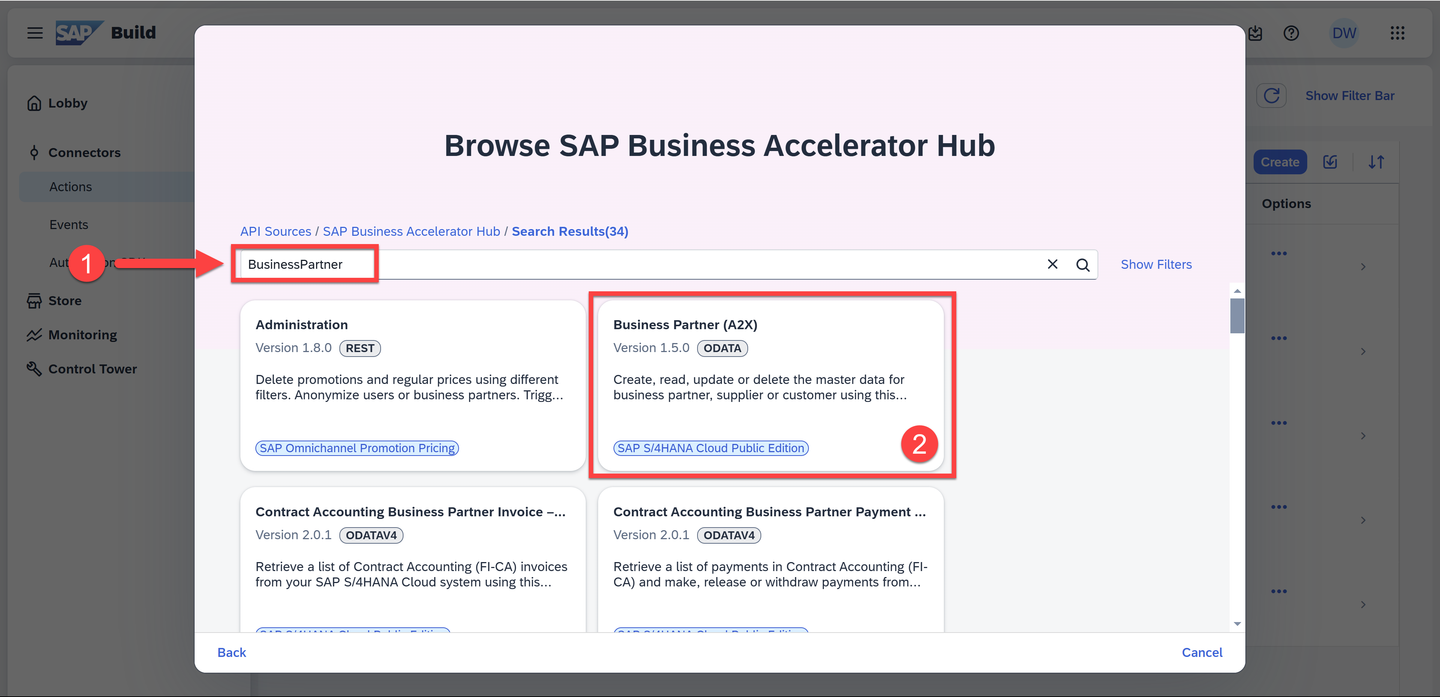
Business partner search Select Business Partner (A2X) from SAP S/4HANA Cloud Public Edition.
The next screen just shows all the API calls inside this API package, for your information.
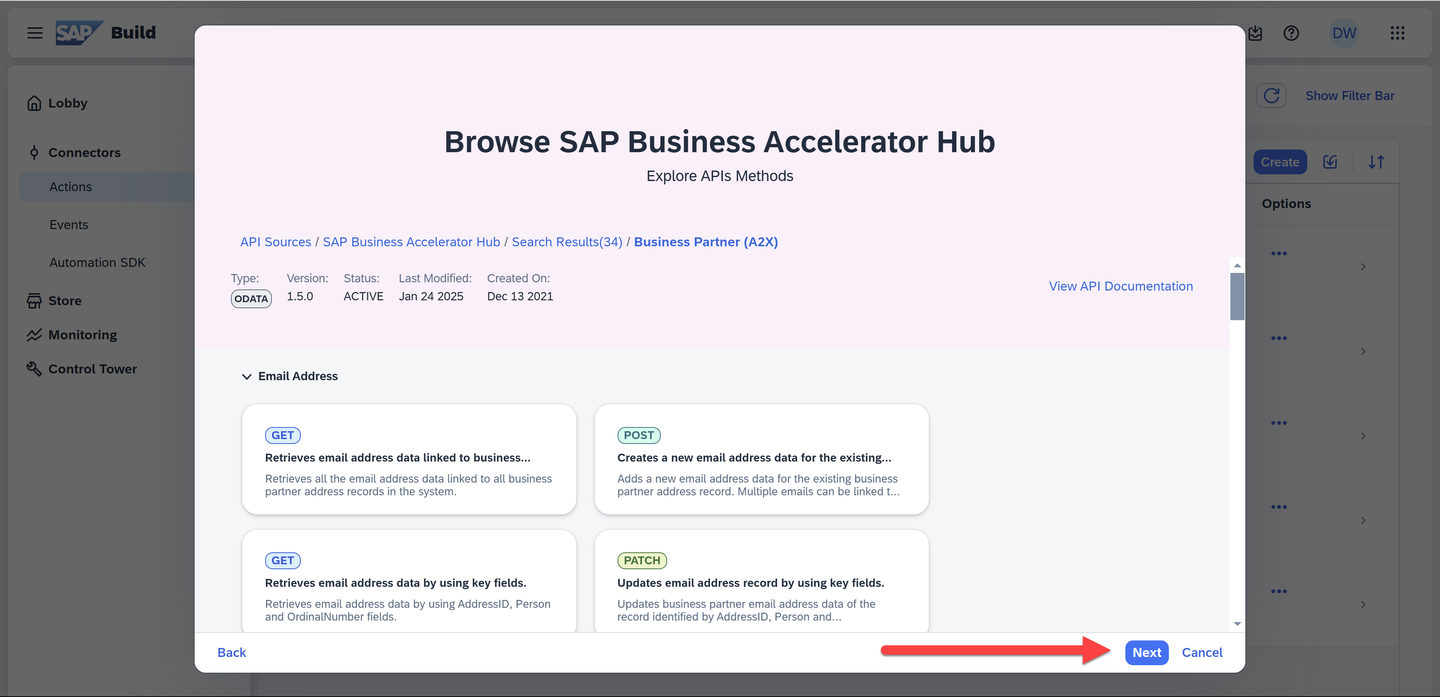
Review APIs Click Next.
Now you can name the action.
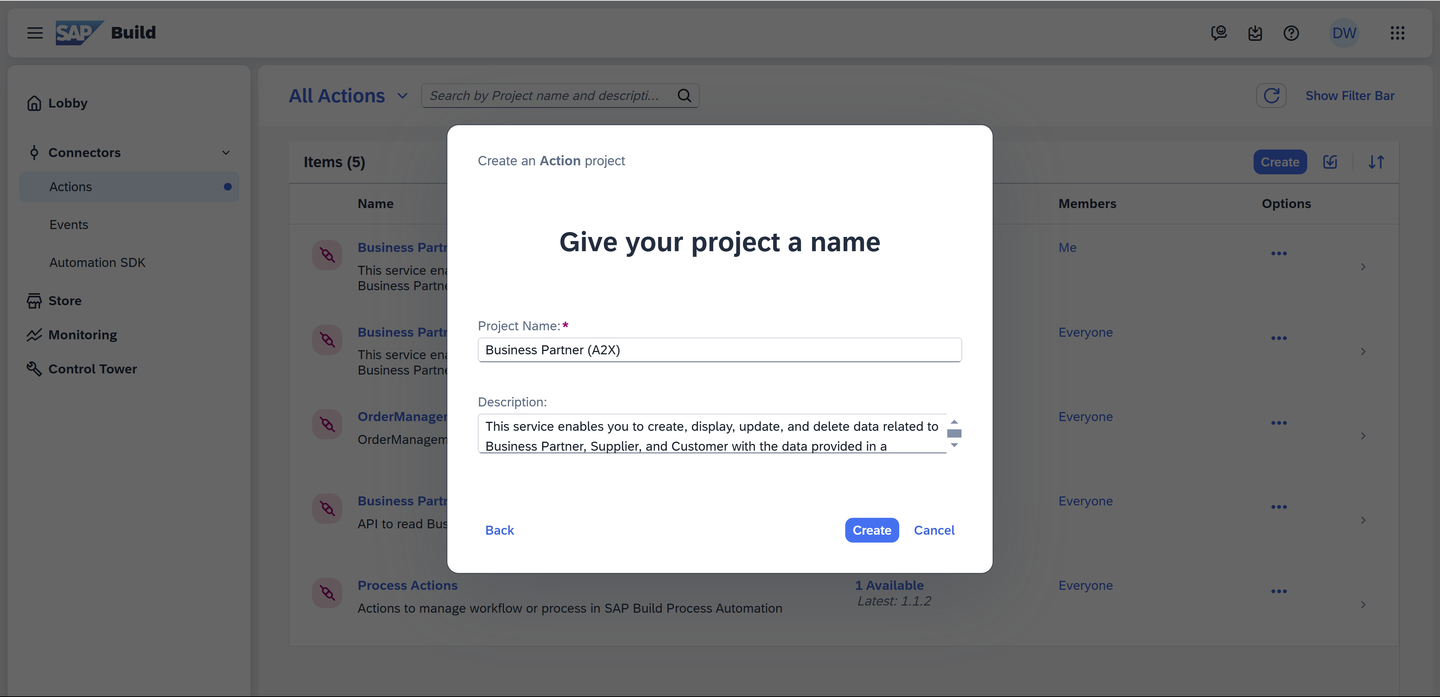
Name action Keep the defaults, and click Create.
The newly created action opens, again showing all the OData calls. But now you can select which ones to include in your action.
In the search, enter Retrieves business partner data.
Open the Business Partner node, and select the /A_BusinessPartner(’{BusinessPartner}’) API call.
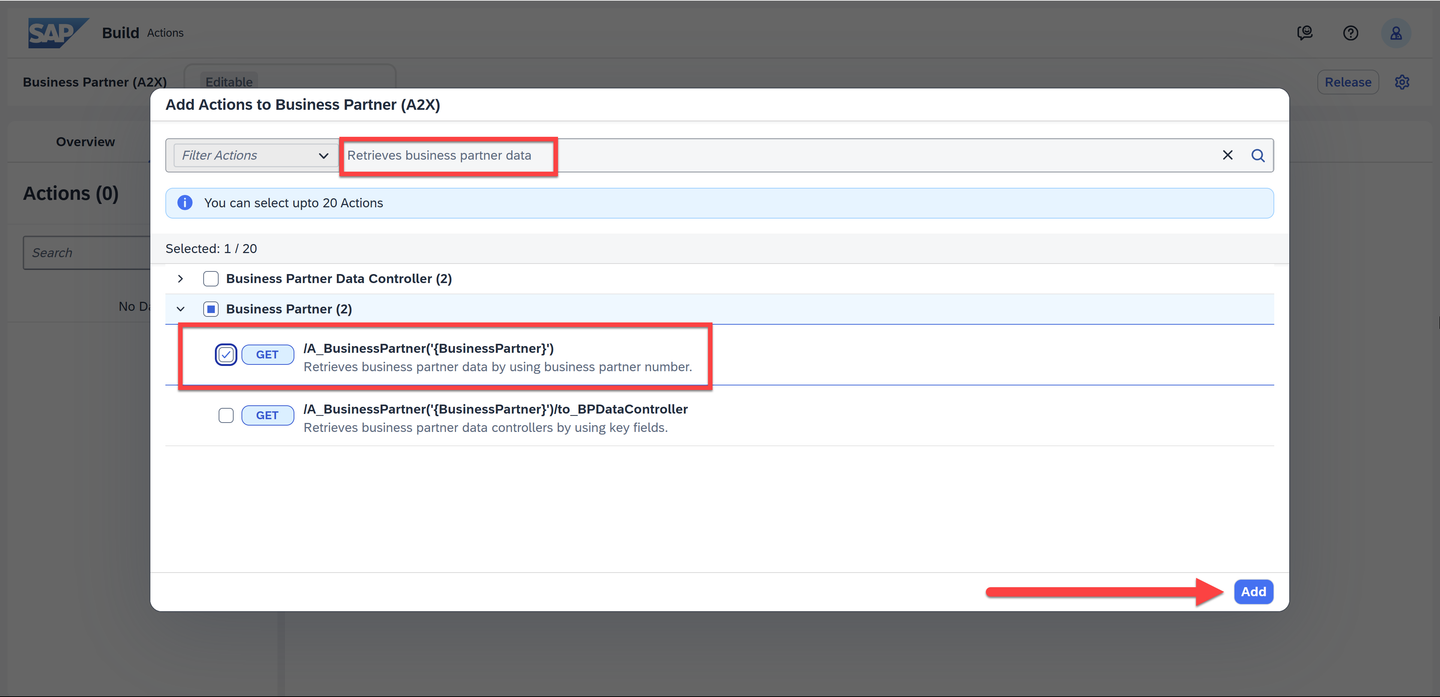
Select API Click Add.
You now get the action where you can modify the inputs and outputs.
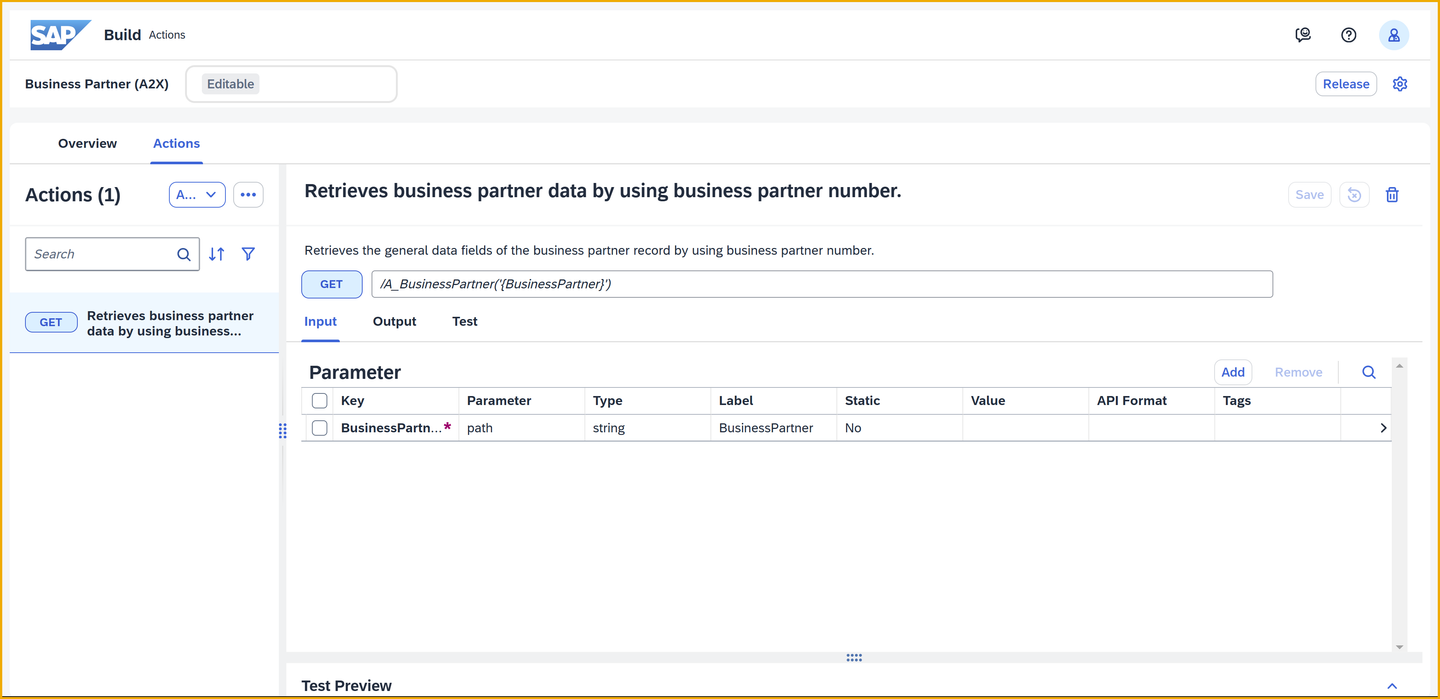
Action opened Click Output.
Check the d node, and then expand it.

Select outputs Uncheck the following fields (it might help to sort by Key):
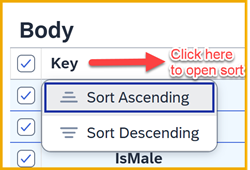
Sort - BusinessPartner
- BusinessPartnerGrouping
- CreationDate
- FirstName
- LastName
- NameCountry
Scroll back to the top and click Remove and then confirm Remove.

Remove outputs You should be left with just a few fields in the output.

Outputs Click Test.
Select Manual under Host.
For the URL, enter:
URLhttps://s4-mock-server-with-bp-created-events.cfapps.eu10.hana.ondemand.com/sap/opu/odata/sap/API_BUSINESS_PARTNER
Set up test Set the authentication to Basic Authentication and then enter the user and password distributed in the CodeJam by your instructor.

Add credentials For the BusinessPartner, input the ID for the business partner you created (or enter this ID: 1003769).
Click Test.
You should get data from the backend.

Test successful Click Save.

Save action Click Release, then click Release to confirm.

Release action Click Publish, and then click Publish to confirm.

Publish action
In the action test, we supplied the URL and credentials, but this was just for the test. In order to use in production, we want to use a destination – a connection defined in the SAP BTP cockpit to a backend system.
Destinations can then be used seamlessly in applications and processes to connect to systems, without needing to know the connection details and using all types of sophisticated authentication schemes.
Download the destination template.
Click Destination template, and then click the download button.
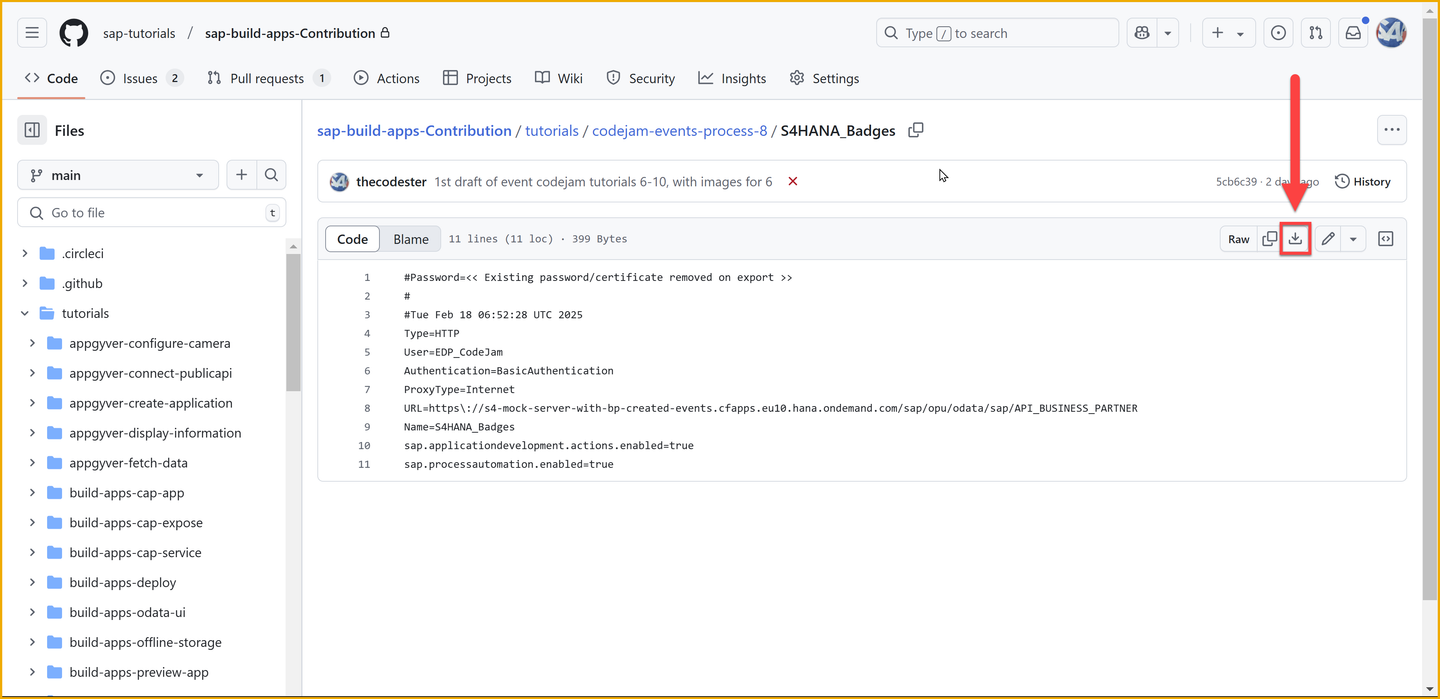
Download destination Go to the SAP BTP cockpit for your subaccount.
You can always return to your trial account cockpit by going to https://account.hanatrial.ondemand.com/ and then opening your subaccount.
Click Connectivity > Destinations.

Import destination Click Import Destination, and select the file you downloaded.
Enter the password distributed in the CodeJam by your instructor.
Click Save.

Save destination Click Check Connection, and you should get a 200 status code.
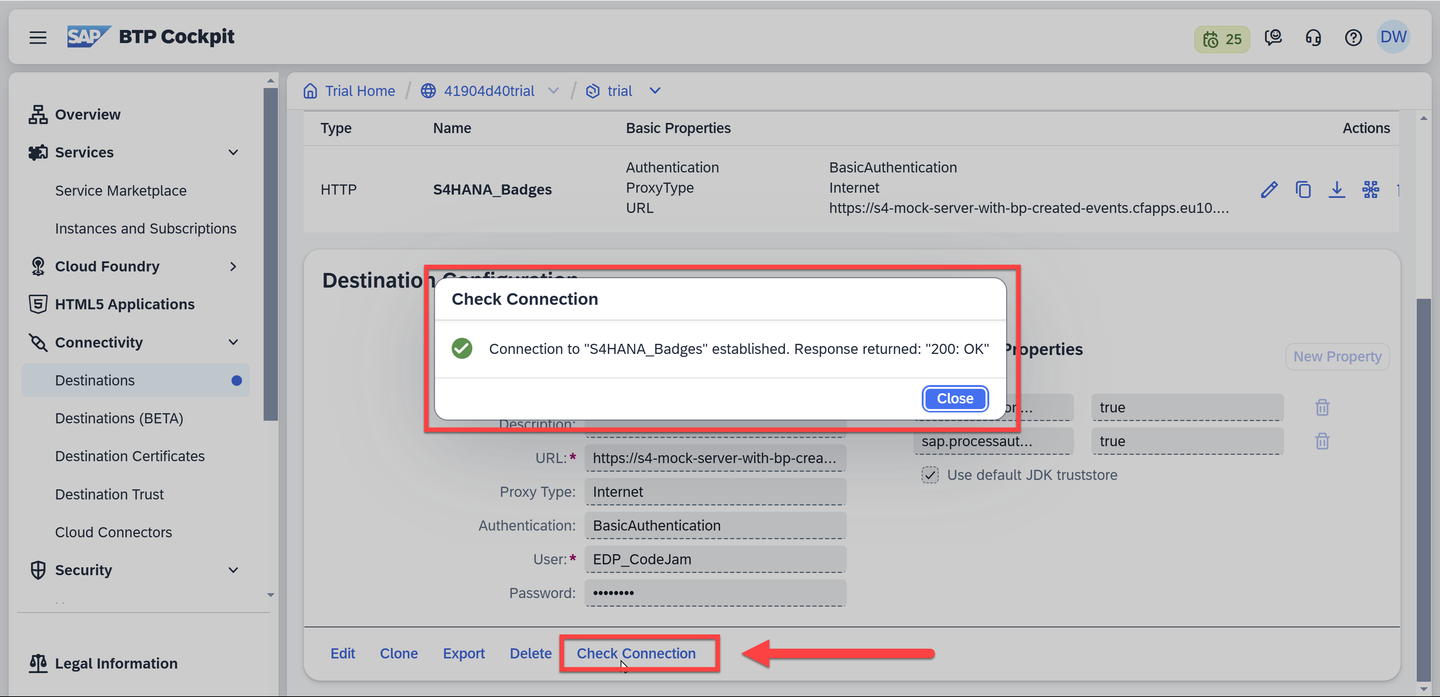
Test destination
You created a destination, but you must let SAP Build Process Automation know that you want to allow it to be used in deployed processes.
In the main SAP Build page, click Control Tower.
Click Destinations.

Add destination to Control Tower Click Add.
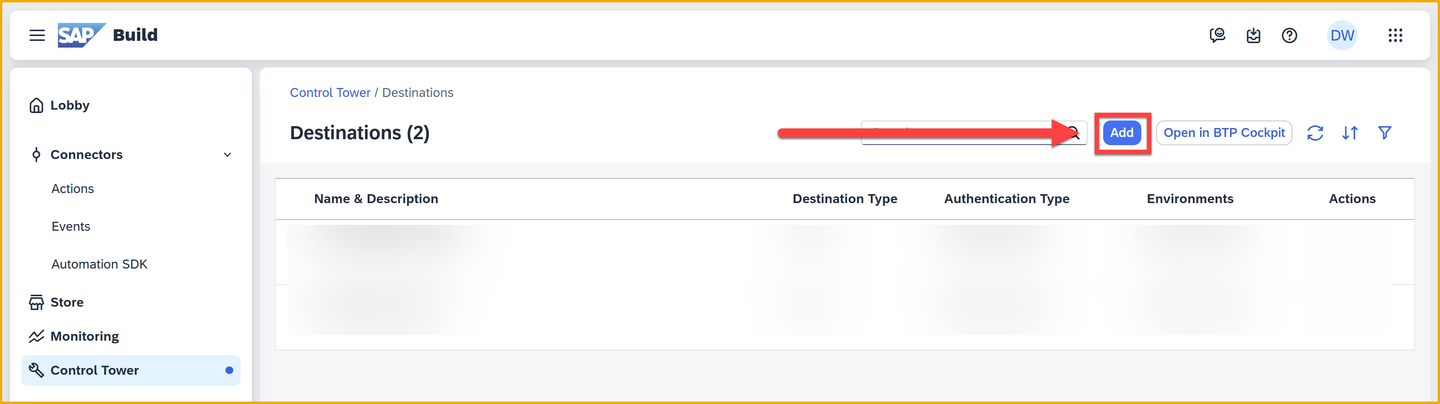
Click Add Select the S4HANA_Badges destination.
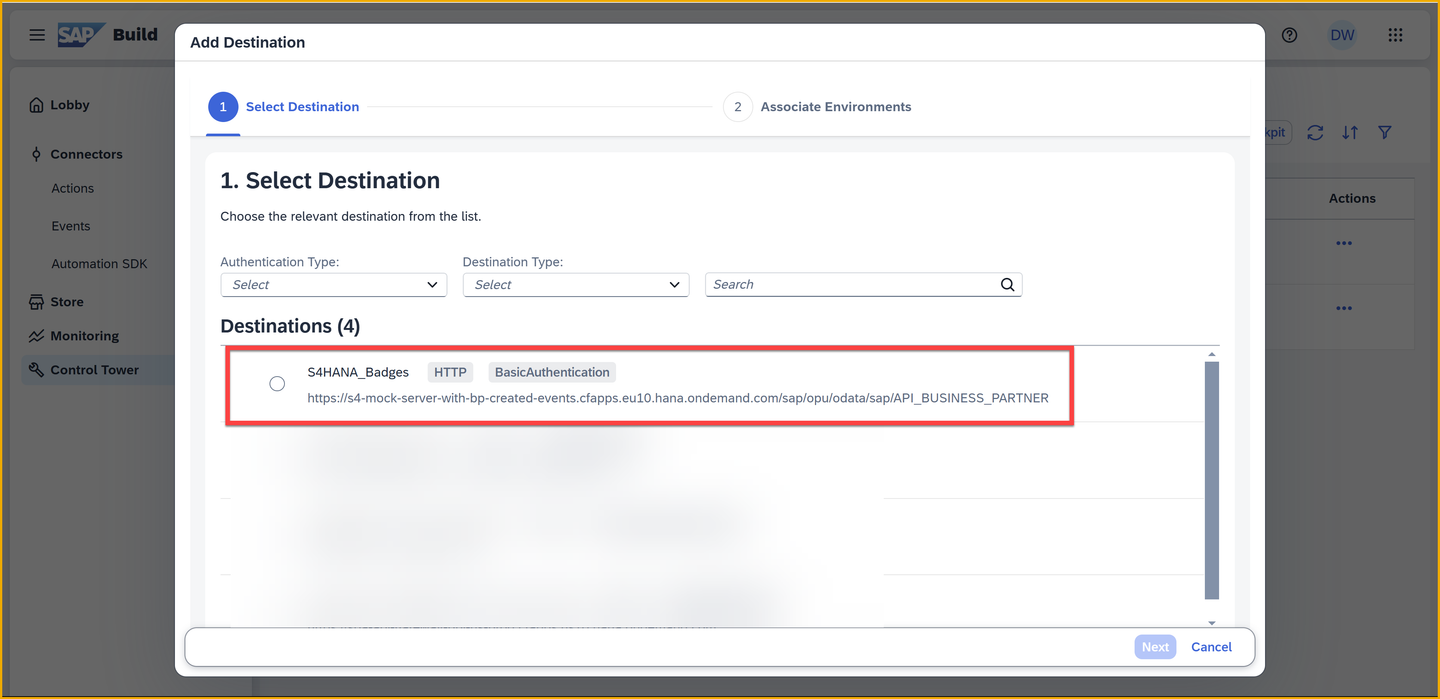
Select destination Click Next.
Keep All Environments, and click Add Destination.
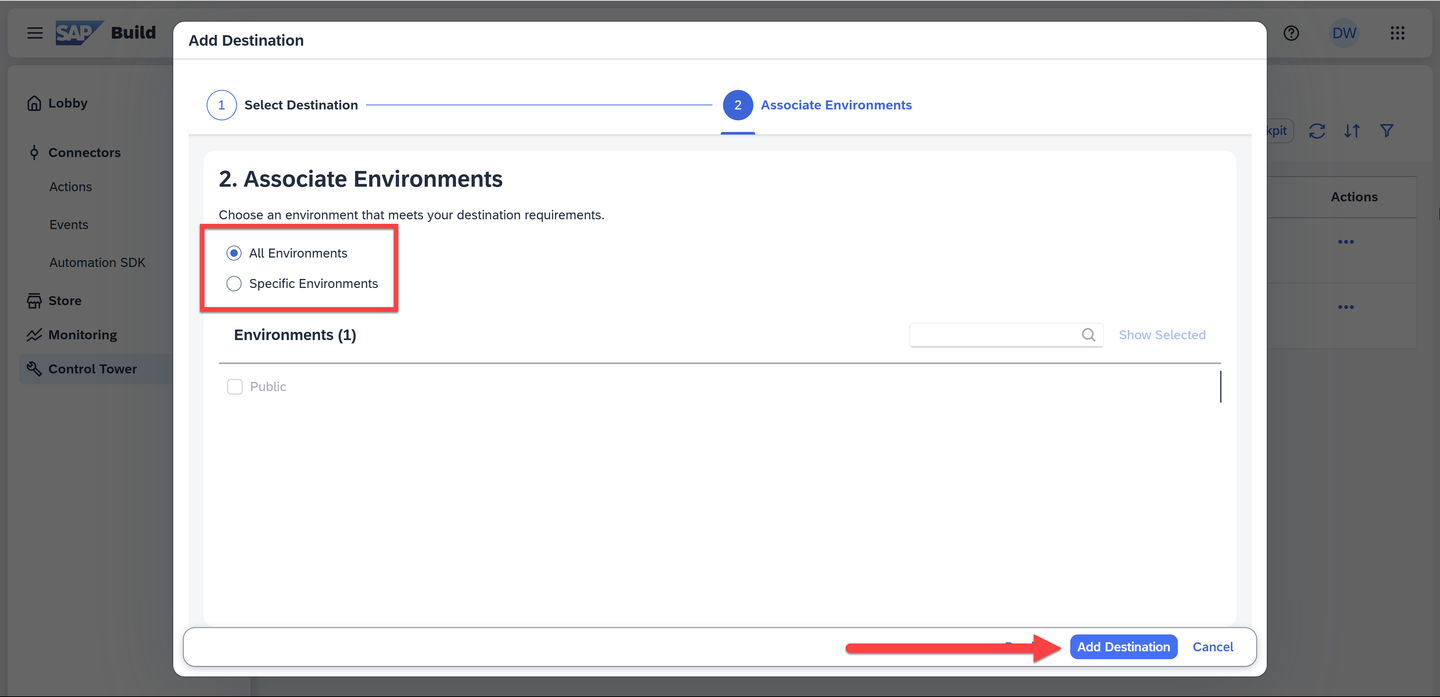
Destination added
The destination should now appear in the list of destinations that can be used with your processes.
Go back to your process project.
Make sure you are in the Editable version.

Open project Under the trigger, click the plus sign, +.
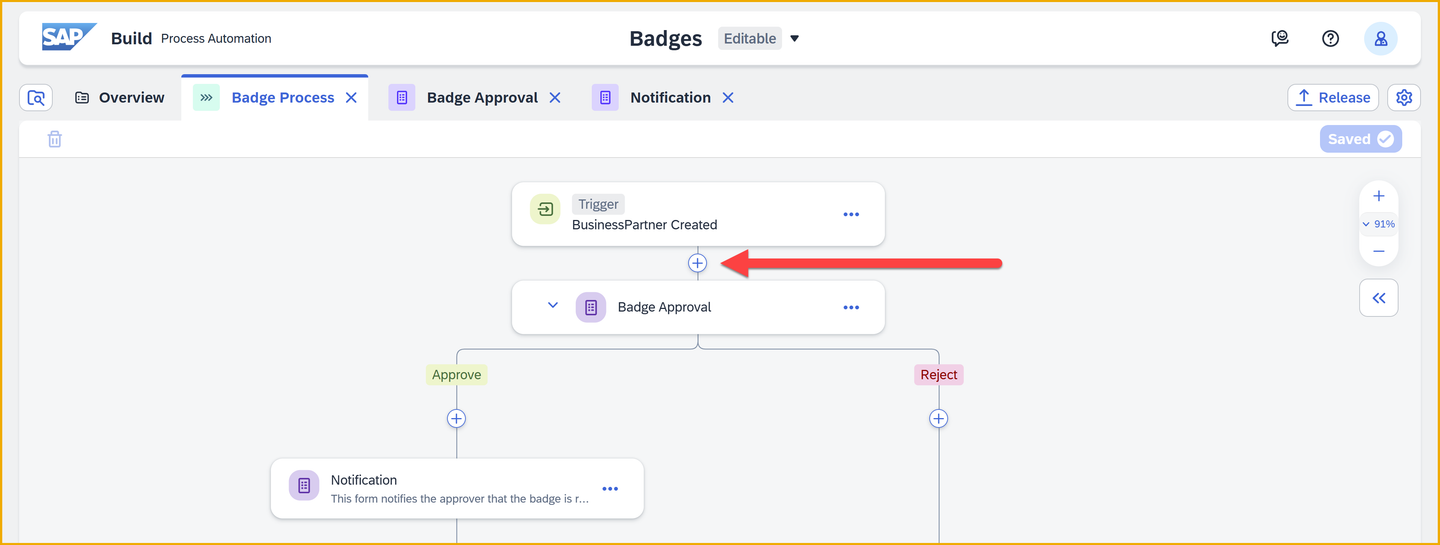
Add step Select Action.

Select Action Select Browse All Actions.

Browse All Actions Click Add next to your action. To help you find the right action, you can see the name of the acttion project.

Add action The action is added to the process.
With the action selected and the process panel on the right open, find the Destination Variable field.
Click Select a Destination Variable, then click Create Destination Variable.

Add destination variable For the identifier, enter BPdest.
Click Create.

Destination variable added In the Inputs tab, click inside the BusinessPartner field.
Select Process Inputs > data > BusinessPartner.

Bind business partner Save the process by clicking Save (upper right).
Now that we’ve retrieved the data, we want to display it in the approval form. You will add a field to display the business partner’s country and grouping.
On the Badge Approval form, click the three dots and select Open Editor.
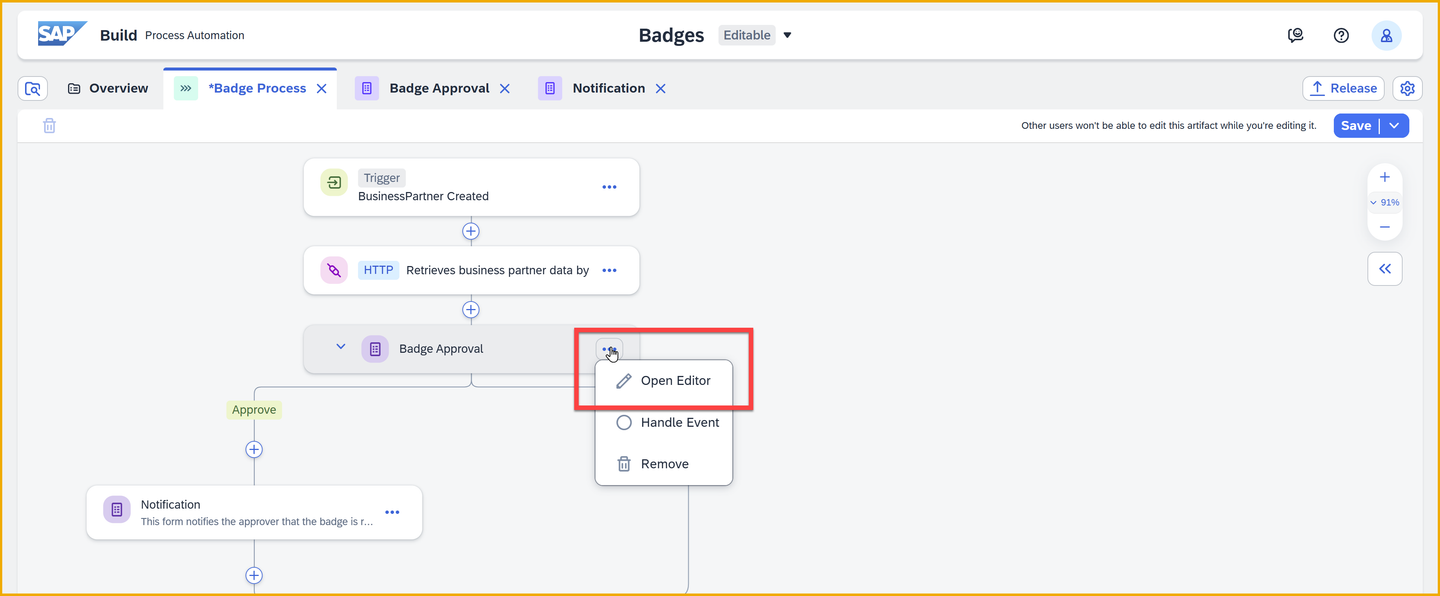
Open form editor Click the Text field on the left twice, which adds 2 new text fields at the end of the form.

Add text fields Set the 2 fields as follows:
Field Name Settings Country Make the field Read Only Grouping Make the field Read Only Click Save.

Text fields added Back in the process, select the Badge Approval form.
Open the Inputs tab.
Bind the 2 new inputs as follows:
Field Binding Country Retrieve business partner > result > Business Partner > Ctry/Reg. for Format Grouping Retrieve business partner > result > Business Partner > Grouping Click Save.
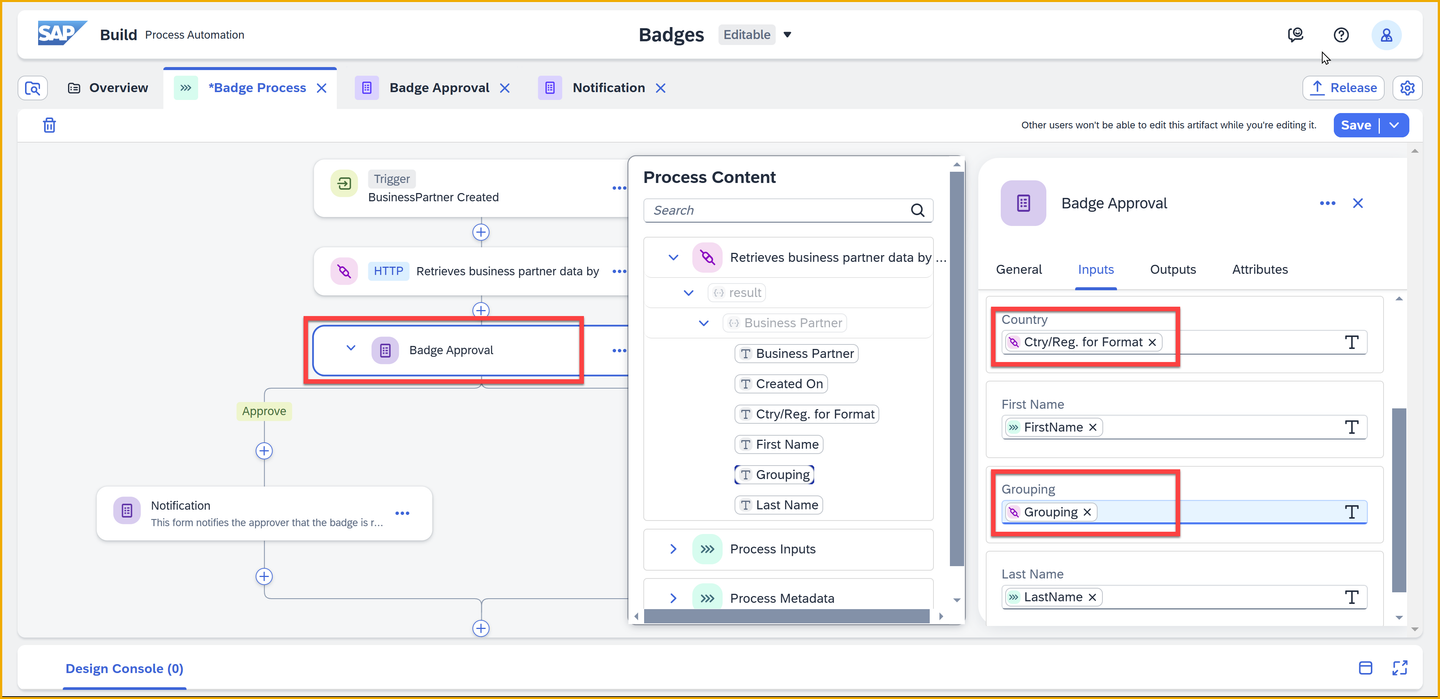
Fields bound
Click Release.

Release Click Release.
Note that after releasing, you are still inside the editable project, not the released version.
Click Show project version (upper left).

SHow new release This will take you to the released version of your project, so you can deploy it.
Click Deploy.

Deploy Select the Public environment.
Select Upgrade – as you already have a version deployed.
You get a message that your deployment will update the existing trigger.
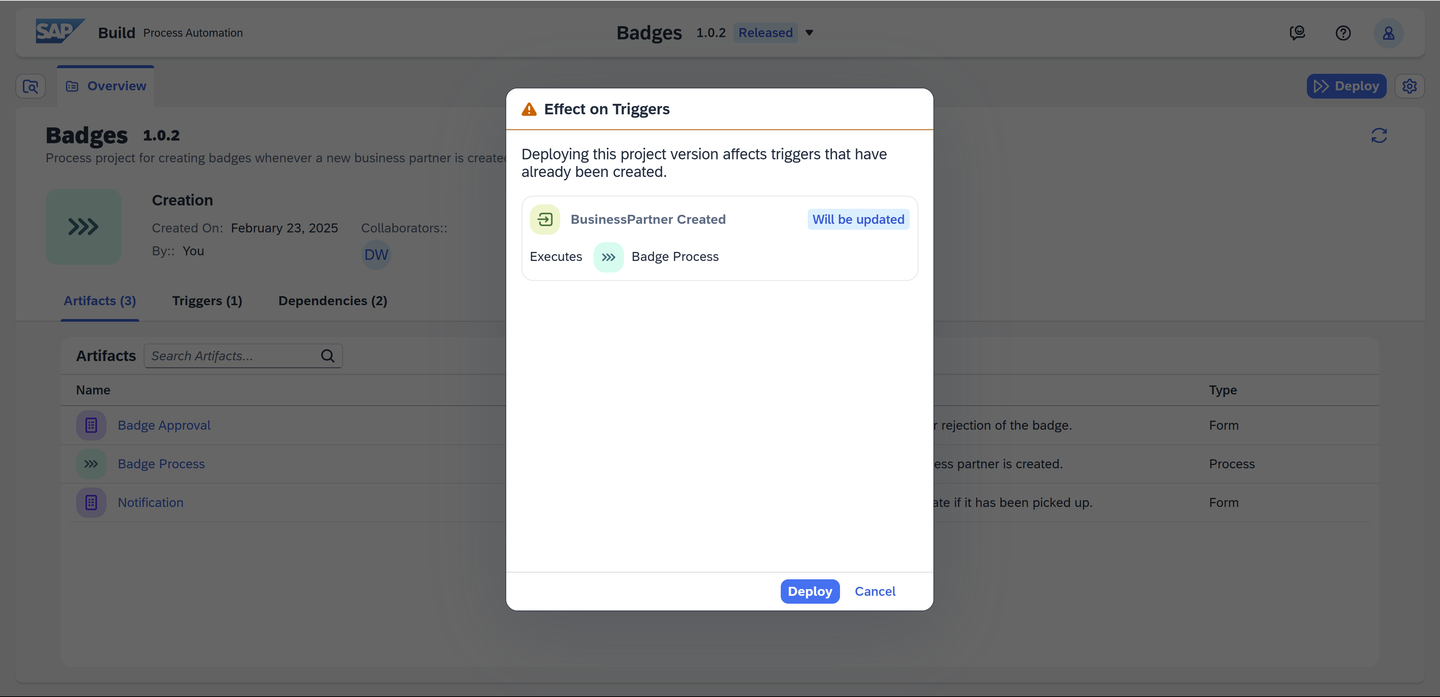
Triggers Click Deploy.
You now get a new dialog to select values for all the environment variables you created for this project. In this case, you created a destination variable for your action, in order to select the destination for connecting to your backend system.
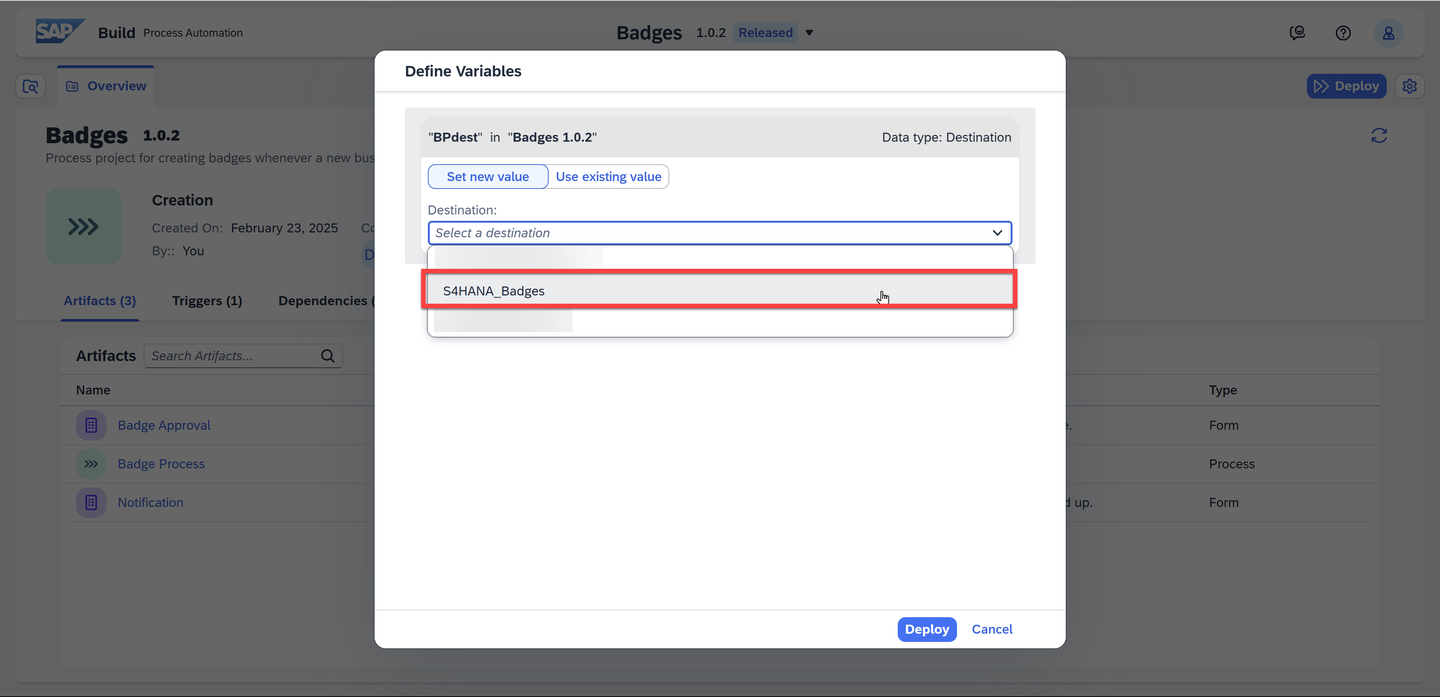
Destinations Select your S4HANA_Badges destination, and then click Deploy.
Go back to the Create Business Partner app we provided to you.

Business partner app Enter the following:
Field Value First Name Anything you want Last Name Anything you want Country Select one of the countries SAP Community Username Your user name in the SAP Community IMPORTANT: You set up your REST Delivery Point to publish only events that contain your community user. So you need to provide your user in order for the event to be delivered to your SAP BTP tenant and to trigger your process.
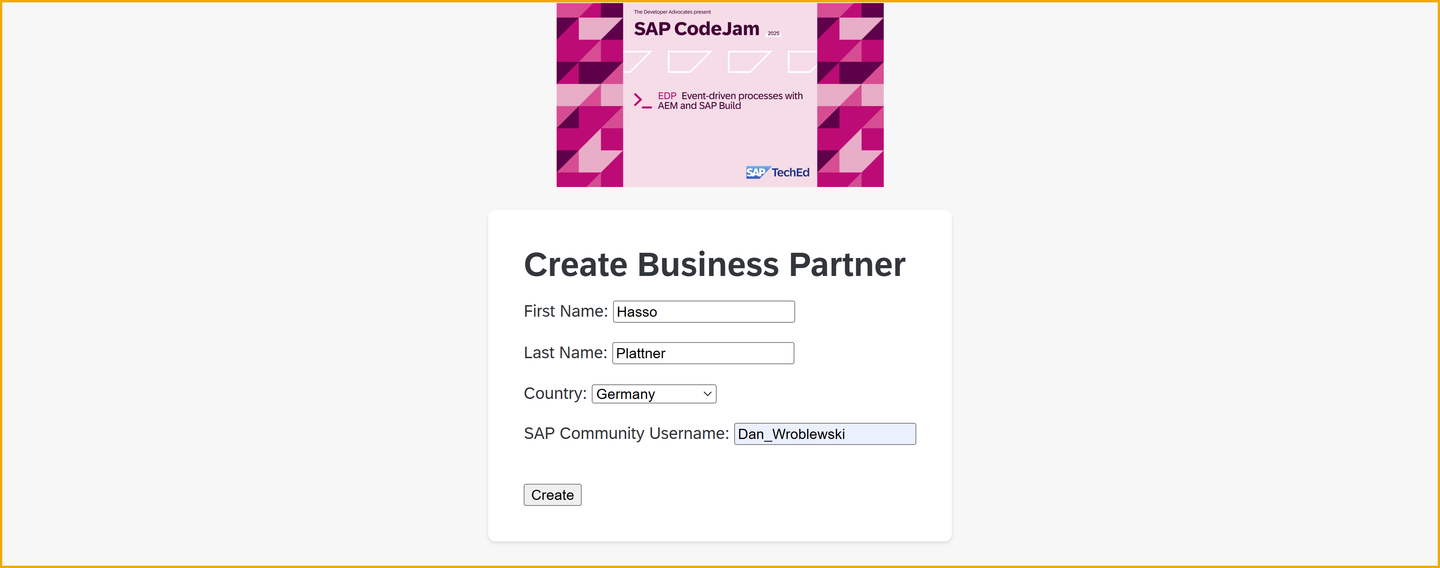
Add business partner Click Create.
Your business partner is created.
Check that the event was received into SAP Build by going to Monitoring (in the main SAP Build page).
Click Acquired Events.

Acquired events Click Business Events. You should see an event created for your new business partner, including the business partner ID that you saw when you created it.

Business events
In SAP Build, click Monitoring.
Click the Processes and Workflow Instances tile.
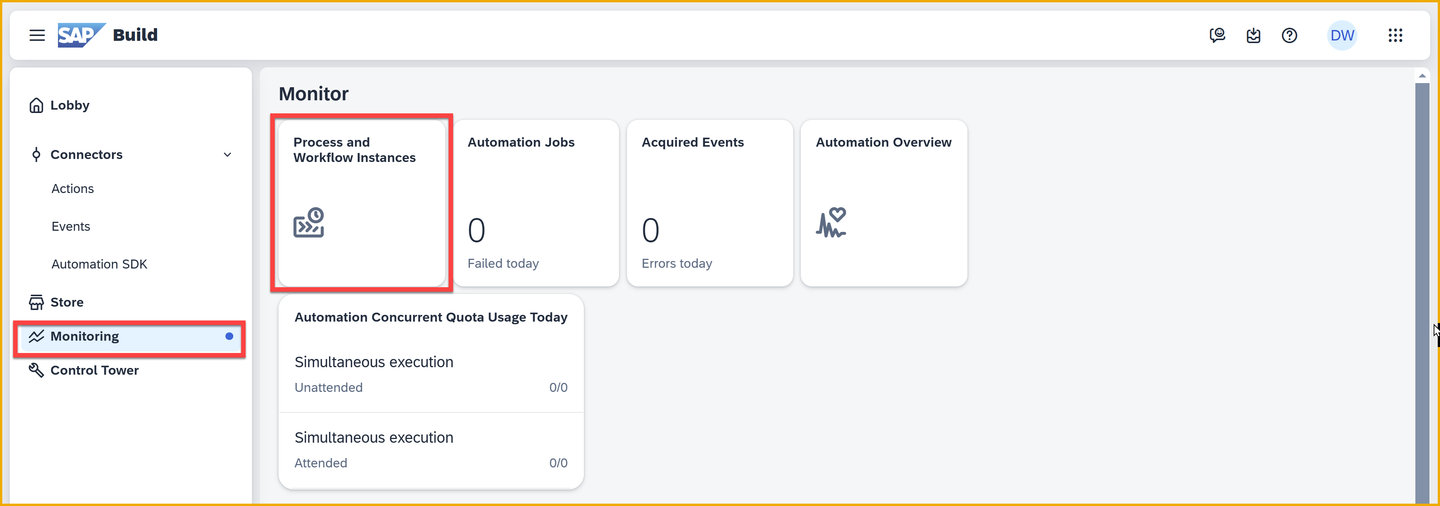
Process and Workflow Instances Click on the process instance to see its details.
In the Logs area, you will see the step where the action was started and completed.

Action steps In the Context area, you will see data received from the event, as well as the data retrieved from the action call to our business partner.

Data from business partner In your Inbox, see the approval form. It now contains the country and grouping, which you retrieved from the SAP S/4HANA Cloud backend.

Data in the approval form
Feel free to finish the process by approving the badge and then acknowledging the notification, as you did in the previous tutorial.
Things to Ponder
What is the advantage of creating actions?
When creating an action, why configure it? Why not leave all the API calls and all the inputs/outputs?
What is the purpose of a destination variable?
What is another advantage of using actions (related to SAP Build Apps, see this news item)?
Resources
Discussion
Share feedback on this tutorial or join the conversation in SAP Community.