
Overview
You will learn
- How to capture a web application
- How to test an application using Application Tester


Prerequisites
Prerequisites
- Access to a SAP BTP tenant with SAP Build Process Automation
- Install and Setup the Desktop Agent
- You have enabled SAP Build Process Automation browser extension
Steps
Intro
In this tutorial you will open the Orders Management application in a browser, create an application in SAP Build Process Automation and declare the elements for the application screen.
Open the application you will automate by choosing the link Browse Orders.
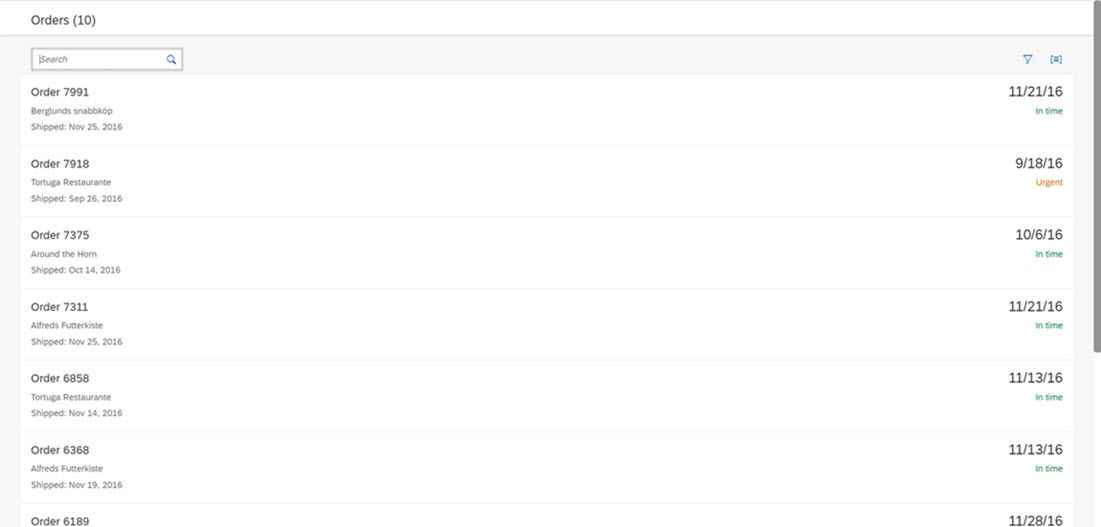
In a new browser window, go to SAP Build Process Automation tenant.
Select Create button to create a new project.

Projects Select Build an Automated Process option.

Projects Select the Task Automation option.

Projects Enter the Project Name and a Description as given below. Select Create.

New Project popup The project opens in a new tab. In the Configure Agent Version dialog box, select the agent version. Choose Confirm.

New Project popup
Choose Create and in the dropdown, select Application.

New Project popup In the Create Application dialog, enter Application Name as Record Orders. Select Create.

New Project popup The system starts detecting the applications and their screens currently running on your local machine. You’ll see a list of screens on the left-hand side. Select the Browse Orders window and select Next.

New Project popup Select Manual Capture and choose Capture.

New Project popup Once the screen has been recorded, select Go to Application.

New Project popup
What’s going on?
To automate a web application, you need to: capture, declare and test the application, screens, and UI elements.
You will capture the application and its screens. Then, declare the screens and the elements within the screens that will be part of the automation. Finally, test the application to make sure all the applications, screens and elements are getting recognized.
This is an important step to make sure that the system knows which application to work on, which screen to open and which element to select.
To declare an application, you need to set recognition criteria – which identifies the application, screens and UI elements correctly when your automation runs.
Choose the URL (below) in the Captured Data to add them to the Recognition Criteria section.
Modify the criterion of URL as below and choose Apply.
- Property
URL - Operator
contains - URL
https://openui5.hana.ondemand.com/test-resources/sap/m/demokit/orderbrowser/webapp/test/mockServer.html

Select View 
Select View - Property
Save your changes.
The Recognition Criteria should look like this:

Screen Declaration
Choose the first order number (here, Order 7991) to select. A green or red border will appear around the selected element.
You can take help from the Both view to drill-down to the specific element.

Select View In the Element Details panel, enter
Order Numberfor the name of the element. The Identifier and Element are automatically detected.
Element Information Remove any already existing criterion by choosing the X.
In Captured Data, choose the data below to add them to the criteria. The selected data is then automatically added as a criterion in Recognition Criteria.
- class equals
sapMTextMaxLine sapMTextLineClamp
- class equals
Once Recognition Criteria is green, it indicates that the bot has recognized your element. You can choose Declare Element now.

Declare Element Order number From the Declared Elements area, choose the Order Number element.
In the right panel under Recognition Criteria, choose the Is a Collection button 
This converts Order Number element into a collection of elements.

Declaration Order Number Repeat steps 1-7 to further declare the element Status. Use the below criteria to declare:
- class equals
sapMObjStatusText
Make sure to declare the status as Collection.

Final Application - class equals
Save your work.
The purpose of testing an application before using it in an automation is to ensure that you have declared all of the elements correctly so that at runtime, they are correctly identified and can be controlled as intended. The application can be tested using Application Tester.
To test your application, choose Test

Test Choose Test.

Choose Environment The system launches the Application Tester.

Application Tester_1 The applications declared in your project are displayed in Declared Applications.
The elements getting successfully recognized will appear in green. If the declared application or screen or element is not recognized, you will see them in red.
The declared elements found on the selected screen are listed in the Declared Elements section. Choose the arrow next to a declared element to display its collection.

Application Tester Declared Elements To test the elements select the element
Order Number(0)from the list.Select Get Element activity and choose the Execute button.
The result can be seen in Output parameters as Order 7991. This way you can test that the elements are getting recognized correctly.

Application Tester Declared Elements
Congratulations! You have successfully captured and declared the application for orders management.
In the next tutorial, you will learn how to build an automation with this captured application to automate the orders management process.
Resources
Discussion
Share feedback on this tutorial or join the conversation in SAP Community.