
SAP HANA XS Advanced - Modules within Node.js SAP HANA applications
Working with Node.js modules
Overview


Prerequisites
Prerequisites
- This tutorial is designed for SAP HANA on premise and SAP HANA, express edition. It is not designed for SAP HANA Cloud.
- Proficiency: Intermediate
- Tutorials: SAP HANA XS Advanced, Creating a Node.js Module
Steps
Return to the project from the previous tutorial (https://developers.sap.com/tutorials/xsa-xsjs-xsodata.html) and create a new module of type Node.js.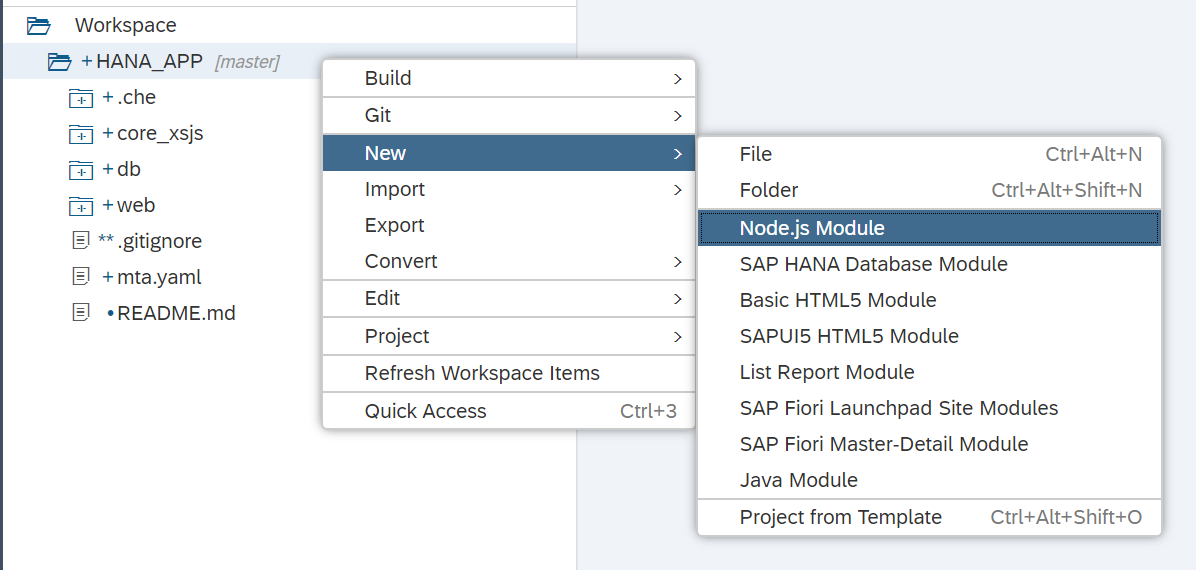
Give the module the name: core_node. Leave all other fields at the default and press Finish.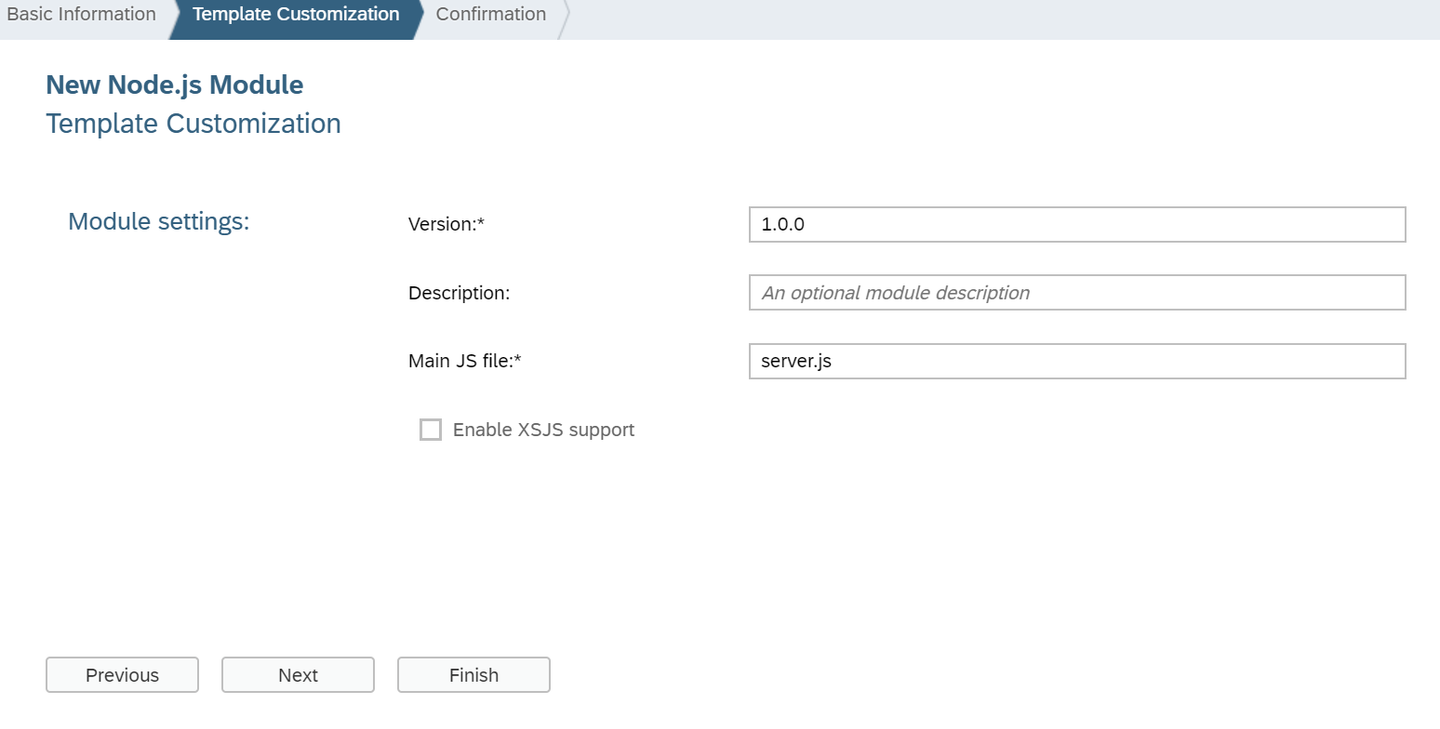
In this new Node.js module you have the server.js source file as your mail entry point. You would like to extend server.js to also handle some purely Node.js code as well.
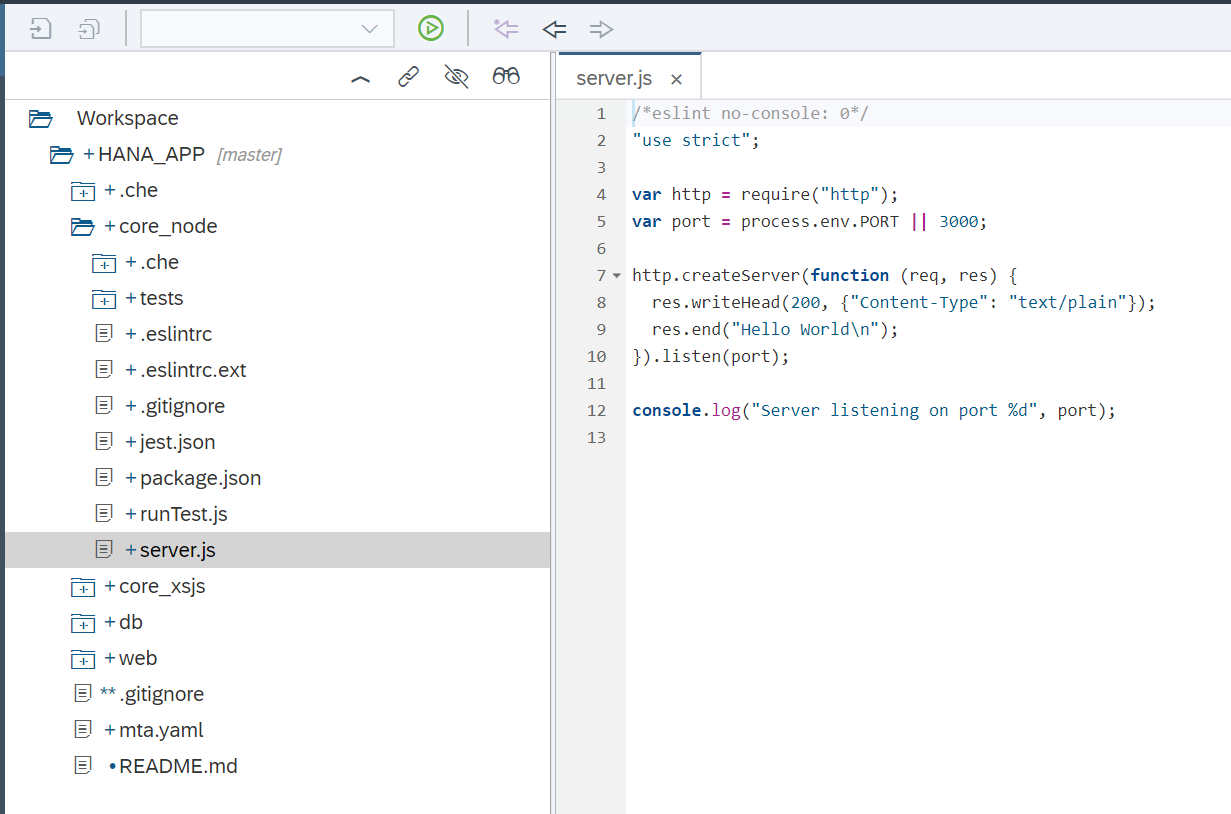
Begin by adding two new Node.js module requirements toward the beginning of the file. One is for the http built-in module and the other is the popular open source module express. One of the most common tasks in Node.js is acting as a web server and handling http requests/responses. Express is a module that wraps and extends the low level http library and provides many additional services.
/*eslint no-console: 0, no-unused-vars: 0, no-undef:0, no-process-exit:0*/
/*eslint-env node, es6 */

"use strict";
const https = require("https");
const port = process.env.PORT || 3100;
const server = require("http").createServer();
const express = require("express");

//Initialize Express App for XSA UAA and HDBEXT Middleware
const xsenv = require("@sap/xsenv");
const passport = require("passport");
const xssec = require("@sap/xssec");
const xsHDBConn = require("@sap/hdbext");
xsenv.loadEnv();

https.globalAgent.options.ca = xsenv.loadCertificates();
global.__base = __dirname + "/";
global.__uaa = process.env.UAA_SERVICE_NAME;

//logging
let logging = require("@sap/logging");
let appContext = logging.createAppContext();

//Initialize Express App for XS UAA and HDBEXT Middleware
let app = express();

//Build a JWT Strategy from the bound UAA resource
passport.use("JWT", new xssec.JWTStrategy(xsenv.getServices({
	uaa: {
		tag: "xsuaa"
	}
}).uaa));

//Add XS Logging to Express
app.use(logging.middleware({
	appContext: appContext,
	logNetwork: true
}));

//Add Passport JWT processing
app.use(passport.initialize());

let hanaOptions = xsenv.getServices({
	hana: {
		plan: "hdi-shared"
	}
});

hanaOptions.hana.pooling = true;
//Add Passport for Authentication via JWT + HANA DB connection as Middleware in Expess
app.use(
	xsHDBConn.middleware(hanaOptions.hana),
	passport.authenticate("JWT", {
		session: false
	})
);

//Setup Additional Node.js Routes
require("./router")(app, server);

//Start the Server
server.on("request", app);
server.listen(port, function () {
	console.info(`HTTP Server: ${server.address().port}`);
});Please take a look at the code you have just pasted.
First, the @sap/logging module is used to write log and trace files. By calling the external node module, passport, you are enforcing the UAA authentication you defined earlier. How? By using a JWT (JSON web token) strategy, a middleware function passes the request to the actual route which, in this case, is the xsuaa service you defined at the very beginning using the XS client. You are then injecting an instance of @sap/hdbext, called xsHDBConn. This module is designed to expose pooled HANA database connections as a Node.js middleware.
Back in server.js, you are calling a router. You will now create a router that will accommodate the different Express route requests. You will mimic part of the folder structure suggested in the Express module documentation and create a folder called router with a file called index.js in it.
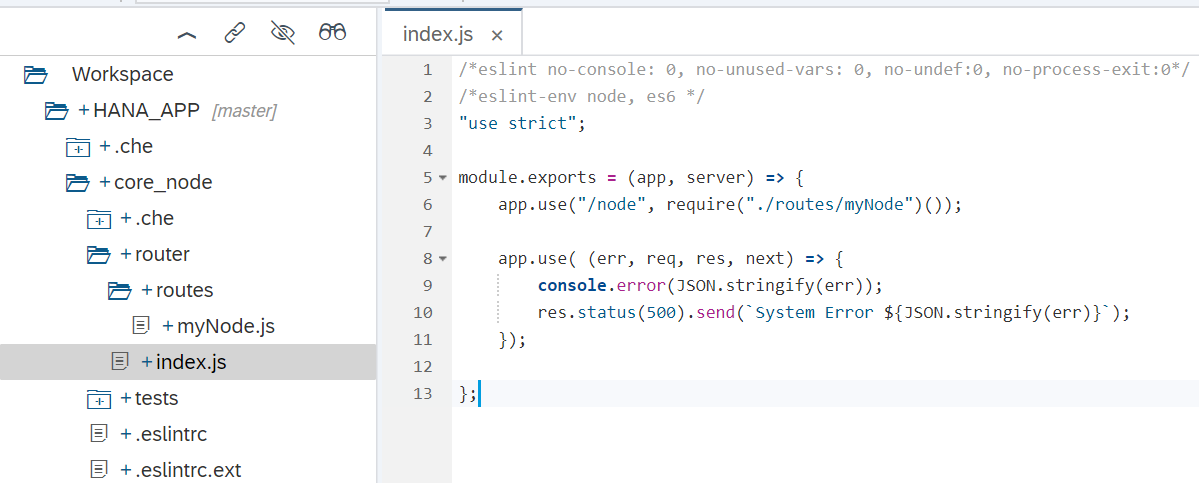
Routes determine how your application will respond to different requests based on the URI and HTTP method. In the following code, a call aiming at the path node like https://app_URL:port/node will be handled by a script called myNode:.
/*eslint no-console: 0, no-unused-vars: 0, no-undef:0, no-process-exit:0*/
/*eslint-env node, es6 */
"use strict";

module.exports = (app, server) => {
	app.use("/node", require("./routes/myNode")());

	app.use( (err, req, res, next) => {
		console.error(JSON.stringify(err));
		res.status(500).send(`System Error ${JSON.stringify(err)}`);
	});

};
Add the code to the new index.js file and save.
As you can imagine from the code in the previous step, you now need a script called myNode.js in a folder called routes
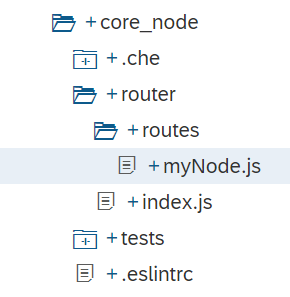
Add the following code to it:
/*eslint no-console: 0, no-unused-vars: 0, no-shadow: 0, new-cap: 0*/
/*eslint-env node, es6 */
"use strict";
var express = require("express");

module.exports = function() {
	var app = express.Router();

	//Hello Router
	app.get("/", (req, res) => {
		return res.type("text/plain").status(200).send("Hello World Node.js");
	});
	return app;
};
You are now responding to a GET request to the relative root location of the file (in this case, router). However, in the index.js file inside the router folder, you set the path to /node in the URL. You need to map this route in the xs-app.json file in the HTML5 module.
Because it is the web module that is exposed for calls, you need to add the new /node route to the file xs-app.json:
 {
 		"source": "/node(.*)",
 		"destination": "core-backend",
 		"csrfProtection": true,
 		"authenticationType": "xsuaa"
 	},
As follows:
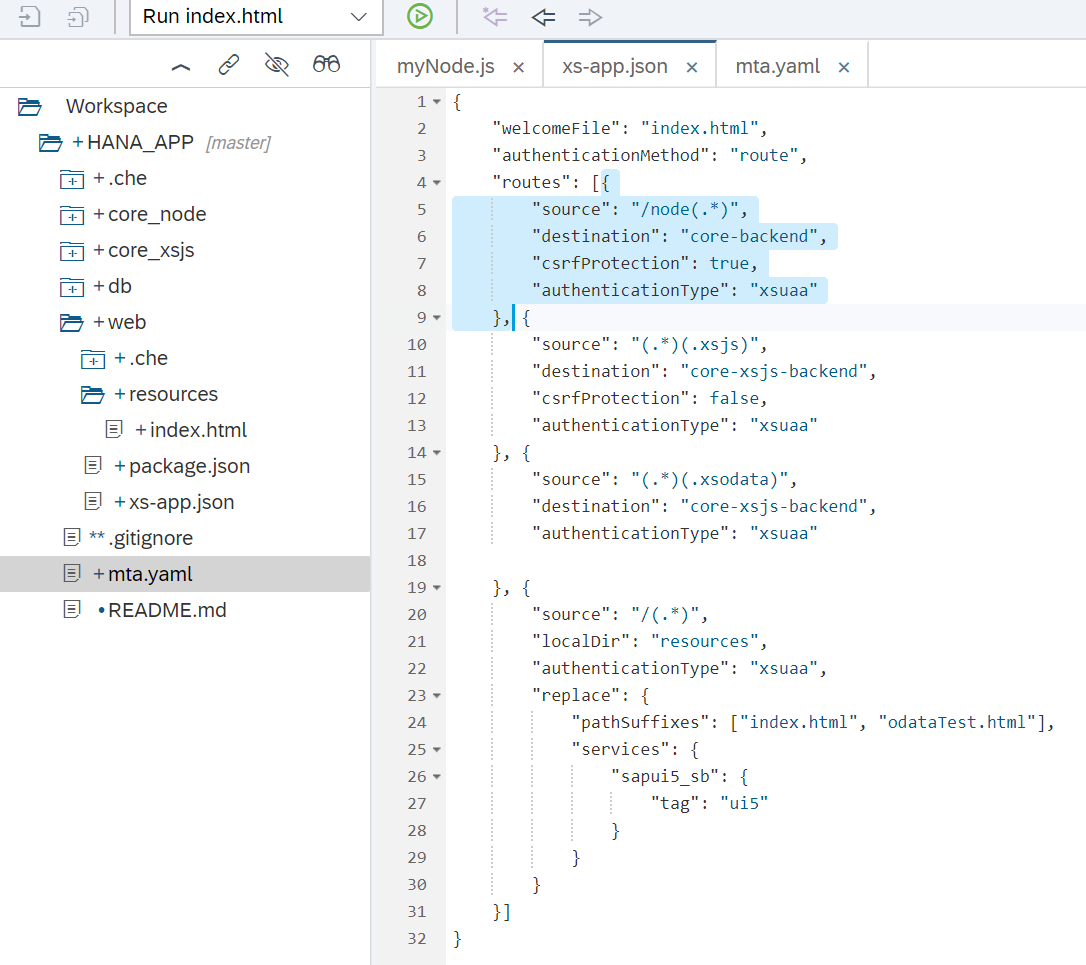
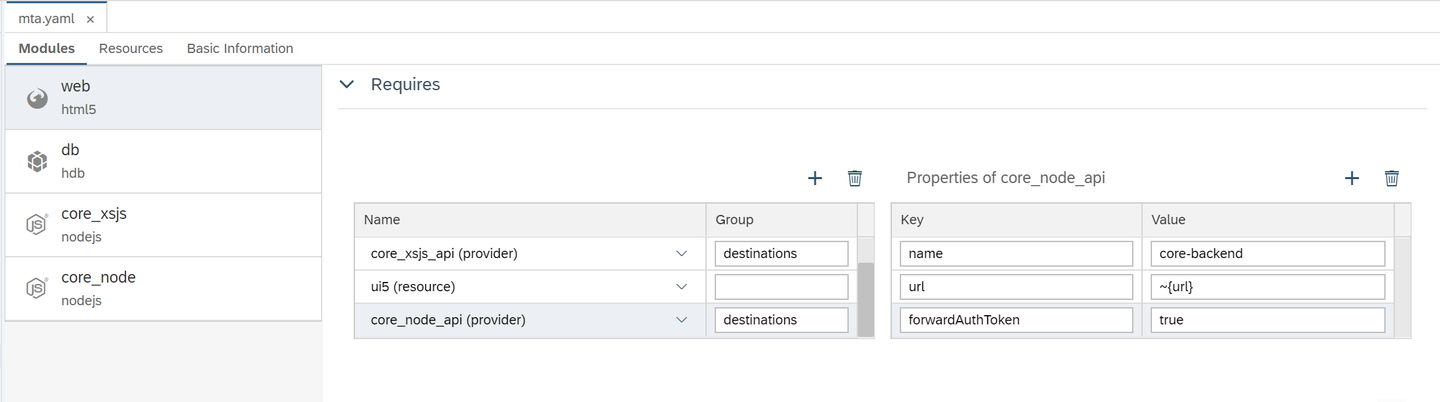
We also need to go to the mta.yaml and now extend the web module to include a dependency to the core_node module. Add a new Requires entry for the web module. Set it to the core_node_api (provider) with a Group value of destinations. Create properties of name = core-backend, url = ~{url}, and forwardAuthToken = true.
Now we need to extend the dependencies for the core_node module itself so it has access to the UAA and HANA service also. Add entries in the Requires section for these resources.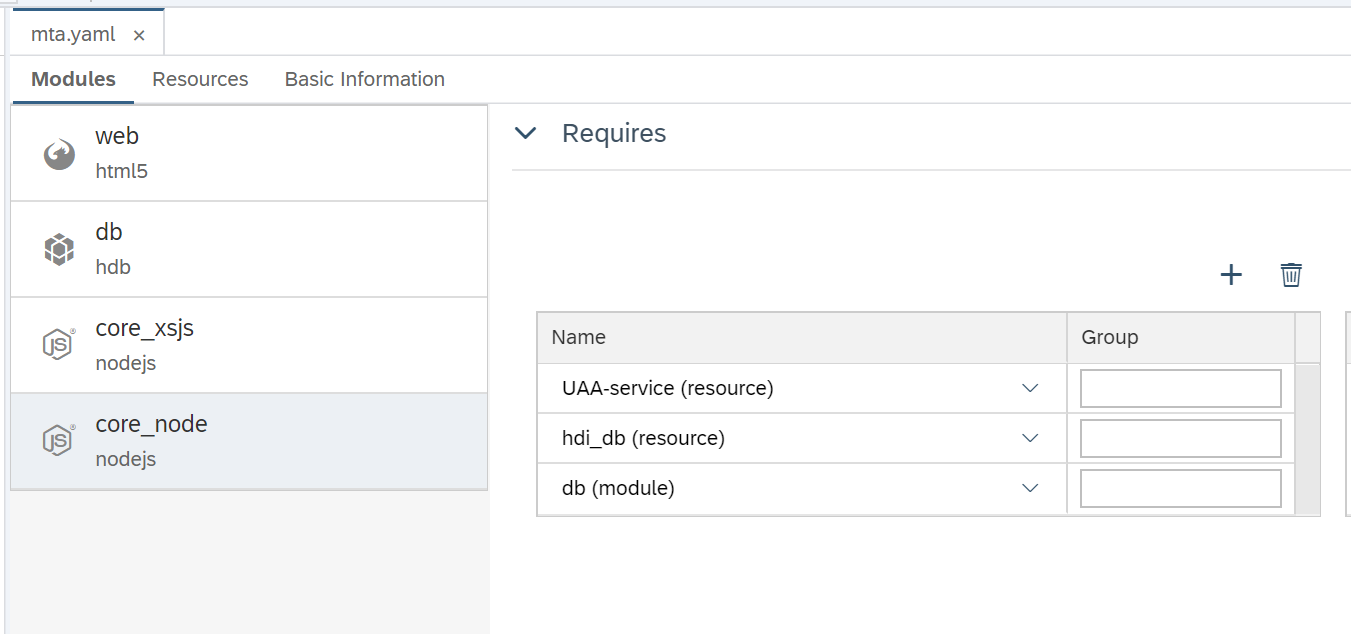
Back in step 1 you added the modules express, passport and several other modules using the require function. You now need to add them manually in the package.json file with the rest of the dependencies for the core_node module.
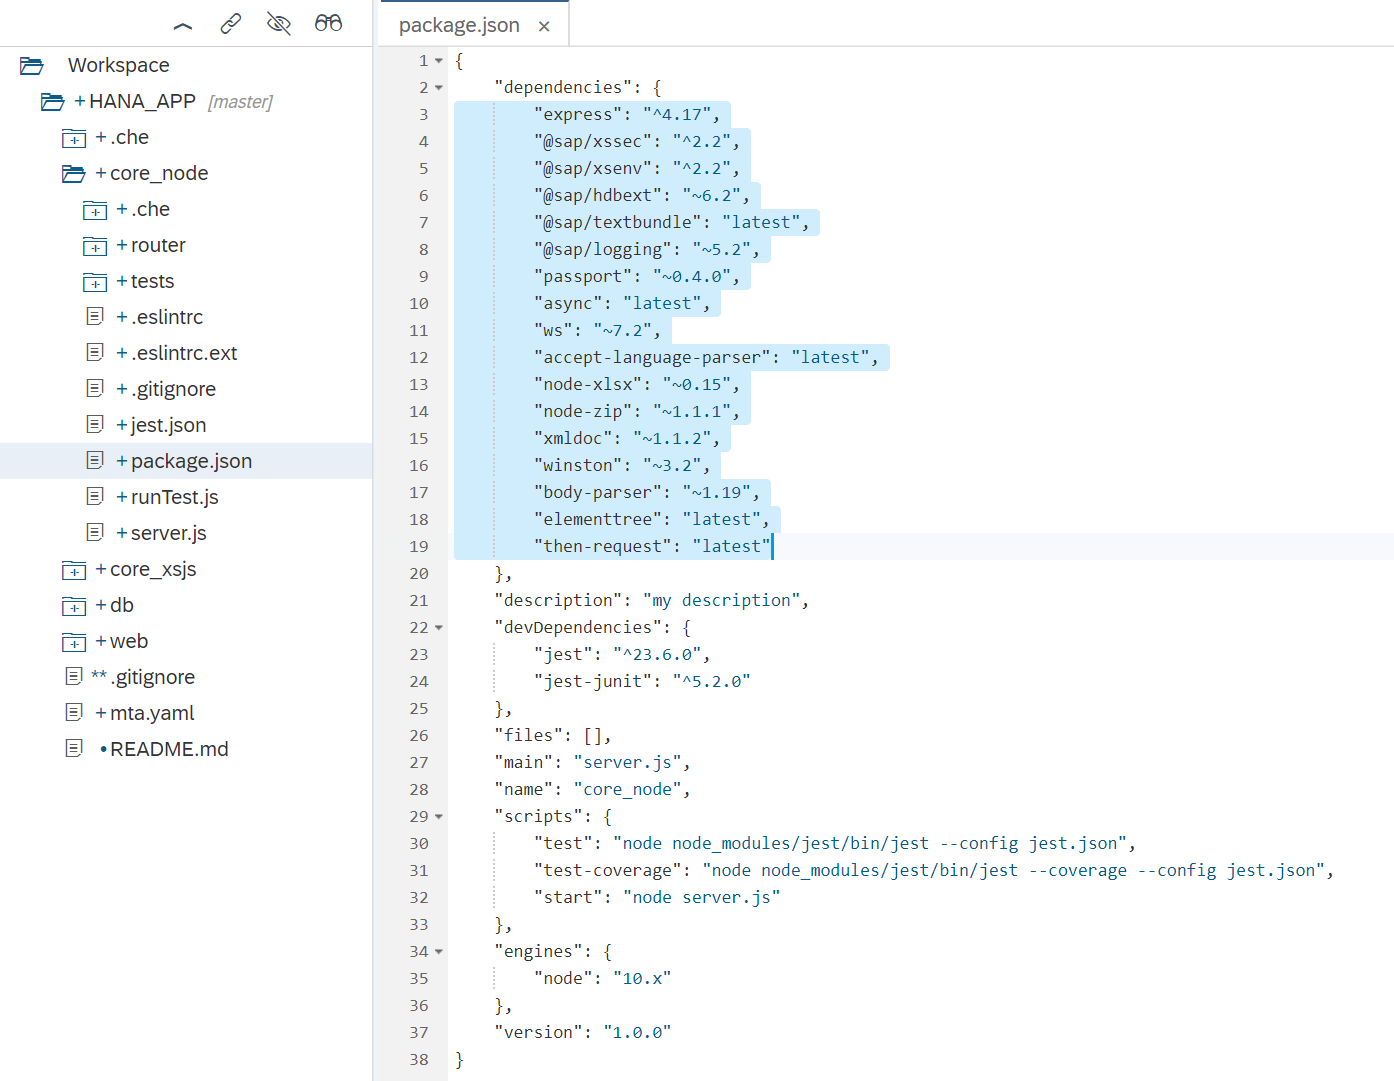
"express": "^4.17",
"@sap/xssec": "^2.2",
"@sap/xsenv": "^2.2",
"@sap/hdbext": "~6.2",
"@sap/textbundle": "latest",
"@sap/logging": "~5.2",
"passport": "~0.4.0",
"async": "latest",
"ws": "~7.2",
"accept-language-parser": "latest",
"node-xlsx": "~0.15",
"node-zip": "~1.1.1",
"xmldoc": "~1.1.2",
"winston": "~3.2",
"body-parser": "~1.19",
"elementtree": "latest",
"then-request": "latest"You can now run the core_node module.
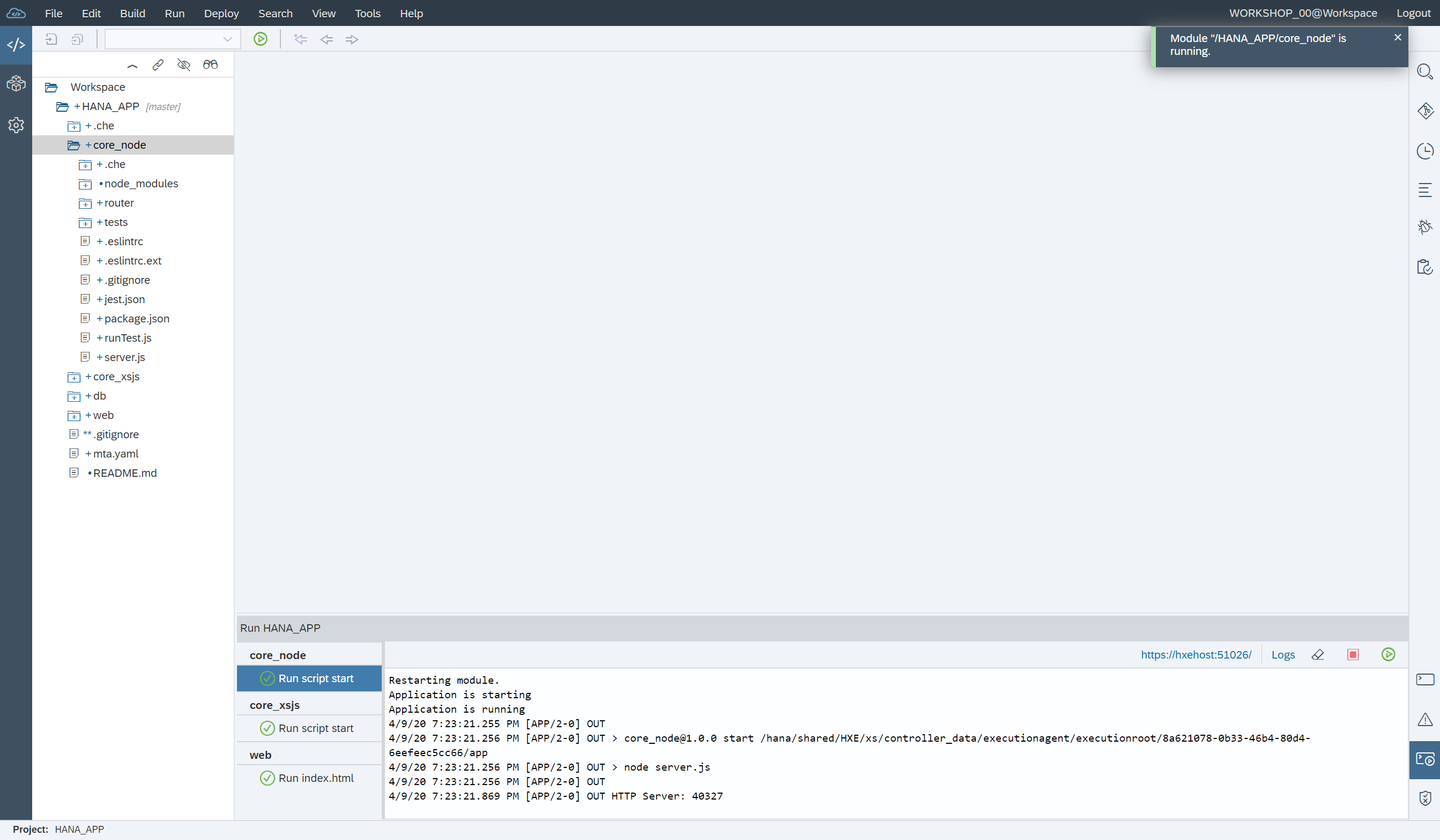
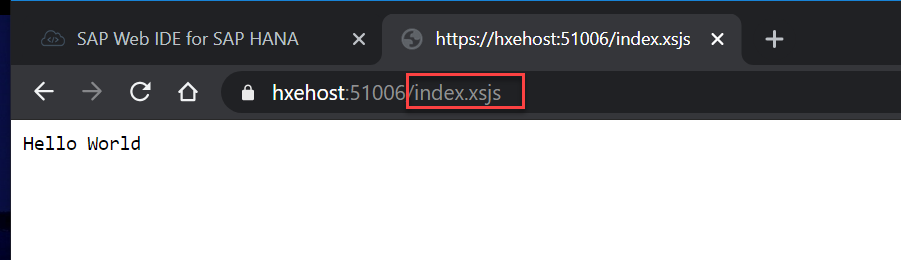
After it has built and started running, you can run the web module. This will open a new tab with the index.html. Test the original .xsjs service is running properly after the paths were changed with the route handler. Replace html with xsjs:
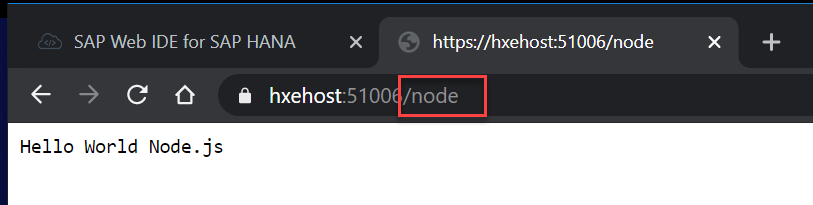
You can also test the newly added router by adding /node to the URL:
Resources
Discussion
Share feedback on this tutorial or join the conversation in SAP Community.