🎓beginner⏱25 min.SAP Business Application StudioBeginnerSAP Cloud Application Programming Model
You will learn
✔How to create a CAP project
✔How to develop business applications based on the SAP Cloud Programming Model (CAP)
✔How to run and test your application using the Run Configurations tool The application you’ll develop is a simple bookshop app consisting of a data model with three entities:
✔Books
✔Authors
✔Genres The data model is exposed via the Catalog Service. The application has some initial data that is used for testing the application, and some custom logic that runs after reading the books from the Books entity. Once you have all the code in place, you will test the application locally.
From the SAP Business Application Studio hamburger menu, select File > New Project from Template.
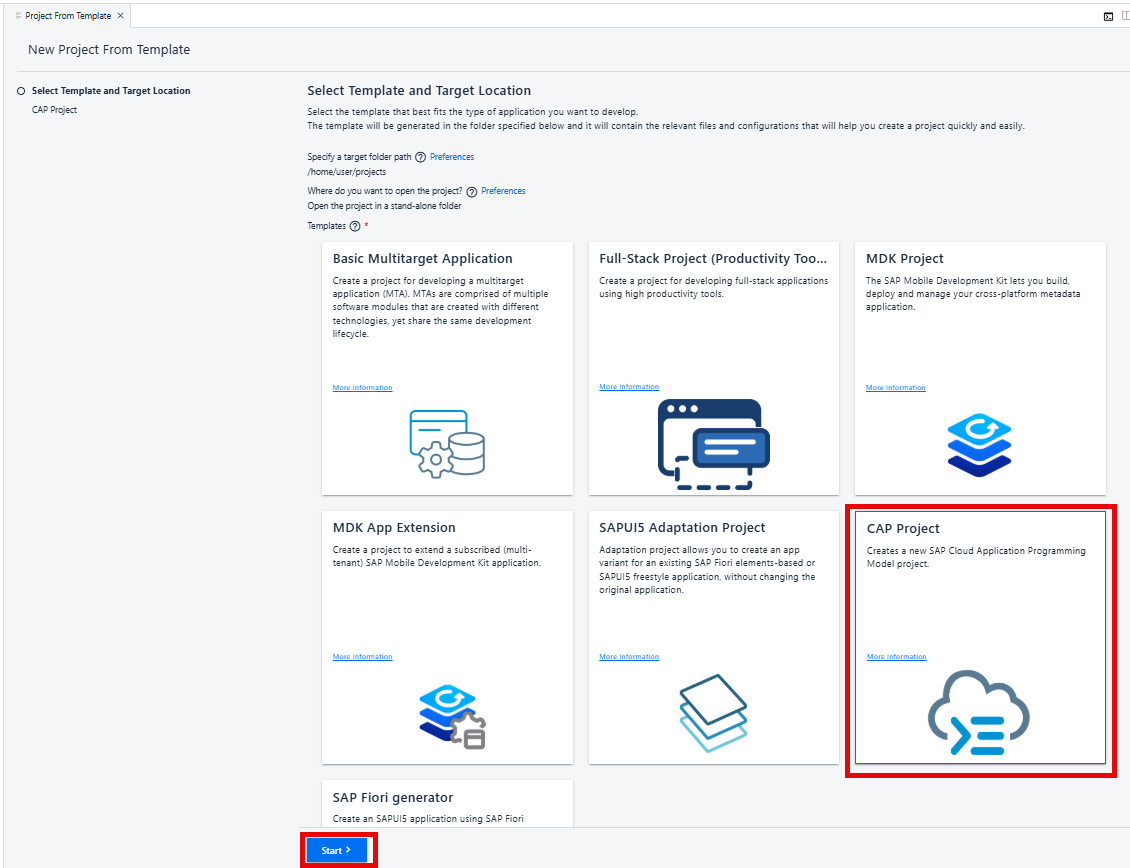
Select the CAP Project template, and click Start.
start project
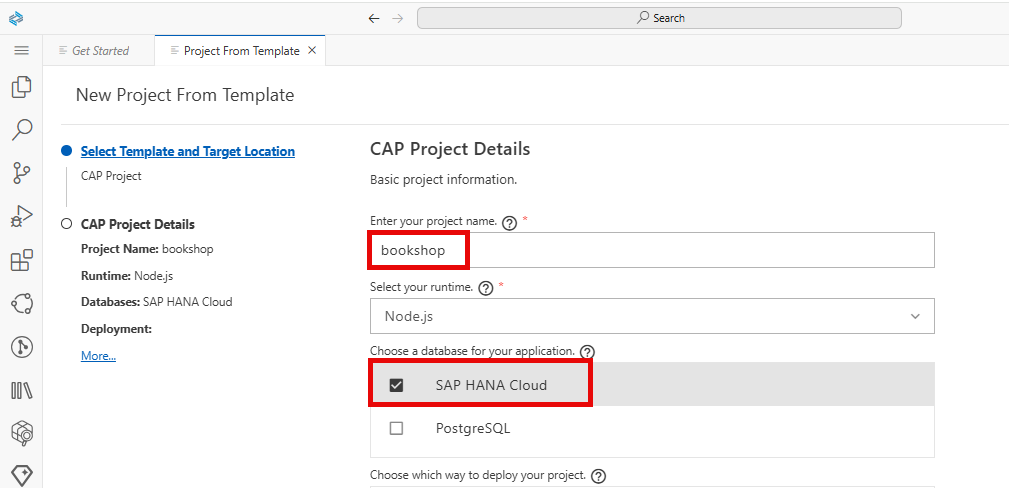
Enter bookshop as the name for the project.
Select the SAP HANA Cloud checkbox.
hana
Click Finish.
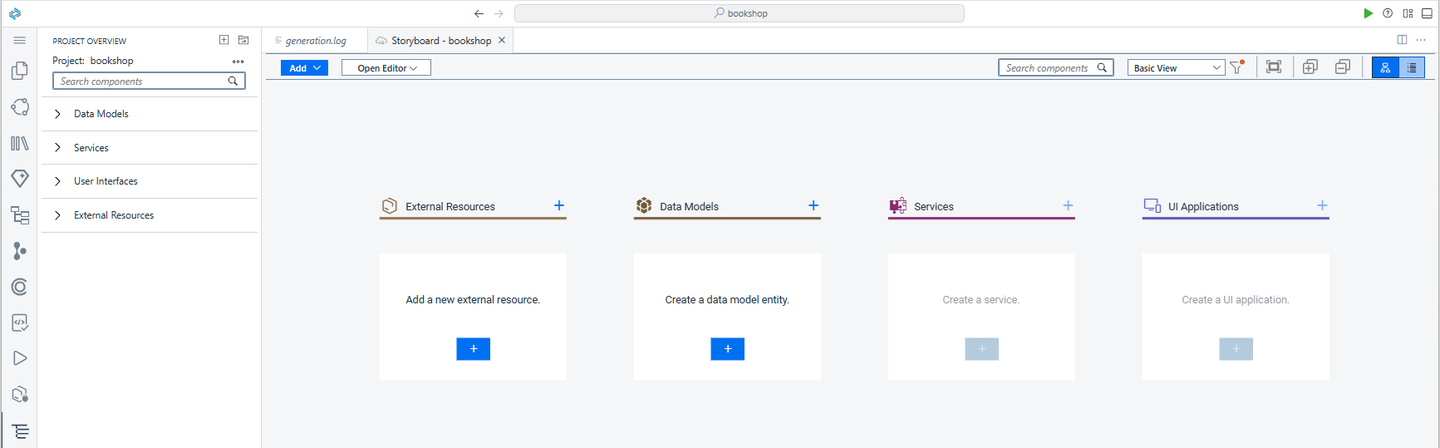
The project is generated and opens in the Storyboard.
storyboard
Step 2Define bookshop data schema
+
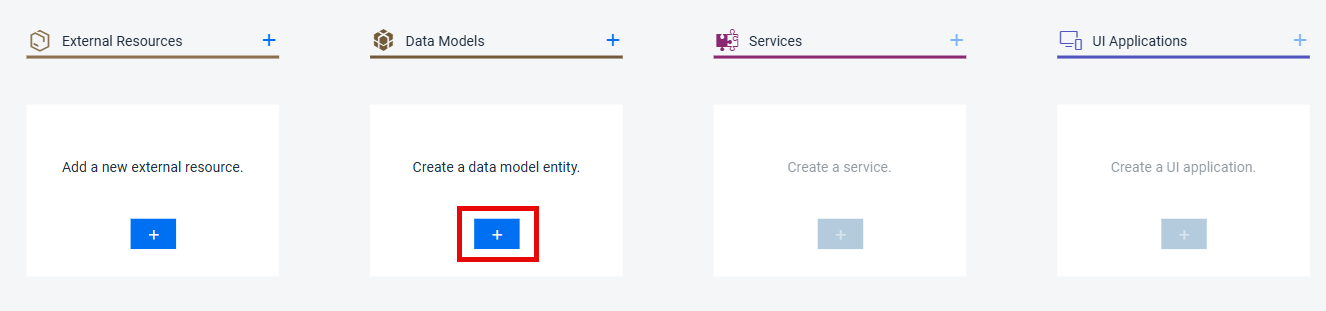
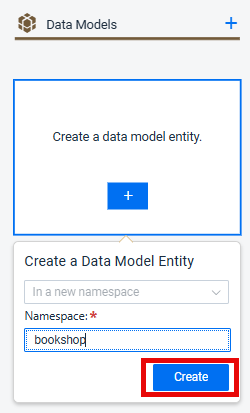
In the Data Models tile, click + to create a data model entity.
data model
Click Create.
create entity
It may take a few moments for the Graphical Modeler to be populated.
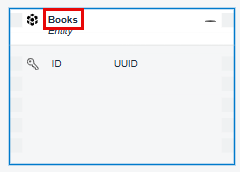
Change the entity name to Books.
entity name
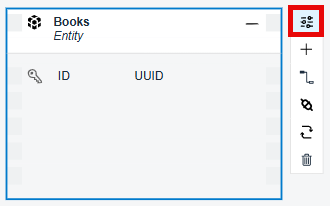
Click on the entity and then click on theshow details(Show Details) icon.
show details
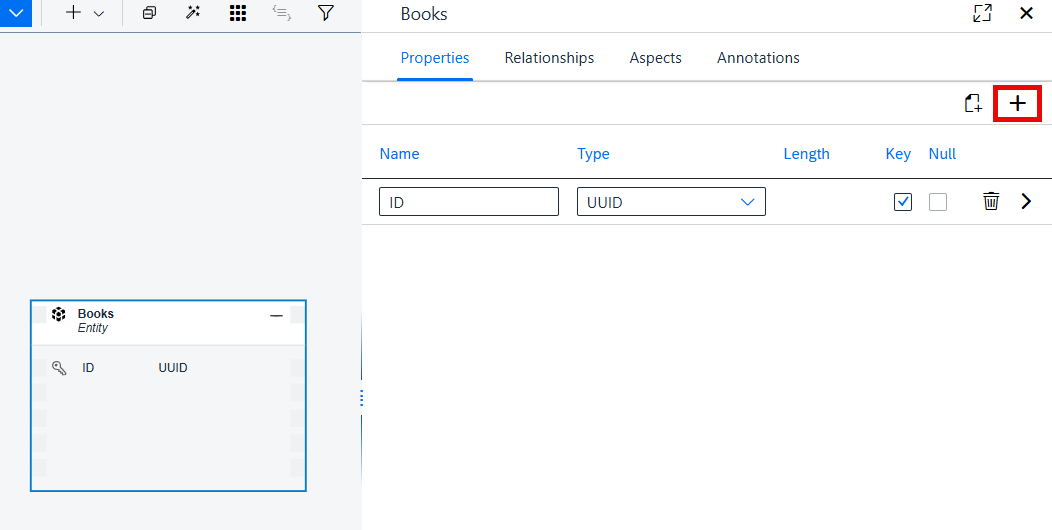
In the Properties pane, click + to add new properties.
show details
Add the following properties:
Name
Type
title
String
descr
String
stock
Integer
price
Decimal
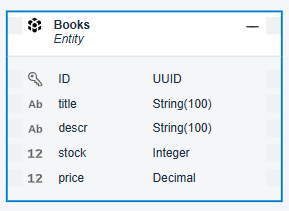
The Books entity should look like this:
show details
Click Add Entity.
show details
Rename the new entity Authors.
In the Properties pane, click + to add a new property.
show details
Add the following property:
Name
Type
name
String
Click Add Entity.
show details
Rename the new entity Genres.
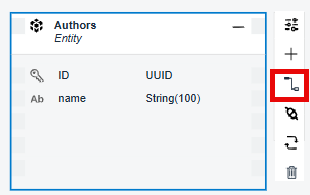
Click on the Authors entity and then click on the Add Relationship icon.
show details
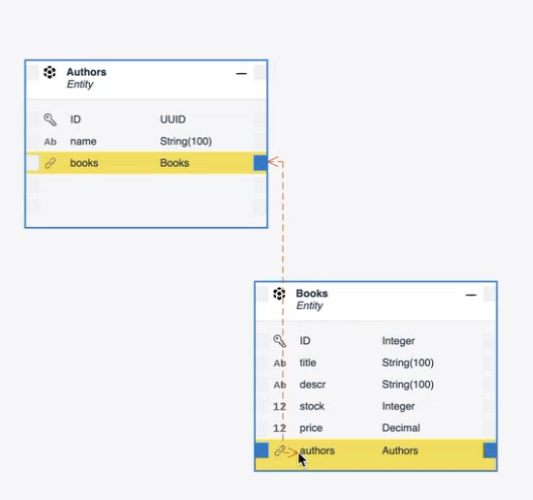
Drag the arrow to the Books entity.
show details
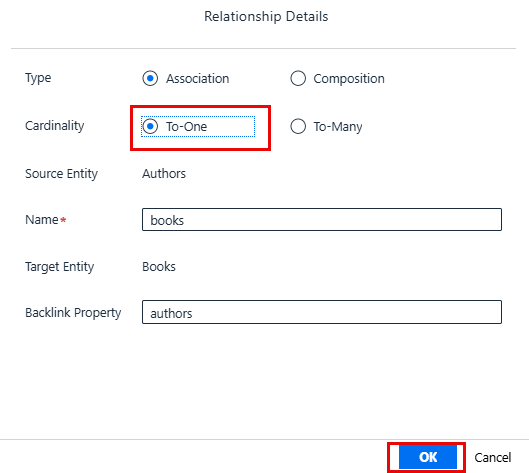
In the Relationship Details dialog, select the To-One radio button for the Cardinality and click OK.
show details
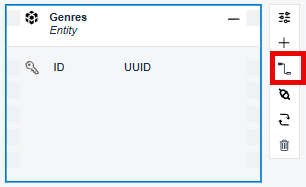
Click on the Genres entity and then click on the Add Relationship icon.
show details
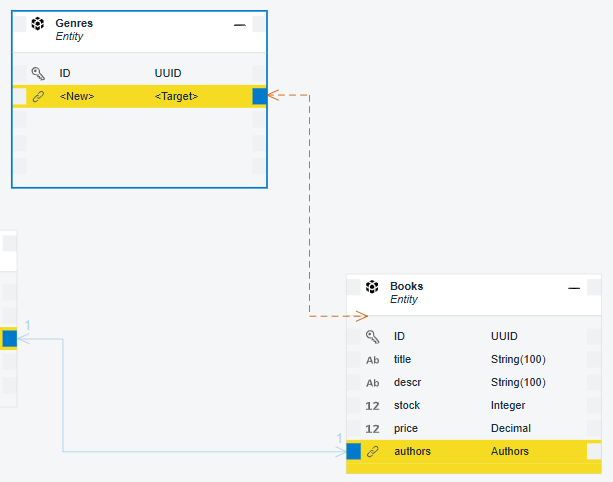
Drag the arrow to the Books entity.
show details
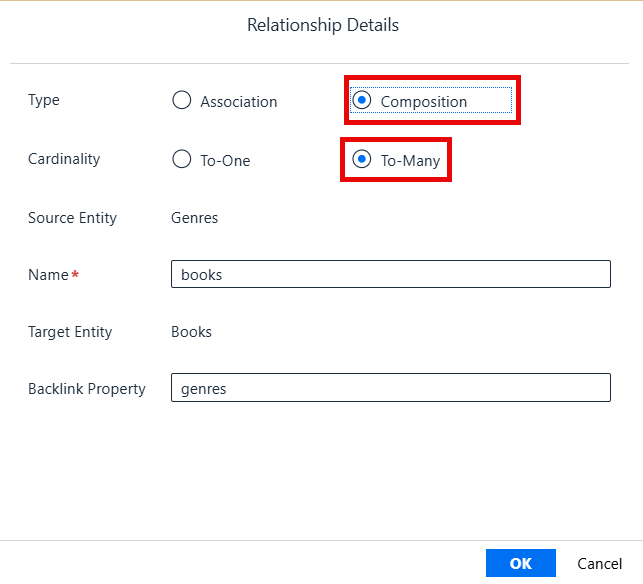
In the Relationship Details dialog, select the Composition radio button for the Type.
Select the To-Many radio button for the Cardinality and click OK.
show details
Step 3Define the bookshop service
+
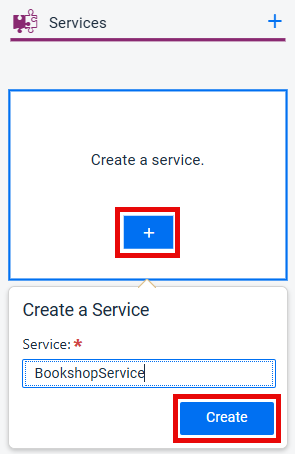
In the storyboard, go to the Service tile, click + to create a service entity.
Click Create.
create entity
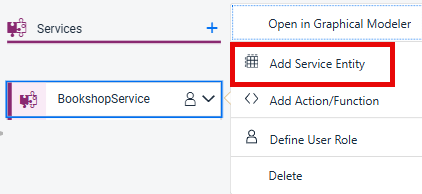
Click on the service and select Add Service Entity.
create entity
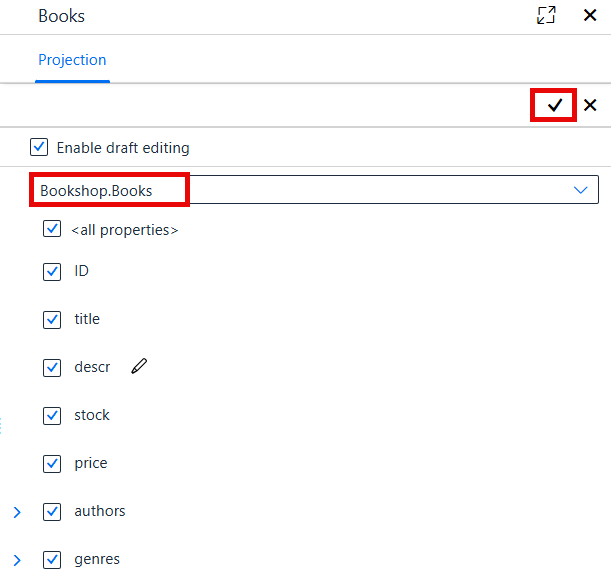
From the Projection dropdown list, select Bookshop.Books.
Clickcreate entityto save your changes.
create entity
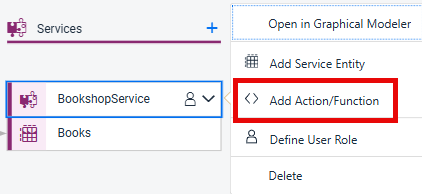
In the storyboard, click on the service and select Add Action/Function.
create entity
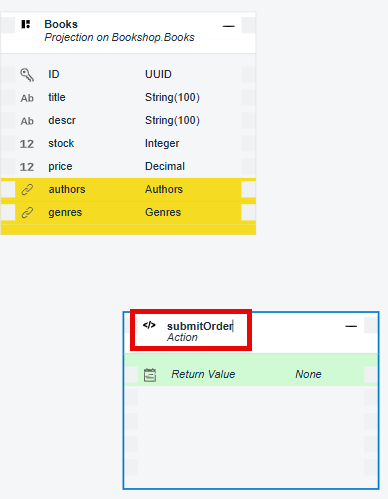
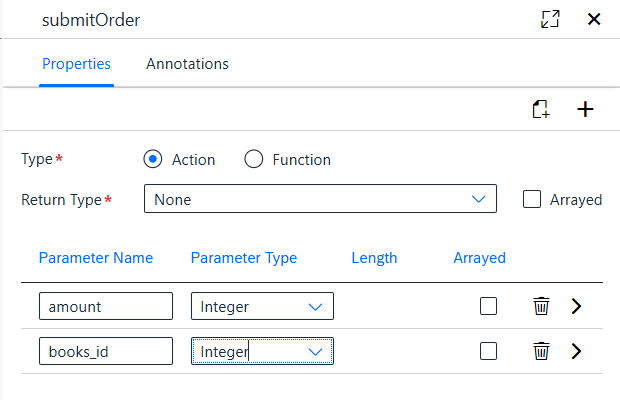
Change the name of the action to submitOrder.
create entity
In the Properties pane, add the following:
Parameter Name
Parameter Type
amount
Integer
books_id
Integer
create entity
Step 4Add initial data
+
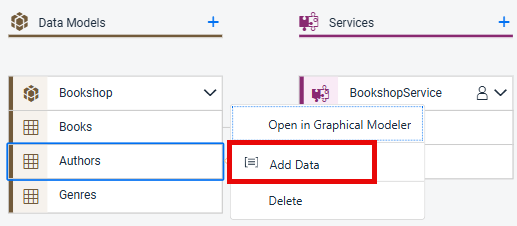
In the storyboard, go to the Data Models tile, click on Authors, and select Add Data.
create entity
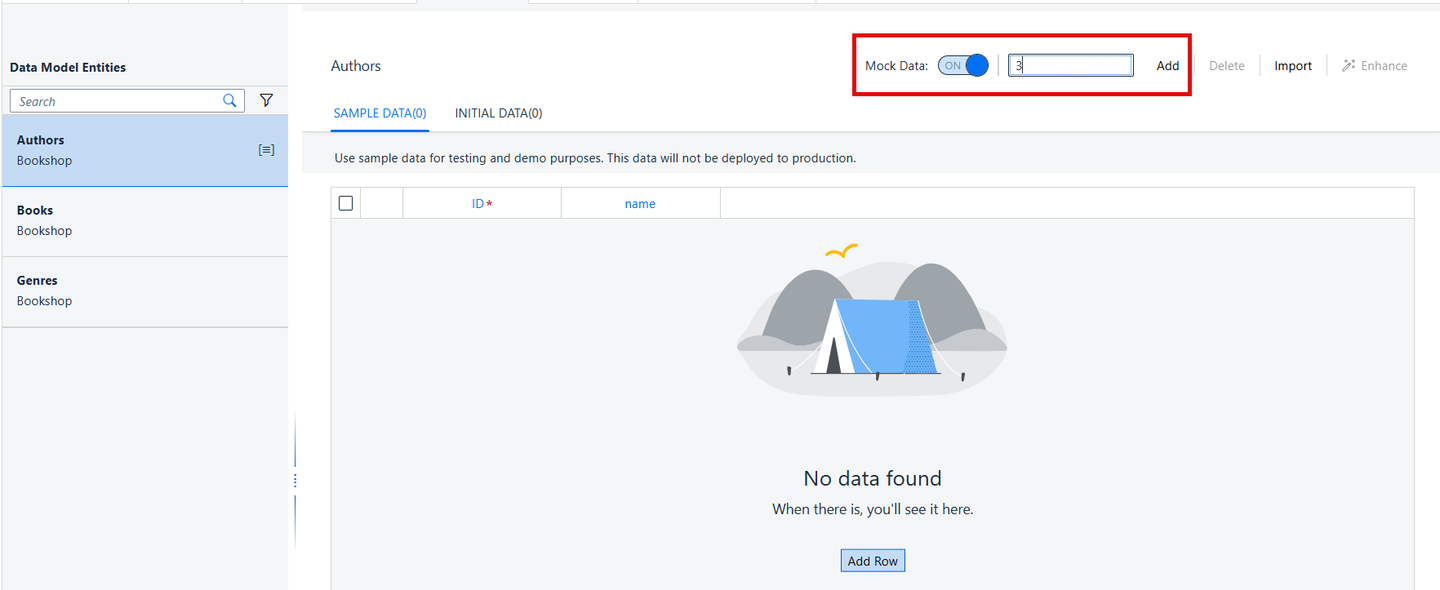
In the Data Editor, enter 3 for the number of rows with mock data and click Add.
create entity
Repeat the procedure to add rows for the Genres and the Books entities.
Step 5Add custom logic
+
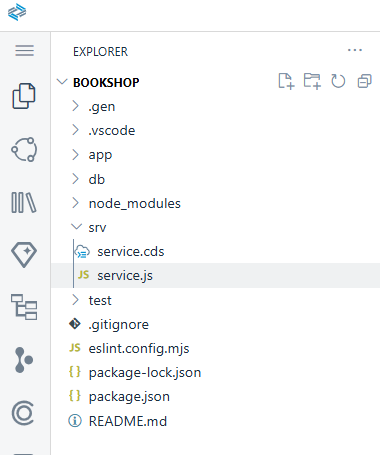
Go to the Explorer.
In the srv folder, create a new file called service.js.
If asked if you want to allow the use of the ESLint library for validation, click Allow.
Allow ESLint
Populate the service.js file with the following:
JavaScript
/**
* Implementation for CatalogService defined in ./cat-service.cds
*/constcds=require('@sap/cds')module.exports=function(){// Register your event handlers in here, e.g....
this.after('READ','Books',each=>{if(each.stock>111){each.title+=` -- 11% discount!`}})}
Save your changes.
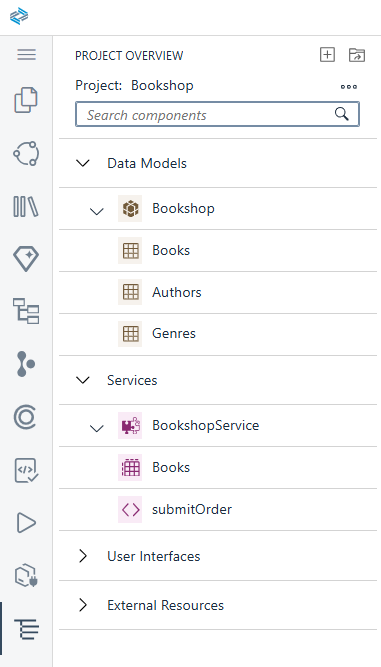
Your application should look similar to the structure shown in the picture below.
Project structure
You can also see the semantic structure of the application in the Project Overview.
Project structure
Step 6Test the app with local database
+
You can explicitly deploy your application to a persistent local SQLite database, or you can run your application and it will implicitly use an in-memory database.
This step describes how to run the application with an in-memory database.
You will first add all required dependencies, and then create and run a run configuration.
Add and install all required dependencies.
From the Terminal menu, select New Terminal.
On the bookshop folder, run the following:
NPM
npm install
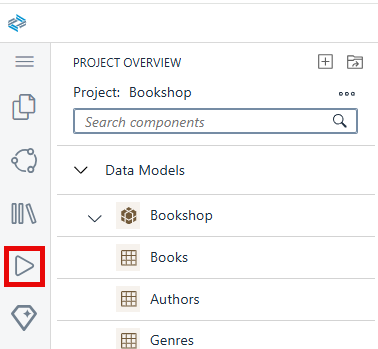
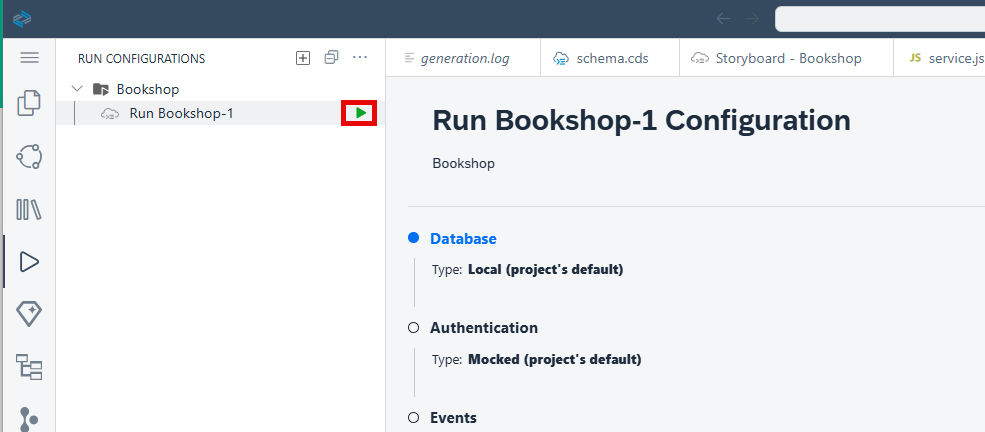
From the left side menu, open the Run Configurations view.
Open Run Configurations view
Click + at the top of the view to add a new configuration.
Open Run Configurations view
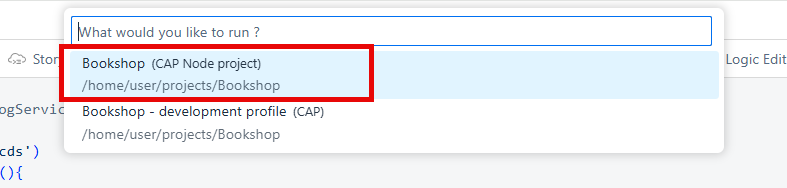
Select Bookshop - (CAP Node project) as the runnable application from the command palette prompt.
Open Run Configurations view
There might be other run configuration options available in the command palette.
Press Enter to use the default name for the configuration. A new configuration is added to the run configuration tree.
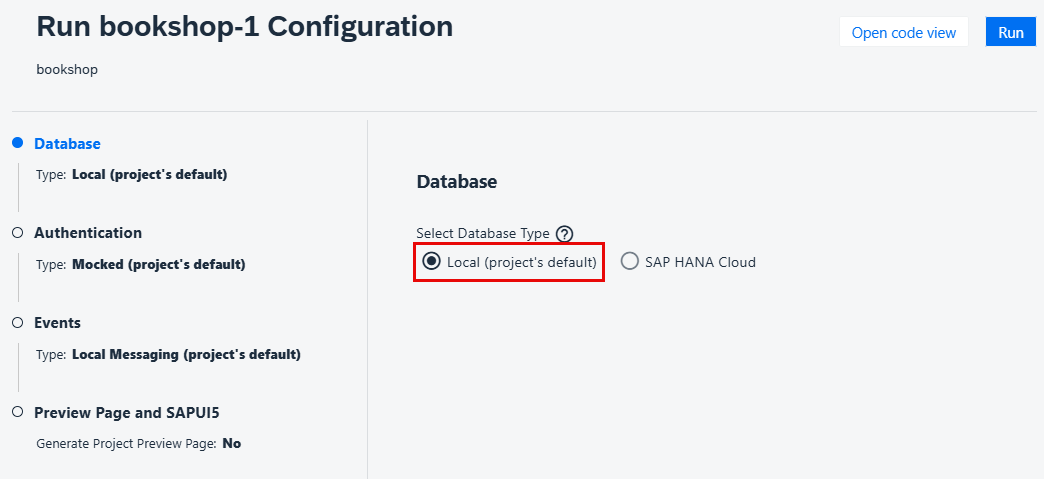
In the Configuration editor, select the Local (project’s default) radio button for the database type.
Open Run Configurations view
Click the green arrow on the right of the configuration name to run the application.
Open Run Configurations view
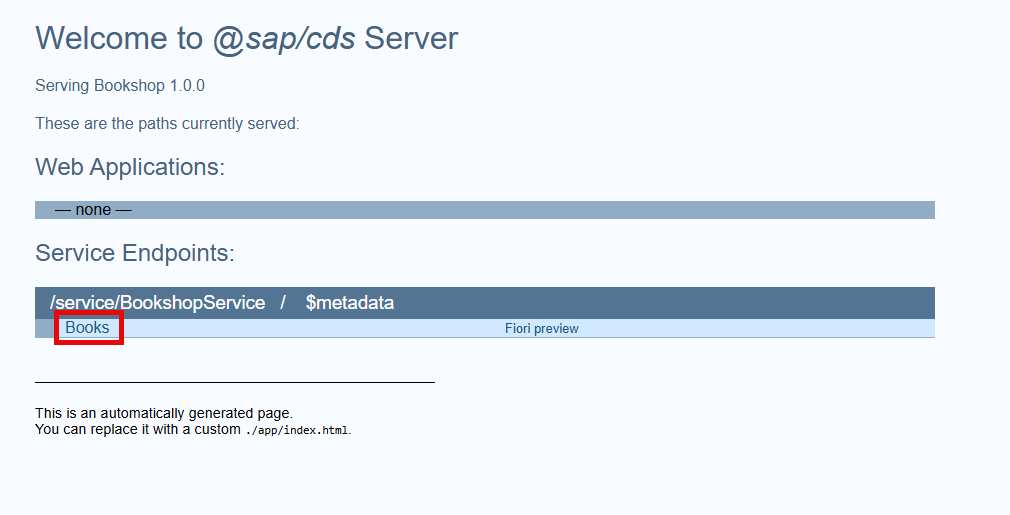
The application opens in the browser.
Click on Books to see the metadata and entities for the service.
Open Run Configurations view
You can also debug your application to check your code logic. For example, to debug the custom logic for this application, perform the following steps:
Place a breakpoint in the function in the service.js file.
In the running app, click the Books entity. It should stop at the breakpoint.
Click Continue in the debugger until all the books are read and the page is presented.
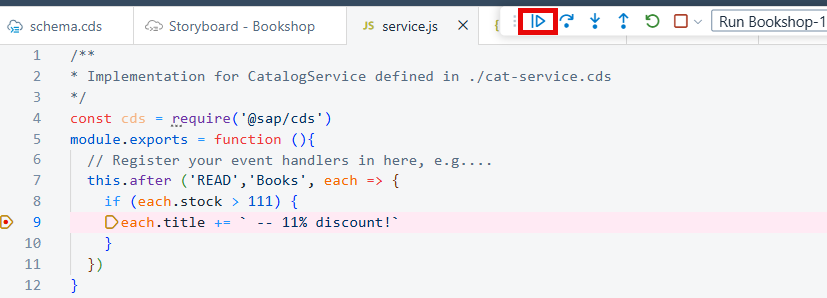
Remove the breakpoint.
Stop the application by clicking Stop in the Debugger. The number beside the Debug icon represents the number of running processes. Click Stop until there are no processes running.
You have an SAP HANA service (SAP HANA as a Service or SAP HANA Cloud) available in your space.
To create a new instance in your trial account:
Go to your space in the SAP BTP cockpit.
Go to Service Marketplace.
Select SAP HANA Schemas & HDI Containers.
Click Create. Create instance
From the Plan dropdown menu, select hdi-shared as the service plan and provide a name for the new instance.
Click Create.
From the Activity pane, open the Run Configurations view.
Open Run Configurations view
Click + at the top of the view to add a new configuration.
Open Run Configurations view
Select Bookshop - (CAP Node) as the runnable application from the command palette prompt.
Open Run Configurations view
There might be other run configuration options available in the command palette.
Press Enter to use the default name for the configuration. A new configuration is added to the run configuration tree.
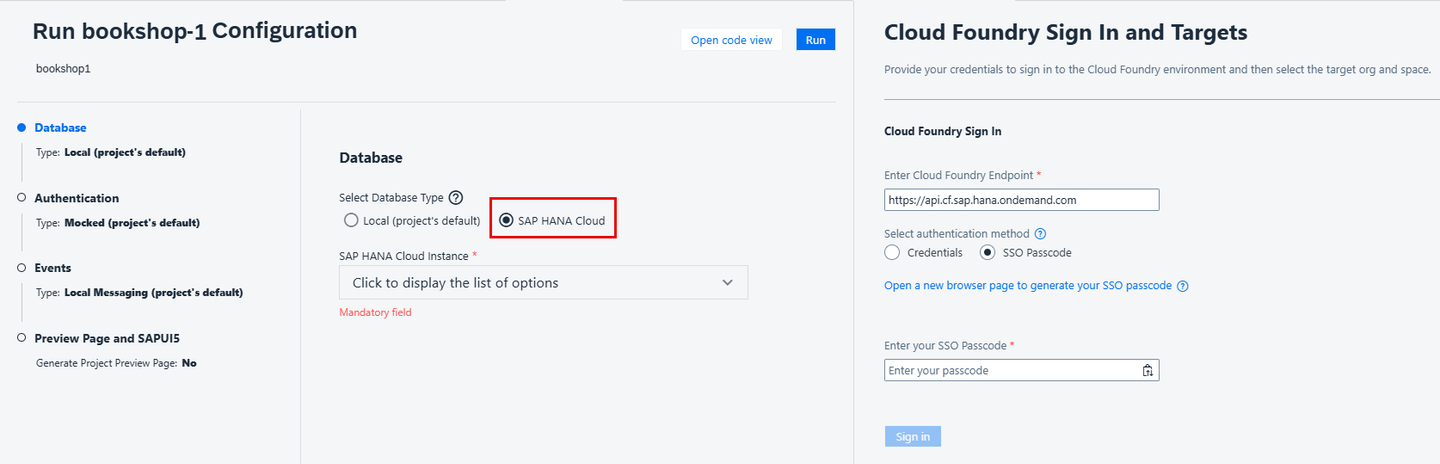
In the Configuration editor, select the SAP HANA Cloud radio button for the database type.
Open Run Configurations view
Log in to Cloud Foundry.
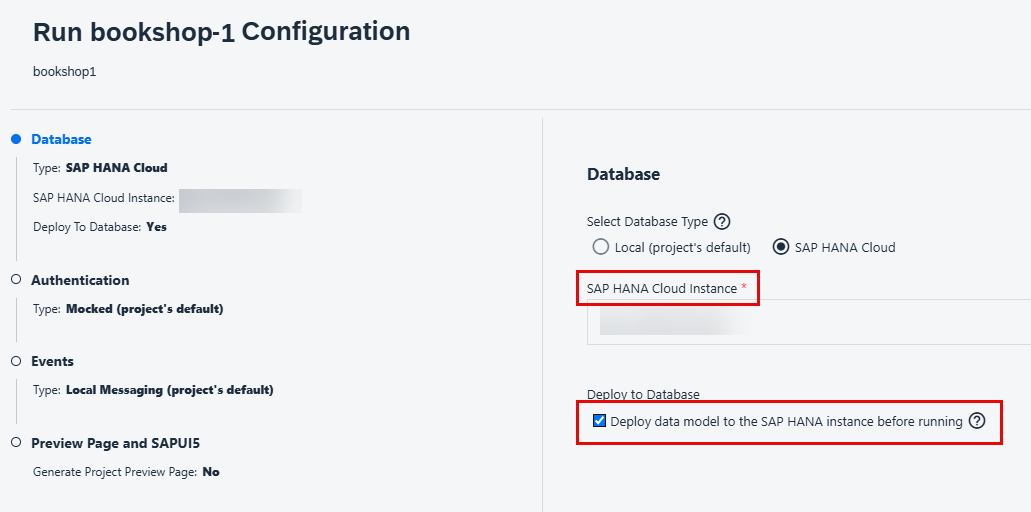
From the SAP Cloud Instance dropdown list, select the relevant instance.
Select the Deploy data model to the SAP HANA instance before running checkbox.
Open Run Configurations view
Click the green arrow on the right of the configuration name to run the application.
From the terminal on the bookshop folder, run cds add mta.
This adds an mta.yaml file to the root of your application.
Note: If you are working on a trial account, open the mta.yaml file, and in the resources section change the service parameter to hana. Save your changes.
Right-click the mta.yaml file and choose Build MTA Project.
Build MTA
A new folder for mta_archives is created containing the new mtar file.
Right-click the mtar file and choose Deploy MTA Archive.
Deploy MTA
Once the task is complete, your application should be available in your Cloud Foundry space.
To access your application, go to your space in the SAP Cloud Platform cockpit and select Applications from the side menu.
Share feedback on this tutorial or join the conversation in SAP Community.
Submit detailed feedbackDiscuss in Community
Steps
Step 1 of 7
1. Create new CAP project2. Define bookshop data schema3. Define the bookshop service4. Add initial data5. Add custom logic6. Test the app with local database7. Deploying your app
Joule
AI Notice
Joule is an AI assistant. Generative AI may produce inaccurate, incomplete, or biased information. Always verify important details before acting on them.
Conversations are sent to SAP-hosted large language models for processing. Do not include personal data, credentials, or confidential information in your messages.
Joule's responses are based on the SAP tutorial catalog and may not reflect the latest product changes. For authoritative guidance, consult the linked tutorials and official SAP documentation.