
Overview
You will learn
- How to test request calls in SAP Build Apps to a SAP Integration Suite API.
- How to set up the needed schema for sending payloads.
- How to retrieve data from a request call’s response.


Prerequisites
Prerequisites
- You have a SAP BTP account or trial account with access to the SAP Integration Suite.
- You have a SAP Build Apps account or trial account.
- You have completed the previous tutorial Configure SAP API Management policies to avoid CORS issues and generate an API Key.
Steps
Go to your SAP Build Apps custom app, click on
Dataon the menu and Add a Data Resource and selectREST API direct integration. Remember that for this exercise, it is needed to create first a custom mobile application from this blog post.
Creating a new API connection Copy and paste your API endpoint from SAP API Management as the base resource URL and name your Data Resource. Enter the name:
IntegrationSuite_API_CORS.
Adding API endpoint Click on the
Create Record (POST)section, make sureidis erased from the relative path and enter your API Key as a header (make sure you don’t put it as optional and mark it as static).
Adding the API Key as a header Set up the custom needed schema for testing a POST request. Remember the payload structure you are using for this exercise:
JSON{ "AppGyverSalesOrder": { "customer": { "ObjectID": "<Object ID from SAP C4C>", "BuyerPartyID": <BuyerPartyID from SAP C4C> }, "paymentData": { "amount": <Payment transaction amount to be processed in Stripe>, "customer": "<stripe customer id>", "currency": "<currency selected in stripe account>", "source": "<card id>", "description": "Test payment via CPI" }, "product": [ { "ProductID": "<Product ID from SAP C4C>", "Quantity": <Product quantity to be purchased> } ] } }So to “translate it” into the custom schema in SAP Build Apps, you’ll need to add these properties manually, as shown in the following image:

Adding the schema propertis for Payloads to be sent Click on the Test tab and open your custom object, where you are going to add the values as the payload for testing.

Adding some values to test the call And setting for testing purposes a Product ID from SAP Sales and Service core (formerly SAP Cloud for Customer or SAP C4C).
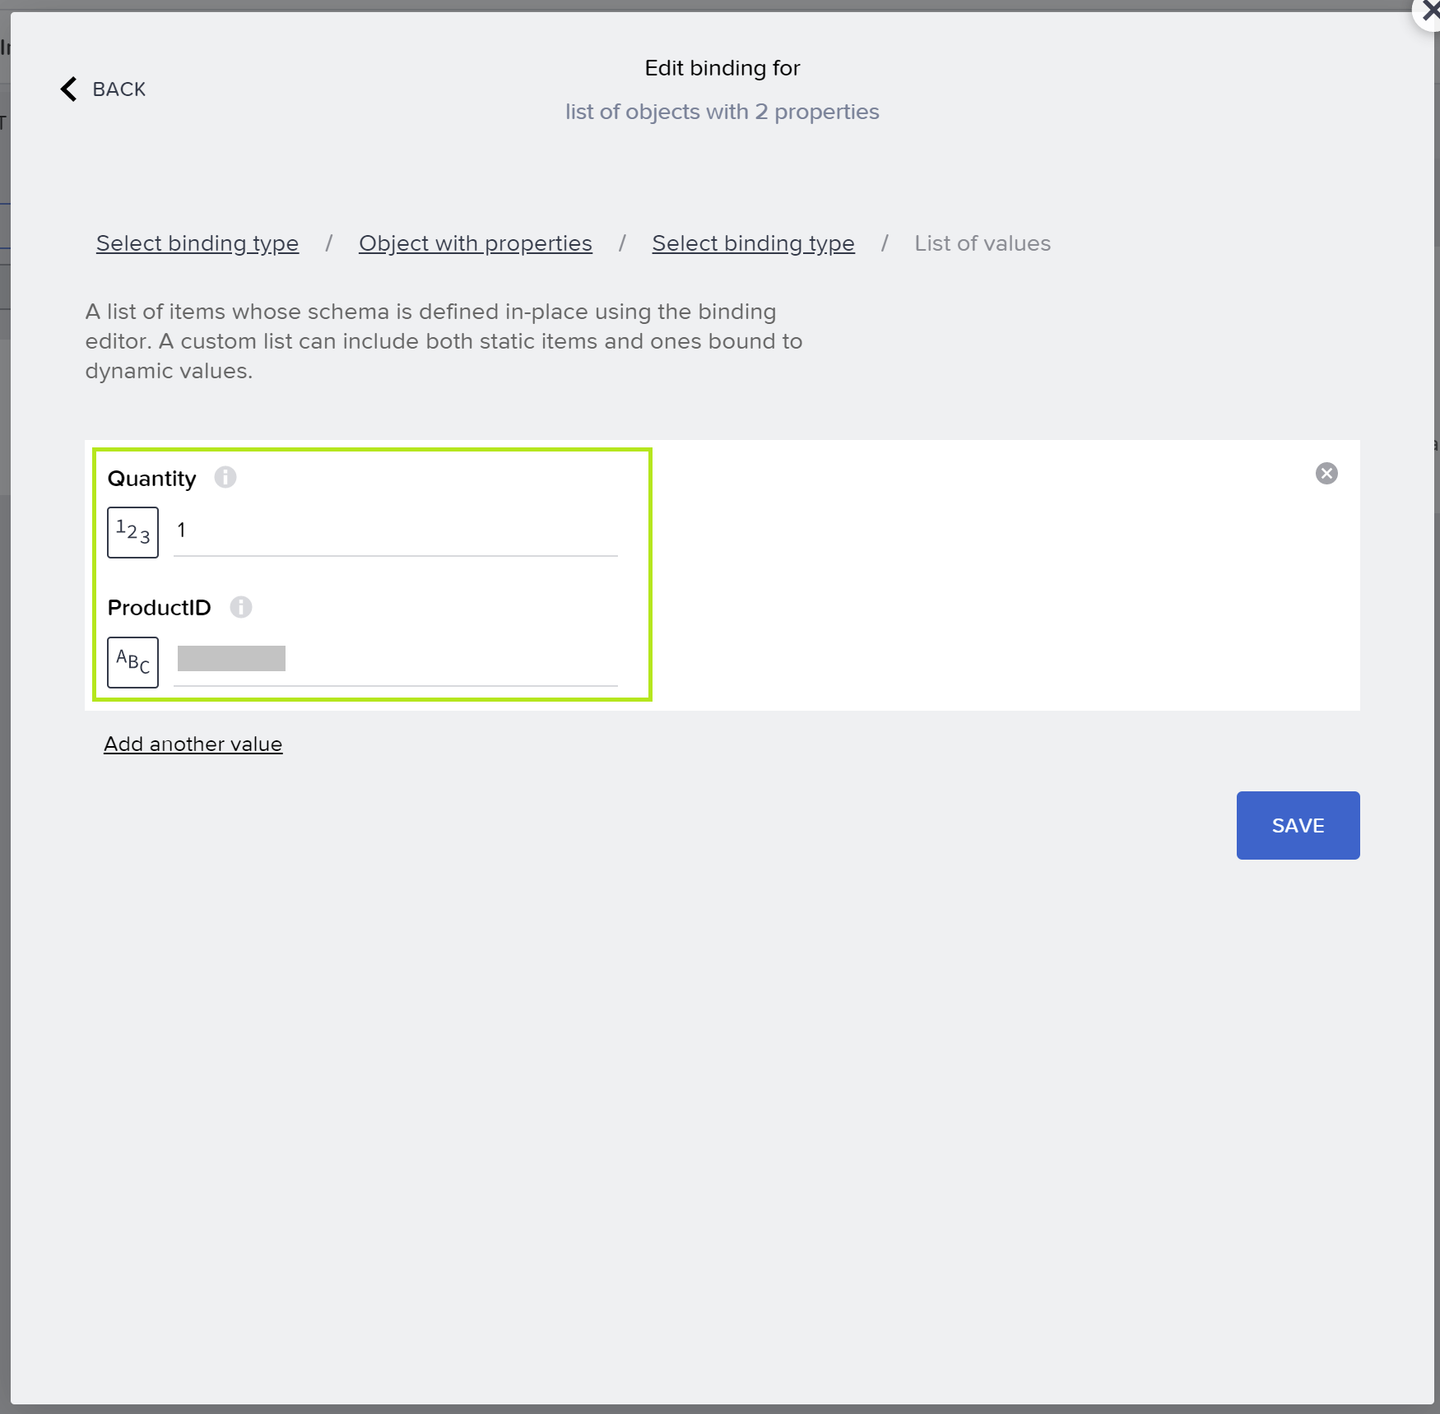
Set Product Id from SAP Sales and Service Core to test it Save it and now click on
Run Test. You should see this responseStatus: OK:
Test response If you check on your Stripe developers account, you can see the amount and description “Ta da!! Integration scenario is set up”:
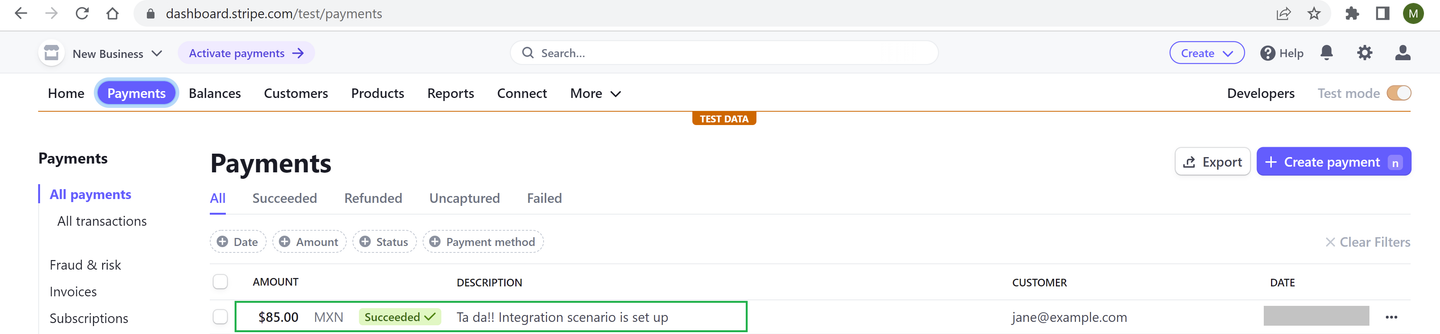
Test Stripe charge
Click on Set Schema From Response to let Build Apps know you want to create a variable for getting the receipt URL.

Set schema from response Now you can see
receipt_urlfrom the return message, as a property, like in the following image. Save your configuration.
Save schema from response Create a variable to enable this
receipt_urlas a variable to be linked in your application UI.Click again on
Datato close it and go back to your application design. Click onView – Variablesand click onAdd Page Variableas it is in the following image:
Create a page variable
Remember you’re following this previous exercise of a custom application developed in SAP Build Apps (as mentioned in the prerequisites first tutorial). The differences are:
Add one field to the QR code
ProductIDfor the purpose of the integration exercise and update the variables you’ve already created in the SAP Build Apps app. Of course, in reality you would want to add as many Product fields as necessary to execute the Sales Order transaction.Add an additional Button (to trigger the API call) and an
WebViewcomponent (to see the Stripe’s payment confirmation with thereceipt url).
Go back to your QR code generator (you can use this one), and paste this JSON object. You may need to change the model and URL too, if you want to test your integration with a different product defined in your SAP Sales and Service Core tenant (SAP Cloud for Customer):
JSON{ "ProductID": "<your SAP C4C product ID>", "model": "Samsung French Door 29 ft", "imgURL": "https://samsungmx.vtexassets.com/arquivos/ids/180853-800-auto?width=800&height=auto&aspect=true" }Save the generated QR Code:

Create a page variable Go back to your SAP Build Apps custom app, and click on
View – Variables, go to Page Variables and update them by addingProductIDas a new property of the parsed Json object: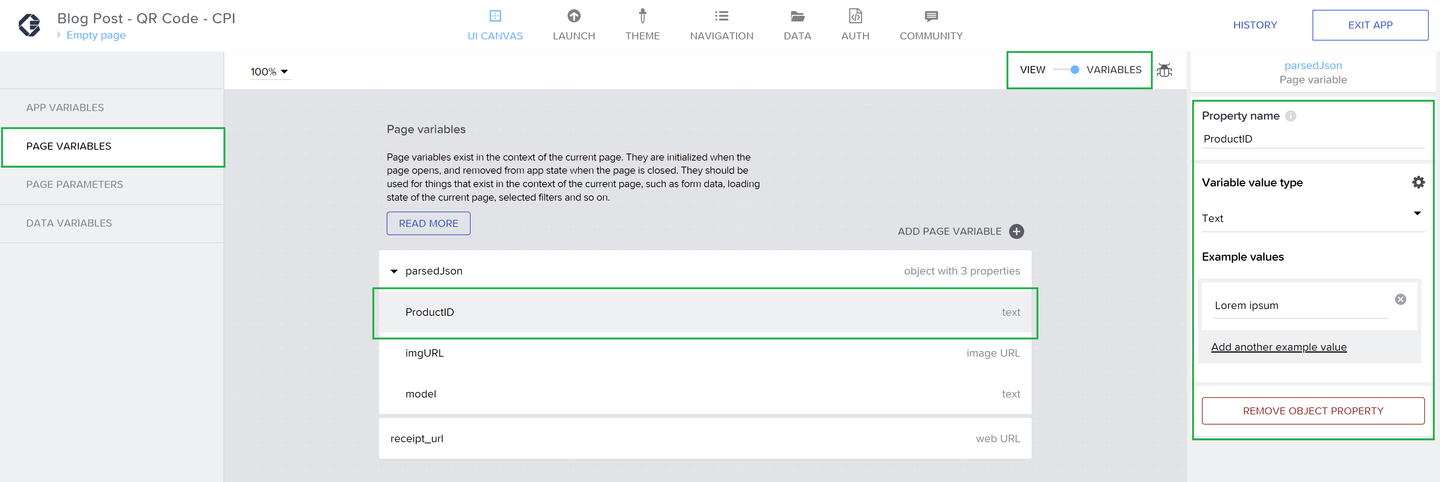
Add Product ID into your page variable Click again in
View – Variablesto go back to your UI editor, change the first title of the Product frombrandto themodelpage variable, to make it consistent with the generated QR code: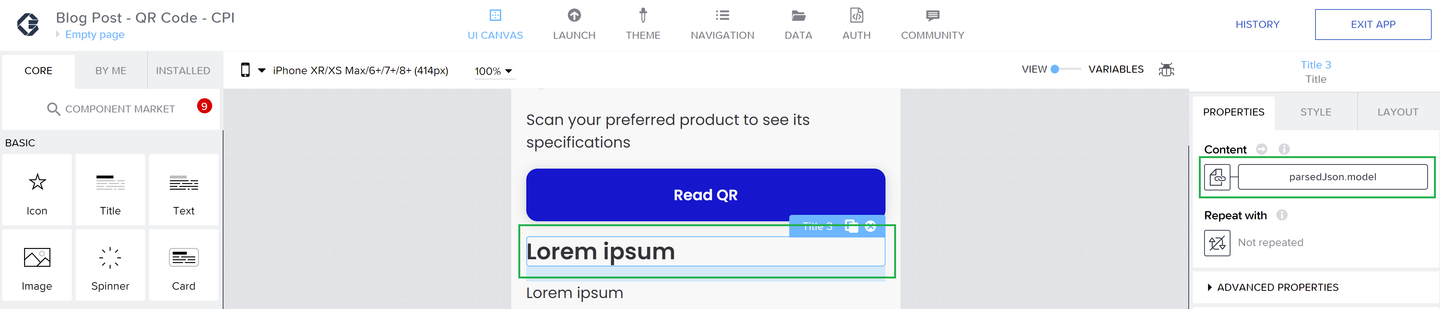
Link you Parsed JSON defined page variable to the button Add the
ProductIDpage variable to the second Product component: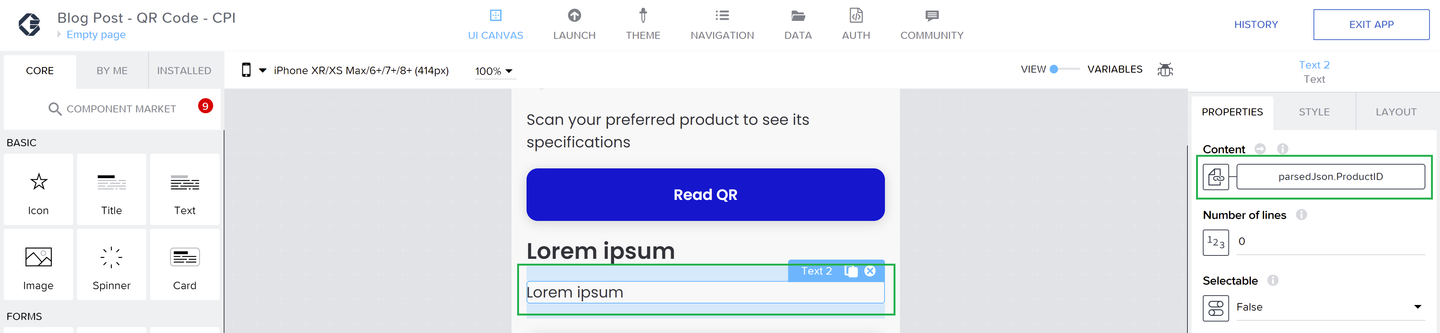
Link you Product ID variable to a text field Leave the image URL as it is in the original exercise.
Add the button and change its name to
Create Order consuming CPI:
Add a button Add the
WebViewcomponent (this one, you have to install it):
Add a button And link it to the page variable
receipt_urlyou created before. Like this: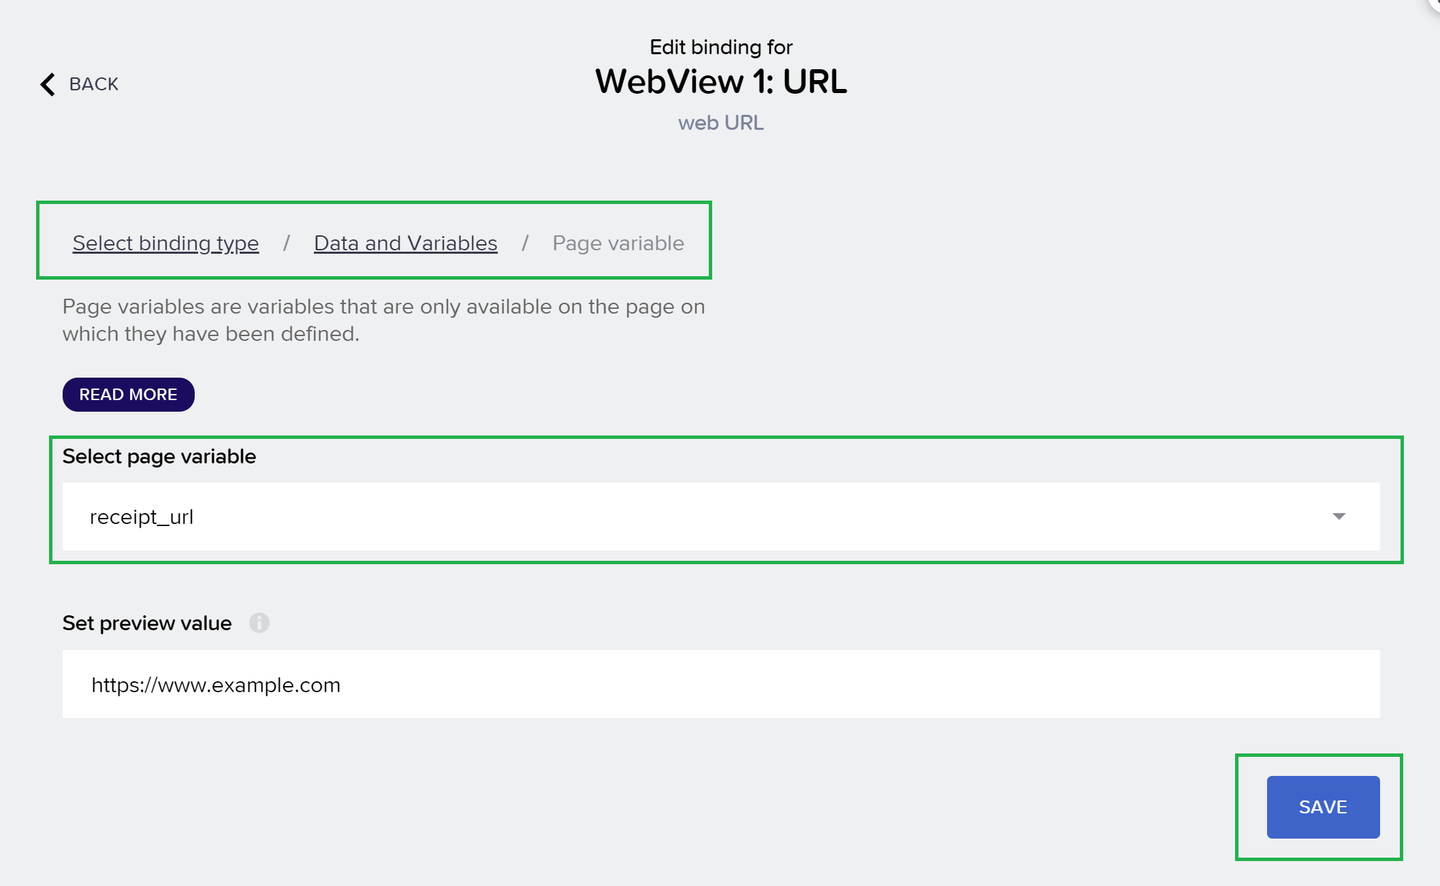
Link the receipt url page variable to the WebView component Select the button and click on the bottom-right “Show logic for BUTTON” and add a
Create Recordlogic component.In the Resource name: select the Data Resource Id you created before
IntegrationSuite_API_CORSFor the Records properties: here you’ll see the custom schema we created before for requesting POST calls from SAP Build Apps.

Create Record Logic
Click on
Record properties->Custom object. And add the newly created property:ProductID.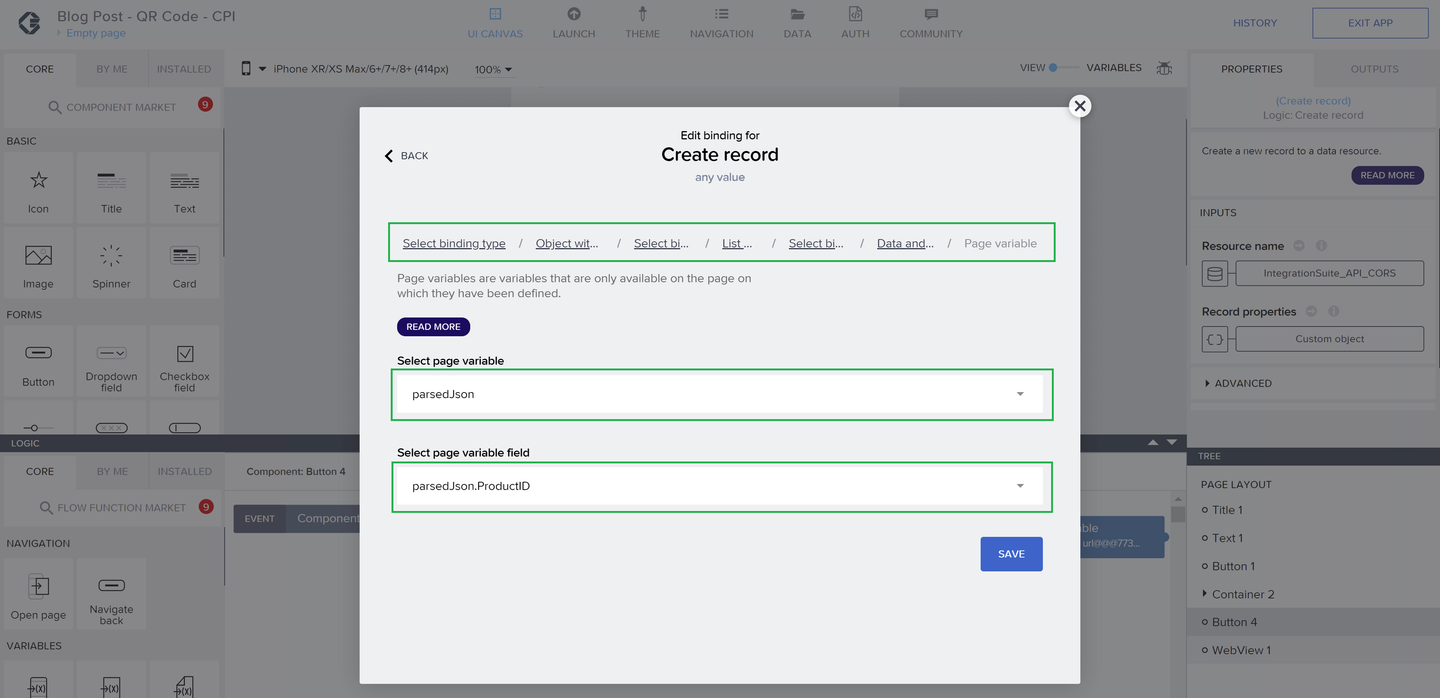
Create Record Product ID After save it, you’ll see it like this in the Product List Object:
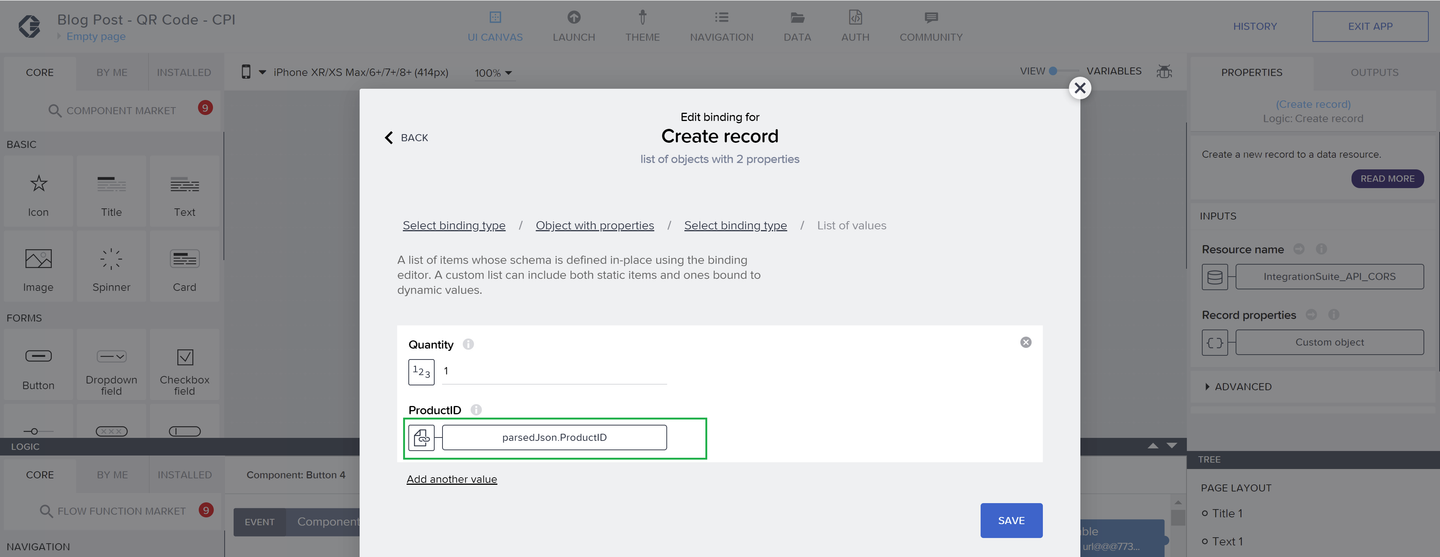
Save Create Record If you want, you can create as may variables as you want to make the exercise more dynamic. As I mentioned before, for the purpose of the integration exercise I’m using only
ProductID. You’ll see your payload structured in Build Apps, like this:
Data Binding Click on Save.
Add a JavaScript logic component, this is to configure the getting of the
receipt_urlfrom the Stripe request response.
JavaScript Component Erase the original
input1name and change it forresponse. Click to bind the data.
JavaScript Component Select the binding type: Output value of another node, then create record and select
receipt_urlas field you want to get from the response.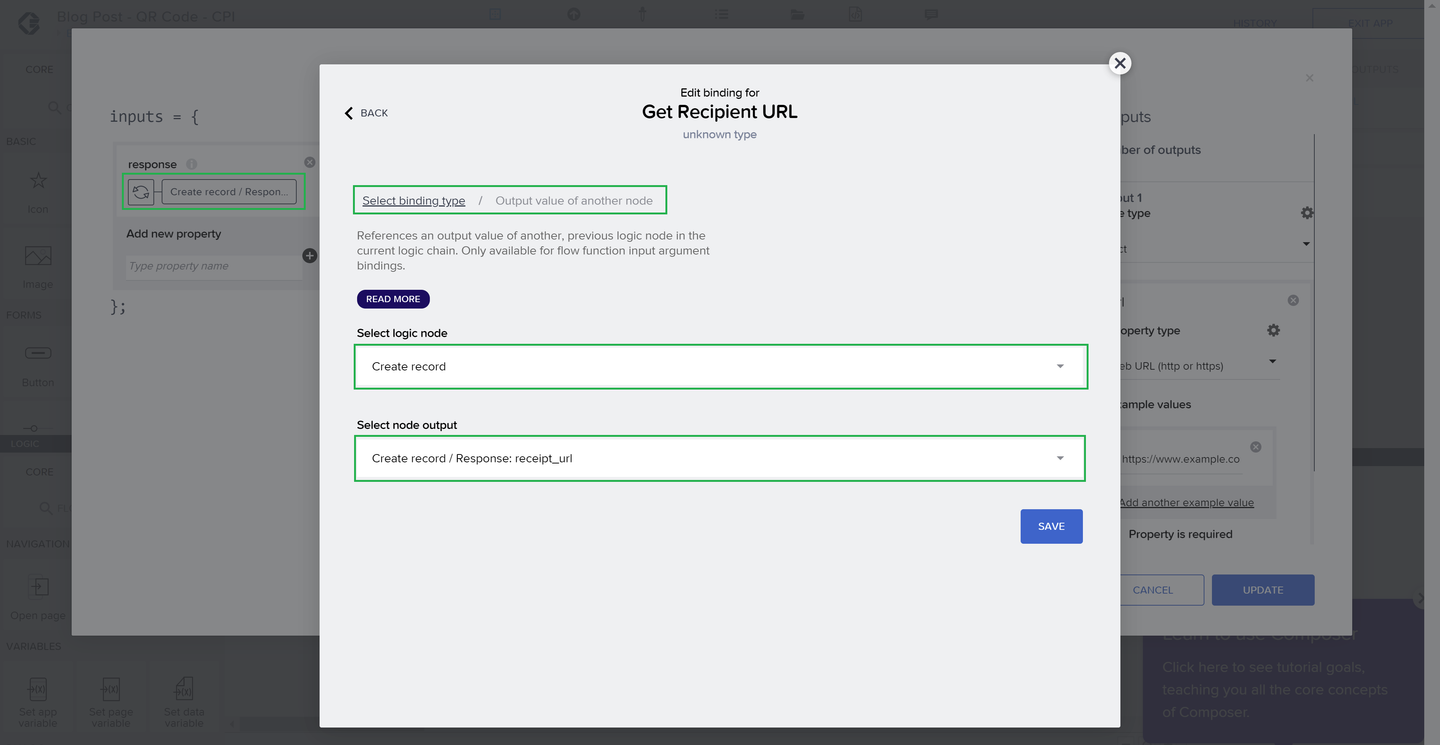
Get Receipt URL from Response Save it and close it.
Add a Dialog Toast, just to show up a message that the request call was successful. Write as a Toast Message
Loading URL, like this: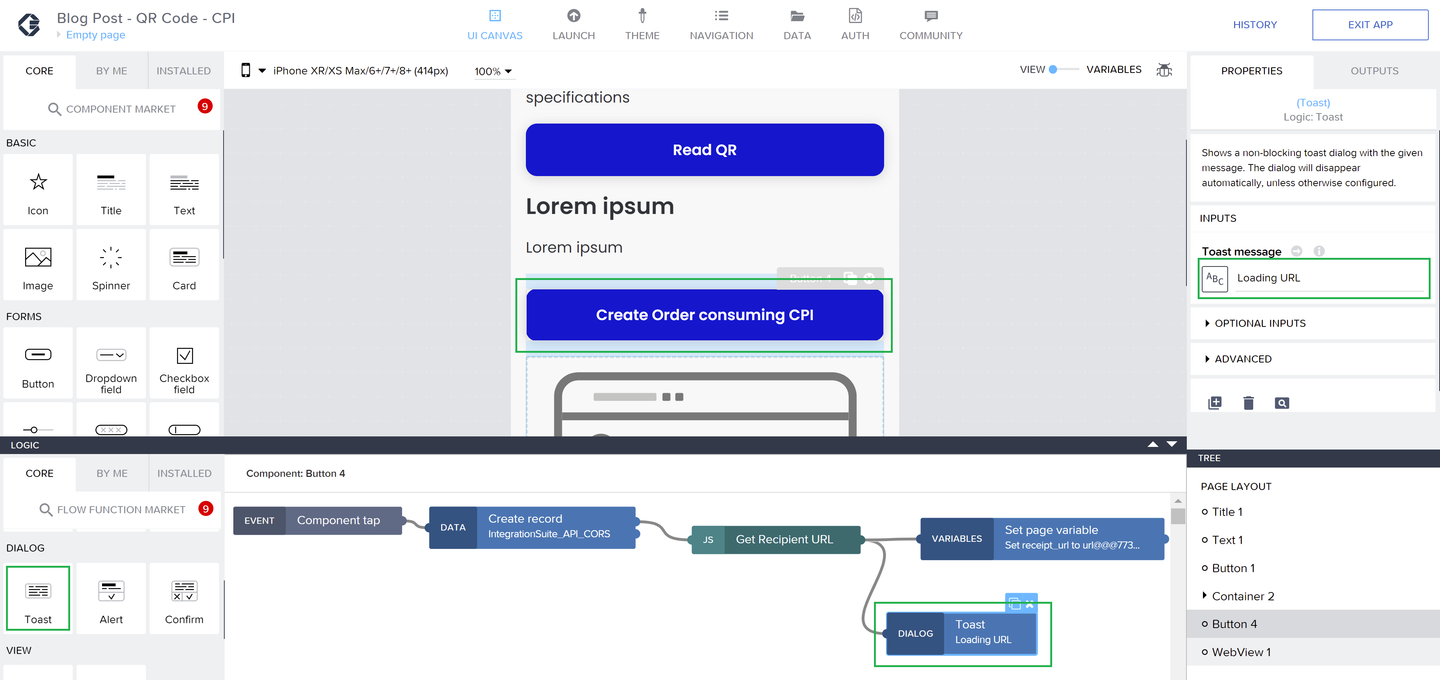
Add Dialog Toast Message Add a
Set page variablelogic component and add as the variable name the page variable you created beforereceipt_url:
Set Page Variable Link the variable like this and save it:
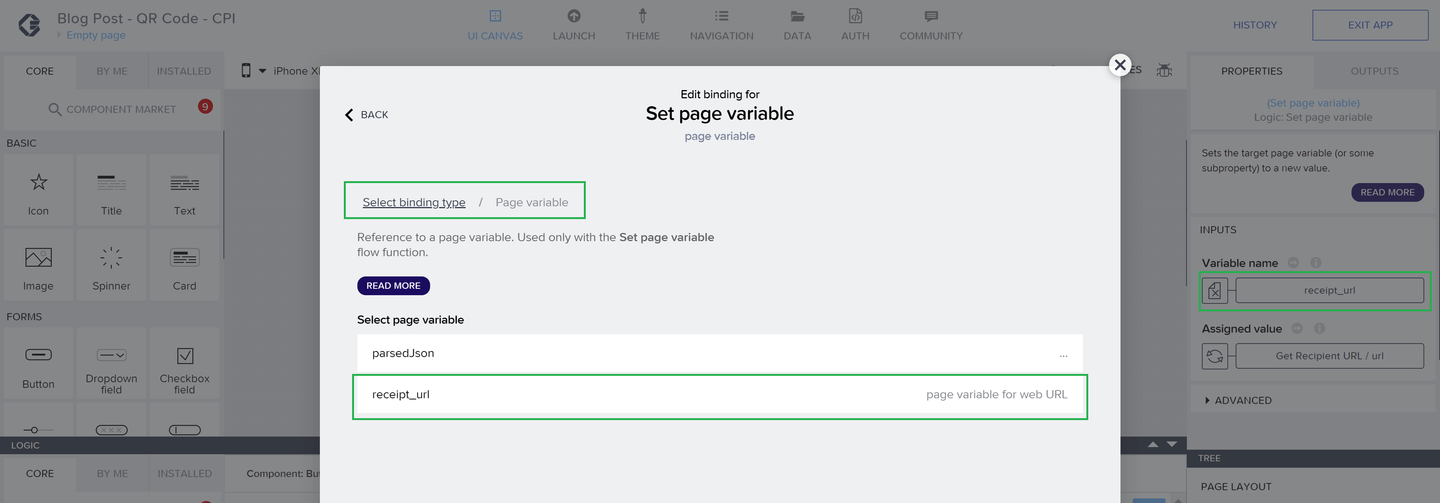
Bind Receipt URL to the page variable Do the same for assigning the value. Here you are going to link it with the
receipt_urlJavaScript component you created before:
Bind Receipt URL as the assigned value
Now it’s time to test the app and the whole integration.
Grab your phone and enter your SAP Build Apps mobile app. Link it to your account as explained in the original exercise. Read the generated QR code:

Product QR Code Click on
Create Order consuming CPIand you’ll see that the order was successfully created. Like this: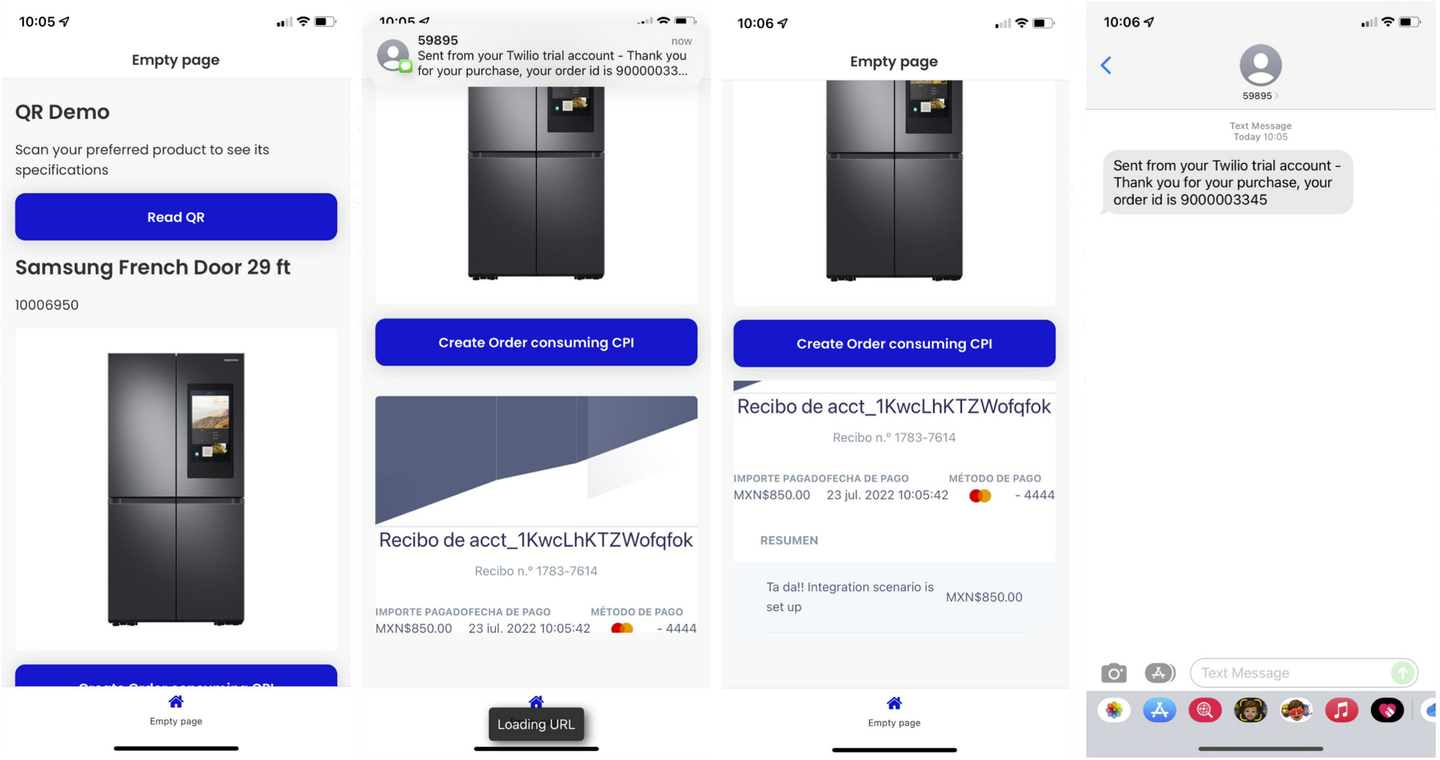
AppGyver Complete Test Check in the SAP Sales and Service Core tenant (formerly SAP Cloud for Customer / SAP C4C):
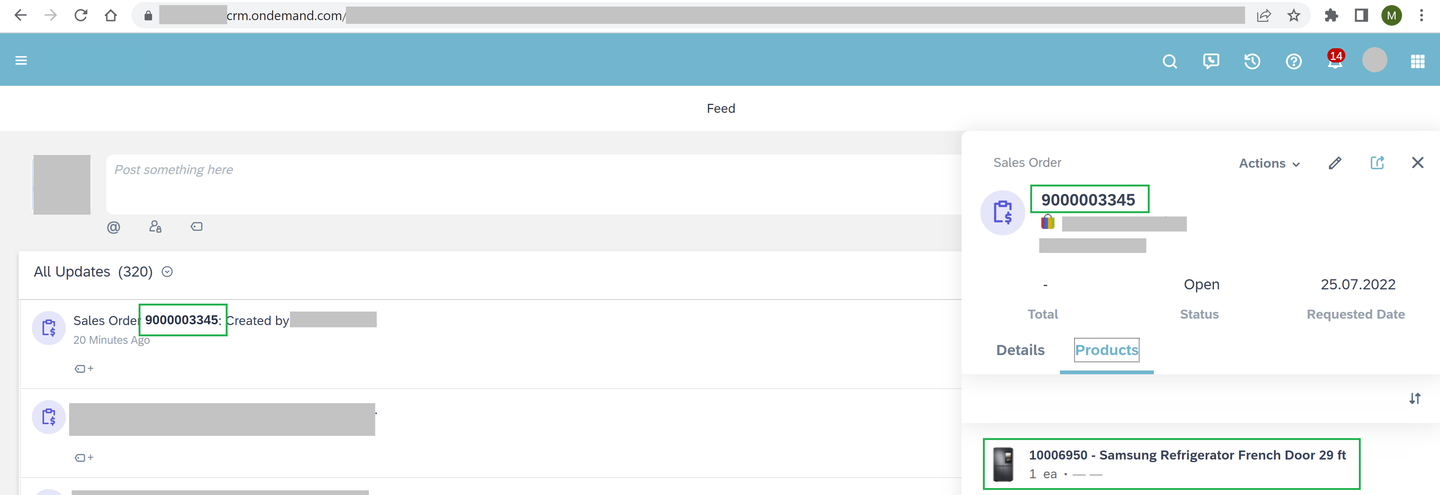
SAP Sales and Service Core test
Congratulations! You’ve successfully created an end-to-end integration scenario leveraging low-code/no-code capabilities from the SAP Integration Suite and SAP Build Apps, for integrating SAP and third-party solutions.
Just to summarize, you’ve integrated solutions and services from:
- SAP Sales and Service Core (formerly SAP C4C)
- Twilio
- Stripe
- SAP Integration Suite:
- SAP Open Connectors
- SAP API Management
- SAP Cloud Integration
- SAP Build Apps (formerly SAP AppGyver)
To create a Sales Order in SAP Sales and Service Core, after a the payment transaction using Stripe is successful, and then sending a SMS with the Order Id confirmation.
Hope you’ve enjoyed this exercise!
Resources
Discussion
Share feedback on this tutorial or join the conversation in SAP Community.