
Overview
You will learn
- How to create an instance of the User Authentication and Authorization service
- How to incorporate security into the routing endpoint of your application
- How to configure Cloud Application Programming (CAP) service authentication


Prerequisites
Prerequisites
- This tutorial is designed for SAP HANA Cloud. It is not designed for SAP HANA on premise or SAP HANA, express edition.
- You have created database artifacts, loaded data, and added basic UI as explained in the previous tutorial.
Steps
Video Version
Video tutorial version:
We are going to set up production level security using the SAP Authorization and Trust Management service for SAP BTP in the Cloud Foundry environment and more specifically the User Account and Authorization or UAA Service. By default CAP allows you to mock your security for testing during development (which we used in the last tutorial). However we also want to teach you how to setup the full production security and test that during development as well.
The UAA will provide user identity, as well as assigned roles and user attributes. This is done in the form of a JWT token in the Authorization header of the incoming HTTP request. We will need the Application Router we added to our application in the last tutorial to perform the redirect to the UAA Login Page and then forward this JWT token to your CAP service. Therefore this will be a multiple step process.
In the previous tutorial, we used an Application Router in our project. When we did, the wizard created an xs-security.json file in the root of the project. This file is used during the creation or update of the XSUAA service instance and controls the roles, scopes, attributes and role templates that will be part of the security for your application. What was generated was a basic version of the xs-security.json that will only require authentication but not specific roles.
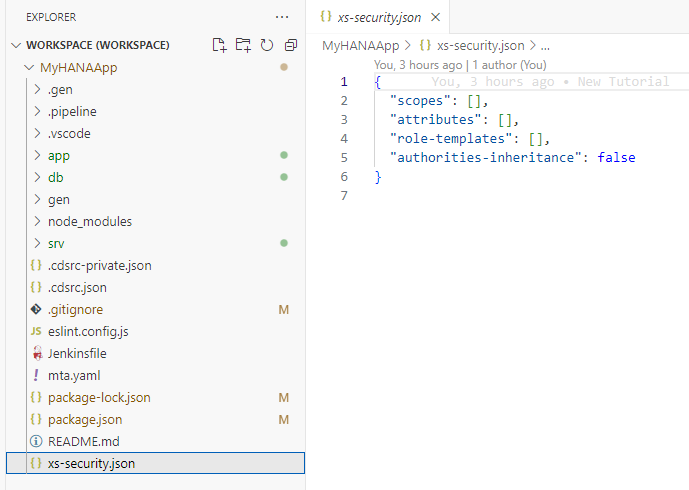
Basic xs-security.json To really test the impact of roles in our application, lets add some security to our services. Open the
interaction_srv.cdsfrom thesrvfolder. Adjust the code as follows to makeInteractions_Headerservice only available to authenticated users andInteractions_Itemsonly available to users with theAdminrole and restrict the results during certain read operations to only those records where the Country column has the value of German (DE).CDSusing app.interactions from '../db/interactions'; using {sap} from '@sap/cds-common-content'; service CatalogService { @requires : 'authenticated-user' @cds.redirection.target @odata.draft.enabled: true entity Interactions_Header as projection on interactions.Headers; @requires: 'Admin' entity Interactions_Items as projection on interactions.Items; @readonly entity Languages as projection on sap.common.Languages; @readonly @restrict: [{ grant: 'READ', where: 'country_code = ''DE'''}] entity HeaderView as projection on interactions.Headers; }When you do add scopes to the services as we did in the previous step you can generate a sample
xs-security.jsonusing the following command and merge that into the basicsxs-security.jsonfile generated by the Application Router wizard.Shellcds compile srv/ --to xsuaa > xs-security.json
Updated xs-security.json Since we want to test the security setup from the Business Application Studio, we are going to have add some additional configuration to the
xs-security.json. You need to add another property to thexs-security.jsonto configure which redirect URIs are allowed by theOAuthconfiguration. Also while editing, add anxsappnamewith the valuemyhanaapp(plus your group number or intials if you in a group workshop) and atenant-modeofdedicatedas well. We can also addcredential-typesas a security best practice. You can read more about the Credential Types in this blog post byDinu PAVITHRANJSON{ "xsappname": "myhanaapp", "tenant-mode": "dedicated", "scopes": [ { "name": "$XSAPPNAME.Admin", "description": "Admin" } ], "attributes": [], "role-templates": [ { "name": "Admin", "description": "generated", "scope-references": [ "$XSAPPNAME.Admin" ], "attribute-references": [] } ], "oauth2-configuration": { "credential-types": [ "binding-secret", "x509" ], "redirect-uris": [ "https://*.applicationstudio.cloud.sap/**" ] } }
oauth2-configuration in the xs-security.json This wild card will allow testing from the Application Studio by telling the XSUAA it should allow authentication requests from this URL. See section Application Security Descriptor Configuration Syntax for more details on configuration options.
Open a terminal and create the XSUAA services instance with the
xs-security.jsonconfiguration using the following command (adjustingMyHANAApp-authto include your group number or intitials if you are in a group workshop like we did earlier):Shellcf create-service xsuaa application MyHANAApp-auth -c xs-security.json
Create XSUAA service Finally return the
package.jsonfile in the root. In the last tutorial we changed the authentication configuration tomocked. Now we can change it back toxsuaa.
XSUAA back in the package.json
From the terminal, we need to create a service key (adjusting names to include your group number or initials if you are in a group workshop). This will give us access to the credentials for your XSUAA instance.
Shellcf create-service-key MyHANAApp-auth defaultChange back to the root of your project in the terminal and issue the command
cds bind -2 MyHANAApp-auth:default. This is the same command that we used to bind our running CAP application to HANA DB earlier. Now we are adding a binding to the security XSUAA service as well.
CDS Bind
Before we can test our application, we need to create a role that includes the XSUAA instance details and grant to that our user. We will do this from the SAP Business Technology Platform cockpit. In the cockpit, you set up the roles and role collections and assign the role collections to your users. This brings the necessary authorization information into the JWT token when the user logs on to your application through XSUAA and Application Router.
Open the SAP BTP cockpit.
The roles collections are created on subaccount level in the cockpit. Navigate to your subaccount and then to Security > Role Collections. Then press the
+to create a new Role Collection.
New Role Collection Name your role collection
MyHANAApp(plus your group number or intials if you in a group workshop). Then go into edit mode on the role collection. Use the value help for the Role. Use the Application Identifier to find your service instance (myhanaapp!XXXXX). Select the role and press Add
Select Role From the Role Collection edit screen you can also grant the role to your user. In the Users section fill in your email address you use for your SAP BTP account. Save the Role Collection.

Assign Role See Assign Role Collections in SAP BTP documentation for more details.
The
approutercomponent implements the necessary handshake with XSUAA to let the user log in interactively. The resulting JWT token is sent to the application where it’s used to enforce authorization.Next open the xs-app.json file in the
/app/routerfolder. Here want to make several adjustments. Change theauthenicationMethodtoroute. This will turn on authentication. You can deactivate it later by switching back tonone. Also add/update the routes. We are adding authentication to CAP service route. We are also adding the Application Router User API route (sap-approuter-userapi), which is nice for testing the UAA connection. We will also add the customlogoutEndpointof/app-logout. You can add this path to your URL if you want to force logout your user; which can be helpful to pickup any changes to your role configuration during development. Finally add the route to the local directory to serve the UI5/Fiori web content.JSON
{ “authenticationMethod”: “route”, “logout”: { “logoutEndpoint”: “/app-logout”, “logoutPage”: “/” }, “routes”: [ { “source”: “^/app/(.)$", "target": "$1”, “localDir”: “.”, “cacheControl”: “no-cache, no-store, must-revalidate”, “authenticationType”: “xsuaa” }, { “source”: “^/appconfig/”, “localDir”: “.”, “cacheControl”: “no-cache, no-store, must-revalidate” }, { “source”: “^/user-api(.)”, “target”: “$1", "service": "sap-approuter-userapi" }, { "source": "^/(.*)$”, “target”: “$1”, “destination”: “srv-api”, “csrfProtection”: true, “authenticationType”: “xsuaa” } ] }
</div><div class="step-validation-mount"
data-step="4"></div>
<div class="step-actions">
<button class="fd-button fd-button--emphasized" data-action="mark-done" data-step="4">Done</button>
</div>
</div>
</div>
<div id="step-5" class="tutorial-step" data-step="5">
<div class="step-header" data-action="toggle-step">
<span class="step-check-circle"></span>
<div class="step-header-text">
<span class="step-label">Step 5</span>
<span class="step-title-text">Test</span>
</div>
<span class="step-toggle-icon">+</span>
</div>
<div class="step-body" hidden>
<hr class="step-divider" />
<div class="step-content">
1. If you open the CAP service test page (`cds watch --profile hybrid` if you need to restart it) and try to access one of the service endpoints or metadata, you should receive an Unauthorized error.
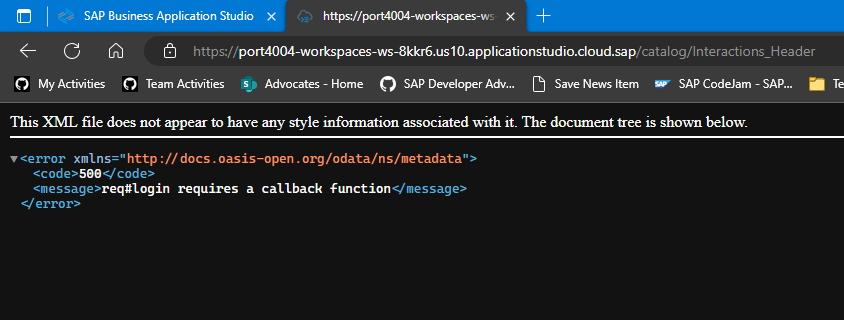
This means your security setup is working. Accessing the CAP service directly will always produce an error now as there is no authentication token present. We need to run via the Application Router to generate and forward the authentication token.
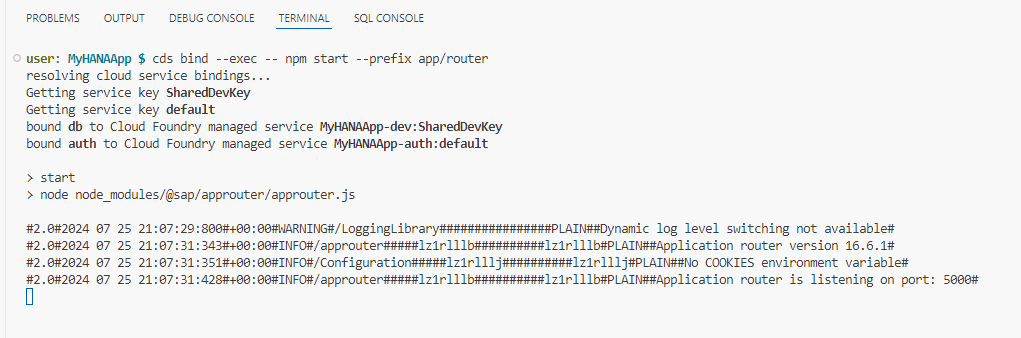
1. Without stopping the CAP service, open a second terminal. In this terminal run `cds bind --exec -- npm start --prefix app/router` to start the Application Router but using the `cds bind` command to inject all the `UAA` configuration into the Application Router automatically and securely as well.
1. Open the application router in a new tab (the new service instance running on port 5000). Click on the `Interactions_Header`. Now instead of the Unauthorized error you received when testing CAP service directly, you should see the data returned normally.
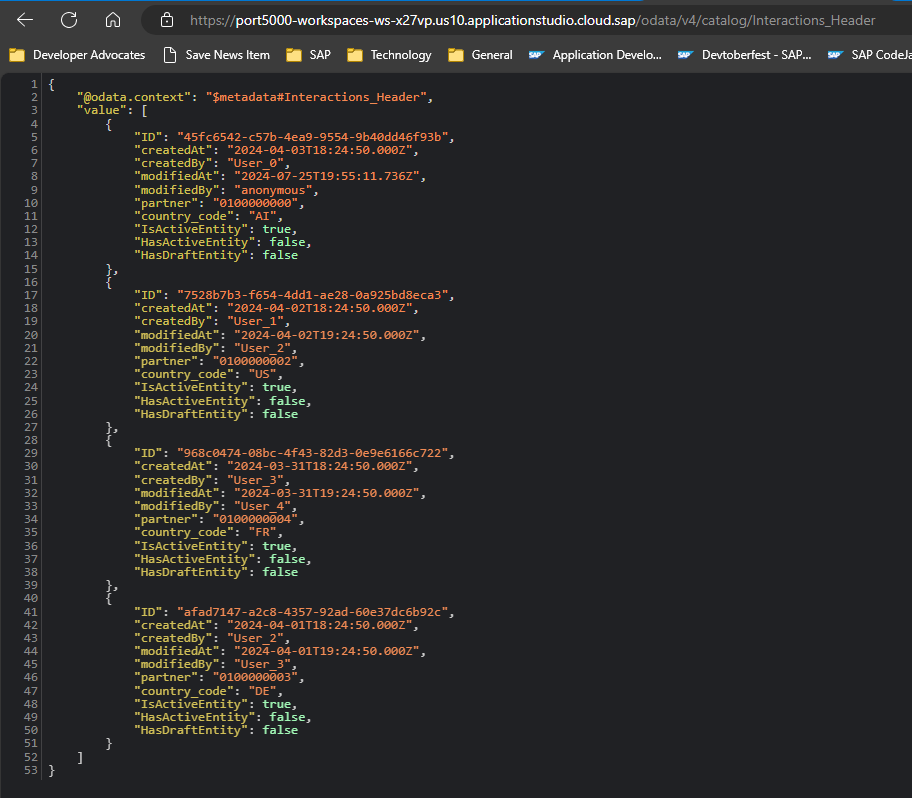
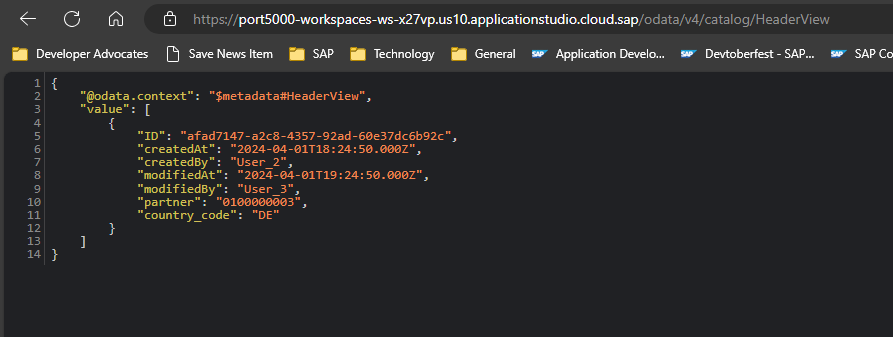
1. Finally change to the `HeaderView` from the test page. You are now testing with data from the CAP service but all with authentication. You should also only be seeing a single record thanks to the data restriction we placed on the service as well.
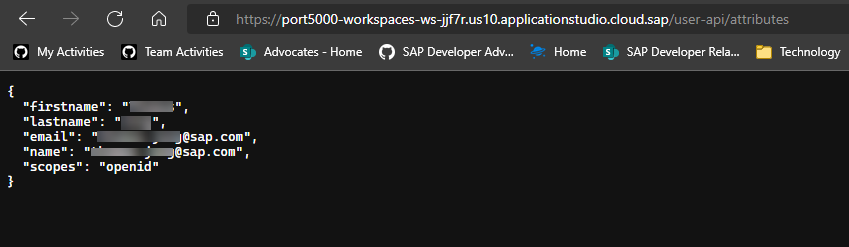
1. Add `/user-api/attributes` to the end of the URL and you should see your Email and other User details. This is testing that the application router is actually getting the security token from the UAA instance.
Congratulations! You have now successfully configured and tested with production level authentication and authorization for the SAP HANA Cloud and Cloud Business Application based project.
If you are wanting to learn about packaging and deploying this complete application as a Multi-Target Application to SAP BTP, Cloud Foundry runtime; there is a separate, optional tutorial which is not part of this mission that covers this step. Note: that this is an advanced topic and does allocate a large amount of your available resources in an SAP BTP trial account. [Deploy CAP with SAP HANA Cloud project as MTA](hana-cloud-cap-deploy-mta)
</div><div class="step-validation-mount"
data-step="5"></div>
<div class="step-actions">
<button class="fd-button fd-button--emphasized" data-action="mark-done" data-step="5">Done</button>
</div>
</div>
</div>Resources
Discussion
Share feedback on this tutorial or join the conversation in SAP Community.
Joule
AI Notice
Joule is an AI assistant. Generative AI may produce inaccurate, incomplete, or biased information. Always verify important details before acting on them.
Conversations are sent to SAP-hosted large language models for processing. Do not include personal data, credentials, or confidential information in your messages.
Joule's responses are based on the SAP tutorial catalog and may not reflect the latest product changes. For authoritative guidance, consult the linked tutorials and official SAP documentation.