
Overview
You will learn
- The API Provider is used to abstract the connection to the backend / target system.
- The API Proxy is the actual API which contains the logic to connect to the target system. Here you can model the flow, add security policies, transform the incoming message or look for content injections.
- The API Product which bundles one or more API Proxies before they are exposed in the API Developer portal so they can be consumed by a developer.


Prerequisites
Prerequisites
- Proficiency: Beginner
- Tutorials: Create an API Proxy
Steps
Next Steps
Intro
In SAP Integration Suite, API proxies are grouped and exposed as products. In this tutorial you will create a new product and assign the previously created API proxy to it
Time to Complete
15 Min.
Log on to SAP Integration Suite (you can get the URL from SAP Integration Suite Launchpad, click on Manage APIs).

To access the list of products, select the Hamburger Menu in the upper left corner and click on Engage.

Select Products from the tab menu. This will bring up the list of previously created products.

On the Products tab, click on Create to start the new product wizard.

On the Overview page, enter the values for Name and Title.
| Field | Value |
|---|---|
| Name | ProductForFirstAPIProxy |
| Title | Product For First API Proxy |

In the tab menu, select API. This is where you can add and remove APIs and API proxies from the product.
Click the Add button.
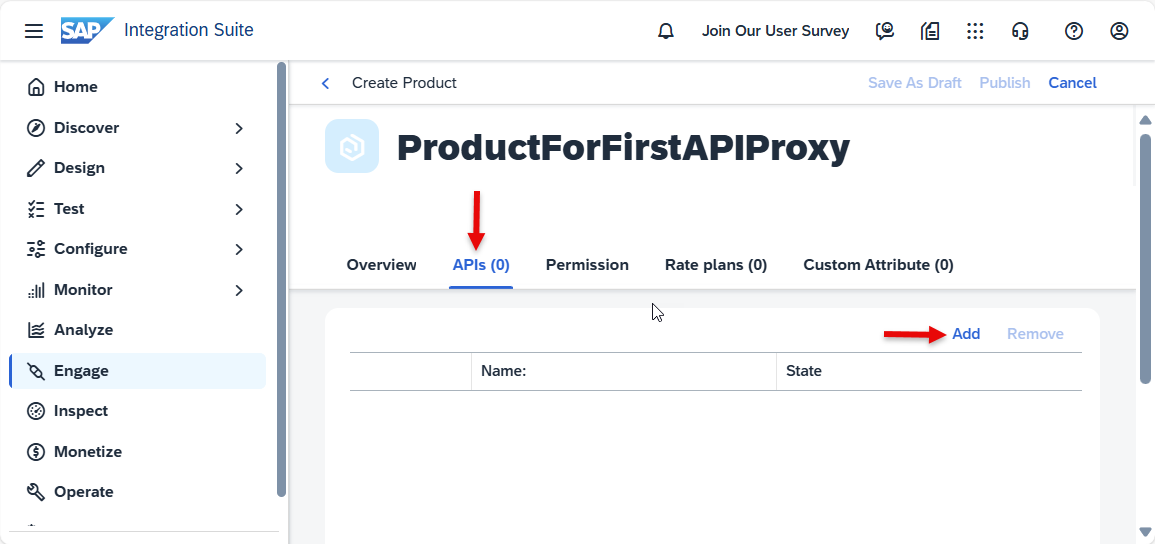
The list of API proxies is populated from the APIs you have created. Select the API proxy FlightCollectionAPI that you created in the previous tutorial. Click OK.

Click on Publish.
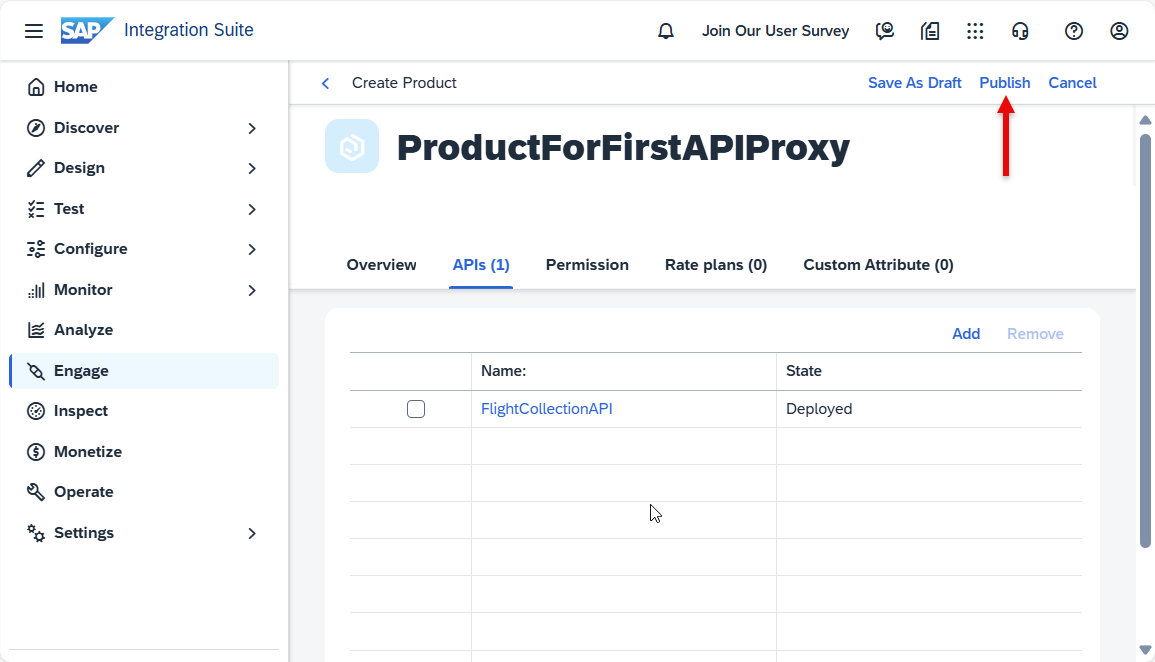
The product is now available.

Resources
Discussion
Share feedback on this tutorial or join the conversation in SAP Community.