
Add an SAPUI5 App to a Workpage in SAP Build Work Zone, advanced edition
Add an existing SAPUI5 app to your workpage
Overview
You will learn
- How to add an SAPUI5 app to a workpage in your site


Prerequisites
Prerequisites
- A subaccount in SAP BTP that includes a subscription to the SAP Build Work Zone, advanced edition service has already been setup for you. Note that it is not available in a trial account
- You’ve already designed the Home workpage where you’ll add this app
Steps
Intro
To add business apps to your site, you need to configure them in a tool called the Content Manager, located in the Site Manager. The Content Manager includes various editors that you can use to configure apps, groups, roles, and catalogs.
Once configured, the app appears as a tile in the Applications page of your site - a single page from where you can launch your apps. The page can be accessed from the top-level menu and displays the business apps that a user has permissions to launch.
Access the Administration Console from the user actions dropdown menu under your avatar.

Open the admin console This option is only available to SAP Build Work Zone, advanced edition administrators.
Go to the External Integrations section, expand it, and click Business Content.
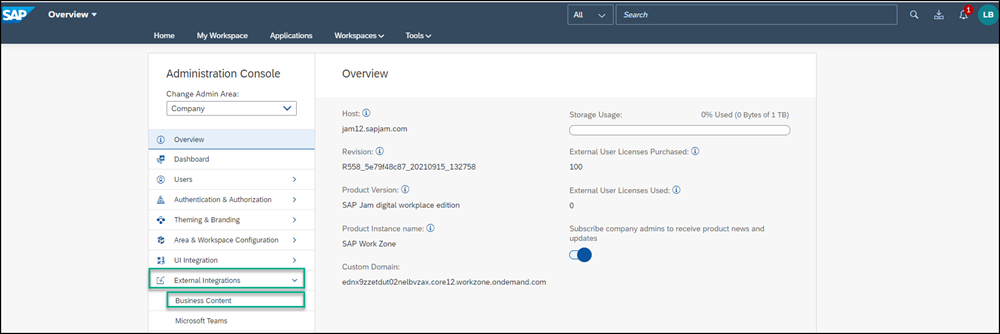
Open business content Click Content Manager.

Open content manager
The Content Manager is part of the Site Manager, where administrators can create and configure their business content. They can also use the Content Explorer to explore exposed content from available content providers. The Site Manager also includes the following tools:
The Site Directory where the site’s tile is located. From here you can update the site settings - for example, assign the site to a specific role.
The Channel Manager where you manage content providers. Content providers expose business content that you can integrate into your site.
The Configurator where administrators can set up onboarding to SAP Build Work Zone, advanced edition. For the tutorial, we assume this configuration has already been done for you.
The Settings where you can configure various settings related to your subaccount.
First create and configure the app.
Click Create and select App from the dropdown list.

Add app The app editor opens with the Configuration tab in focus.
Enter the following values:
Title:
New OrdersOpen App: In place
URL:
https://sapui5.hana.ondemand.com/test-resources/sap/m/demokit/cart/webapp/index.html
Define app properties
When working in your own environment, it’s better to integrate SAPUI5 apps by configuring a destination to the relevant system and setting the app properties to use this destination. In this case in the App UI Technology dropdown list, you would select SAPUI5. This configuration allows you to better manage your content in the Dev-QA-Prod lifecycle.
Click the Navigation tab to specify the intent of your app.
The unique combination of a semantic object and an action is called an intent. It is used to define navigation to an application.
Enter the following values:
Semantic Object:
OrderAction:
Display
Define navigation properties
Click the Visualization tab. In this tab, you specify how the app tile will appear in the Applications page of your site.
Enter the following values:
Subtitle:
Shopping CartInformation:
Order Now!Icon: Click the browse icon, type
my-sales-order, and click on the displayed icon, to add it.
On the right, you can see a preview of the tile with all the properties you entered. Click Save.

Define visualizaton properties
Click Content Manager in the breadcrumbs in the top header to navigate back to the Content Manager.

You can see your app in the list of content items in My Content:

The Everyone role already exists in the Items list of the Content Manager by default. Content assigned to the Everyone role is visible to all users.
In the Items list, click the Everyone role to open the Role editor.
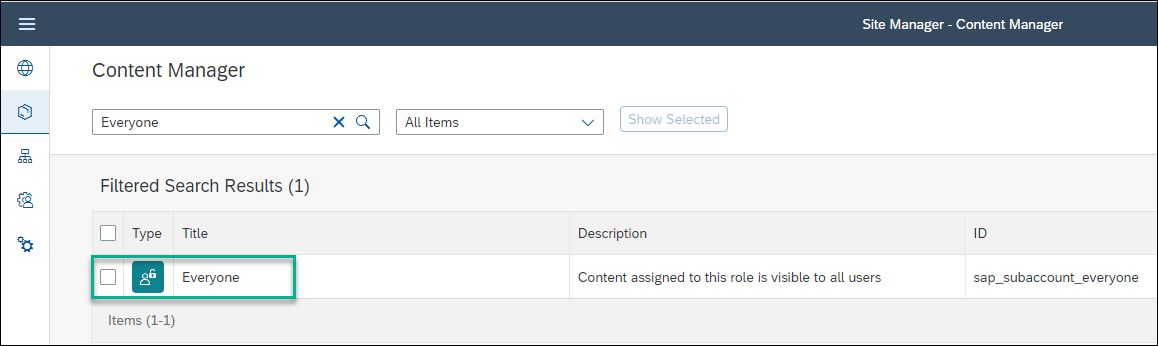
Select Everyone role Click Edit.

Click Edit Click the search box in the search box to see any available apps in the list below.
If you have many apps, you can type some letters of your app name in the search bar, (for example,
Or) to search for the app.In the Assignment Status column, drag the toggle switch to the right next to the
New Ordersapp to assign this role to your app. You’ll see that the icon changes.Click Save.

Assign role to app
Once an application is configured, it becomes available to add to your workpages.
A group is a set of one or more apps displayed together on the Applications page of your site. Assigning apps to groups, makes them visible to the user from this page. In this step you’ll create a new group and assign the app to it.
Click Content Manager in the breadcrumbs in the top header to navigate back to the Content Manager.
Click Create and select Group to create a group.

Create a group Enter
Purchasingas the Title.In the Assignment Status column, drag the toggle switch to the right next to the
New Ordersapp to assign it to your group. You’ll see that the icon changes.Click Save.

Assign app to group
Your app is configured. Now you’ll go to the Applications page to see that the app appears there.
Click the Site Directory icon in the side panel.

Open the Site Directory Click the Open site icon.

Open your work zone In the top-level menu of your workpage, click Applications.

Open Applications page
You’ll see your app is displayed as a tile in the group you assigned it to:
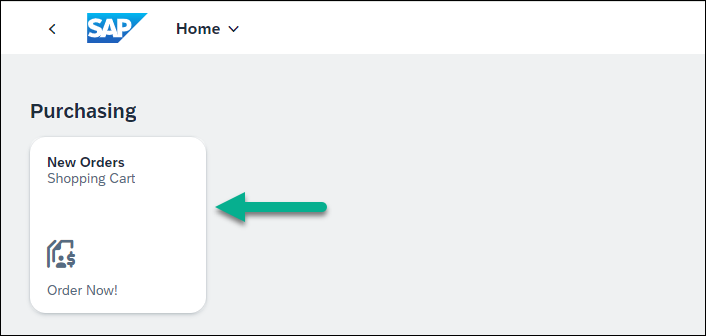
Now that the app is configured, you’re going to add it to your Home workpage.
To design your workpage to be more practical, we’ll add a header for the app and then add the app under it.
From the Applications page, you can quickly navigate back to the Home page by clicking Home in the top navigation bar of your site. Then click Home.
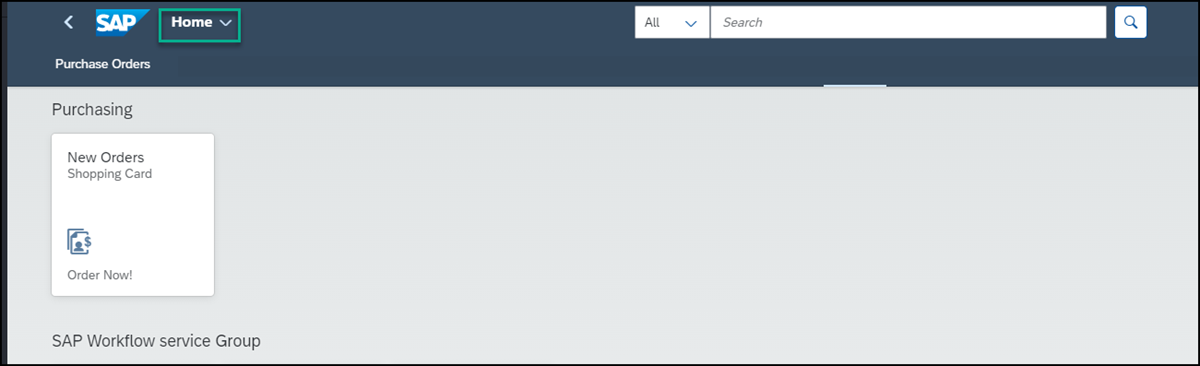
Navigate to Home page You can also simply click the back arrow to navigate back to the Home workpage.
Click the pencil icon to open the Page Designer.

Open Page Designer Scroll down to the last section on the page and click + to add another section.
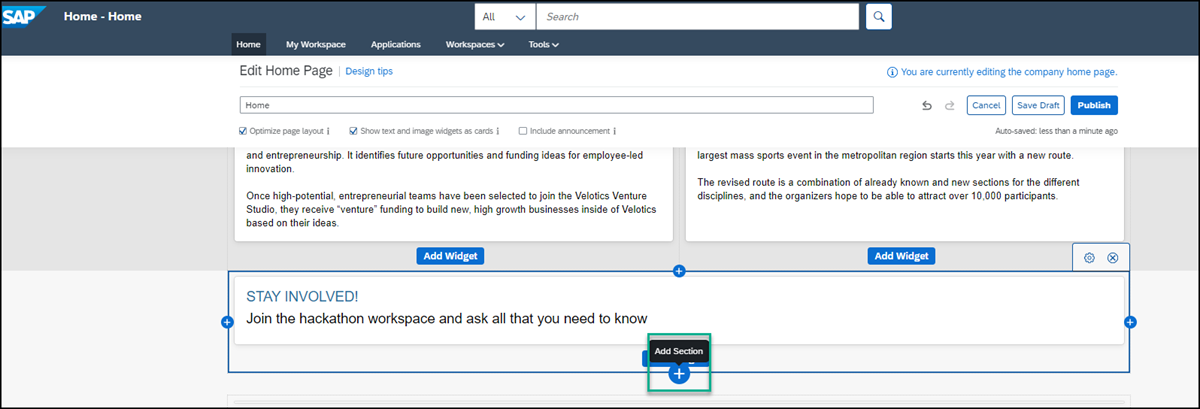
Add a row Click Add Widget to open the widget gallery and select the Text widget.
Design the text widget as follows:
| :————- | :————- | Text | Type in the following:
Most Popular Apps. | Font | Select the text and change to Arial 14pt. | Color | With the text still selected, choose the color black from the chart.
Design the header To increase the spacing between this section and the section above, hover over the section to expose the settings at the top right, and click the cog icon.

Edit row settings Enter the following values:
Under Padding Top, add the value
30pixels and click Save.Check the box Extend the row to full width.

Add values to settings
Now you’re going to add your first app under this header.
Click + to add another section and then click Add Widget.

Add another widget Click Tiles.
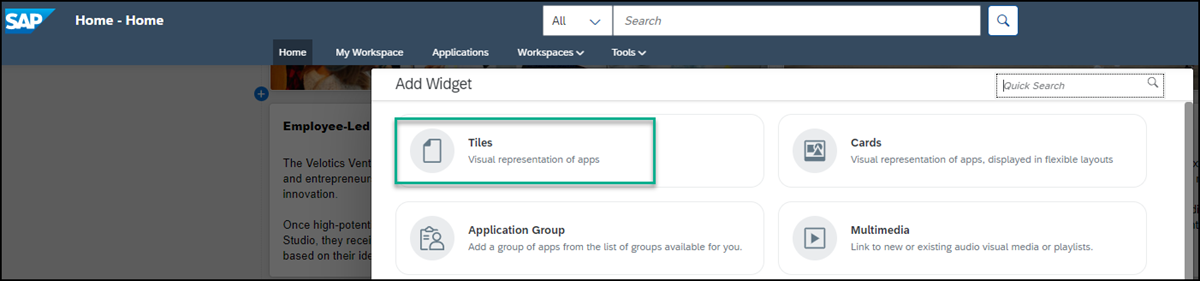
Select tiles In the Search box, start typing in the name of your app
New Orders, select the app, and then click Add.
Select your app Scroll to the top of the page, and click Publish.
This is how your Home workpage looks with the app added to it:

Home page with 1 app Click the app to open it.
Resources
Discussion
Share feedback on this tutorial or join the conversation in SAP Community.