
Add an App From the Backend to SAP Build Work Zone, advanced edition
Add a classic SAP application (like those typically run by SAP customers on the data center backends), to your SAP Build Work Zone, advanced edition.
Overview
You will learn
- How to add a Web Dynpro ABAP backend application to your workpage


Prerequisites
Prerequisites
- You have created a destination in SAP BTP cockpit to the SAP Gateway Demo System
- You have an environment set up and you can access SAP Build Work Zone, advanced edition
- You have opened SAP Build Work Zone, advanced edition
Steps
Intro
To add business apps to SAP Build Work Zone, advanced edition, you configure them in a tool called the Content Manager, located in the Site Manager. The Content Manager includes various editors that you can use to configure apps, groups, roles, and catalogs. Once configured, the app appears as a tile in the Applications page of your site. The page can be accessed from the top-level menu of the site and displays the business apps that a user has permissions to launch.
In this tutorial, you’re going to add one of SAP’s classic applications, a Web Dynpro ABAP app, to your site using the Content Manager. SAP’s classic applications typically run on the backend of a data center.
Access the Administration Console from the user actions dropdown menu under your avatar.

Access the Admin Console Go to the External Integrations section, expand it, and click Business Content.

Open Business Content entry Click Content Manager to open it.

Access Content Manager
The Content Manager opens with the My Content tab in focus.
In the Content Manager, click Create and select App from the dropdown list.

Add new app The app editor opens with the Configuration tab in focus.
Enter the following values:
Field Value Title Search POs. In a workshop, use:<your unique identifier>_Search POs.System Select the value ES5. In a workshop use:<your unique identifier>_ES5.App UI Technology Select Web Dynpro ABAPApplication ID S_EPM_FPM_PO
App properties In the Navitation tab, enter these values:
Field Value Semantic Object S_EPM_FPM_POAction Display
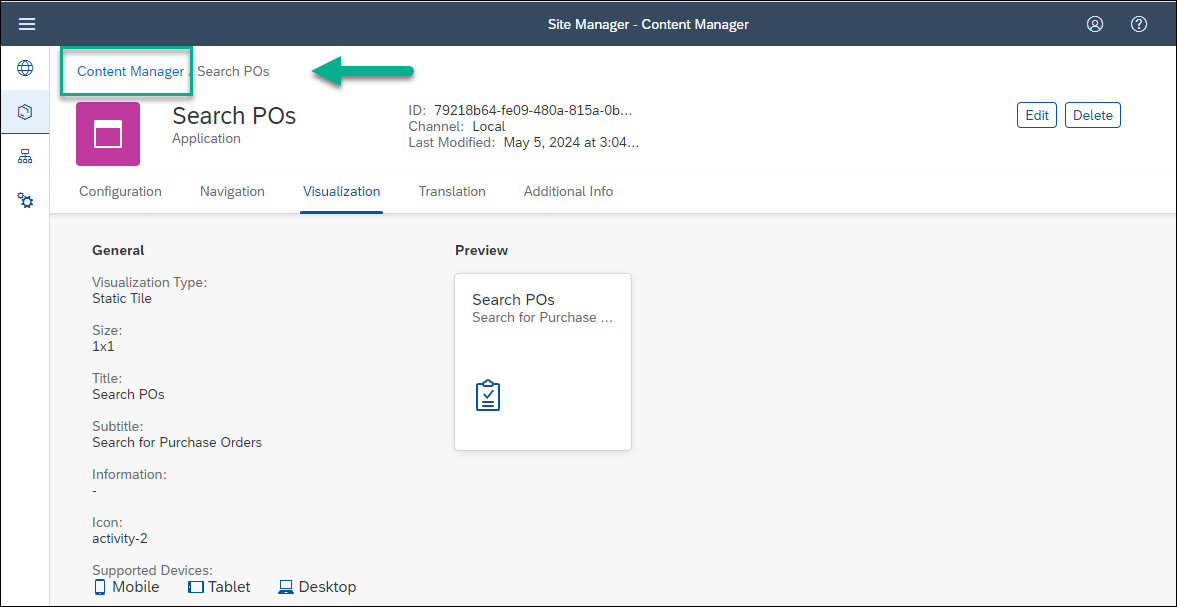
Add navigation properties In the Visualization tab, enter these values and then click Save.
Field Value Subtitle Search for Purchase OrdersIcon Click the browse icon, type activity-2. You’ll see two icons. Click the first one to add it.You can see all the visualization properties you defined in the preview tile.

Add visualization properties
Click Content Manager in the breadcrumbs in the top header to navigate back to the Content Manager.
You can see your Web Dynpro ABAP app in the list:

To view the app in runtime, you must assign the app to a role. You also need to assign the app to a group so that it’ll be visible in the Applications page of your site. This is described in the following steps.
The
Everyonerole already exists in the Items list of the Content Manager by default. Content assigned to theEveryonerole is visible to all users.
In the Content Manager in the Items list, click the
Everyonerole to open up the Role editor.
Select everyone role Click Edit.

Edit everyone role Click the search box to see any available apps in the list below.
If you have many apps, you can type some letters of your app name in the search bar, (for example,
Search) to search for the app.In the Assignment Status column, drag the toggle switch to the right next to the
Search POsapp to assign this role to your app. You’ll see that the icon changes.Click Save.

Assign app to role
The Search POs app is now assigned to the Everyone role. In the next step you’ll assign the app to a group.
A group is a set of one or more apps displayed together in the Applications page of your site. Assigning apps to groups, makes them visible to users.
Click Content Manager in the breadcrumbs in the top header to navigate back to the Content Manager.
Click Create and select Group to open the Group editor.

Create a new group Name the group
Purchase Orders.Click inside the search box on the right of the screen, to show all available apps. You should see the
Search POsapp.IIn the Assignment Status column, drag the toggle switch to the right next to the
Search POsapp to assign it to the group. You’ll see that the icon changes.Click Save.

Assign app to group Now that the app is configured, it is automatically added to the Applications screen in your site. You can also add it to one of your workpages.
Click the Site Directory icon in the side panel.

Open Work Zone directory Click the Open site icon.

Open work zone In the top-level menu of your site, click Applications.

Open Applications page
You’ll see your app is displayed as a tile in the group you assigned it to:

Resources
Discussion
Share feedback on this tutorial or join the conversation in SAP Community.