
Integrate a UI5 Integration Card to Your SAP Build Work Zone, advanced edition
Add a custom UI5 integration card to your workspace.
Overview
You will learn
- How to make a deployed UI5 integration card available in SAP Build Work Zone, advanced edition and add it to your workpage


Prerequisites
Prerequisites
- You have deployed a UI5 integration card
Steps
Intro
You’ve already deployed a UI5 integration card. In this tutorial, you’ll enable it to make it available in your site and later add it to your workspace.
Access the Administration Console from the user actions dropdown menu under your avatar.

Access the admin console Go to the UI Integration section, expand it, and click Cards.
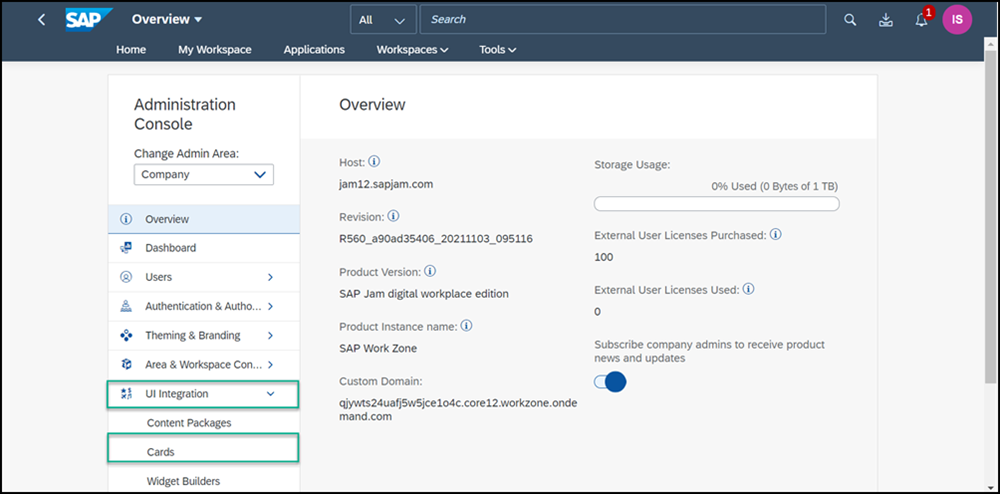
Open Cards section Search for your card.
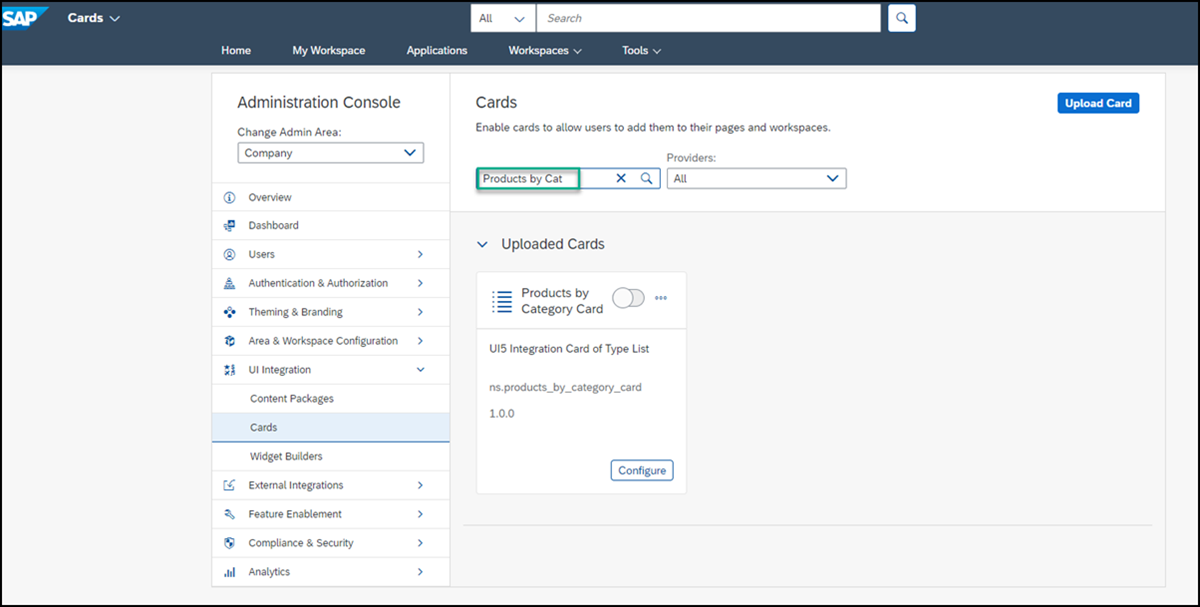
Search for card Your card will display under the Uploaded Cards section.
If you don’t see your deployed card, you may need to refresh the browser.
Click the slider button to enable the card.
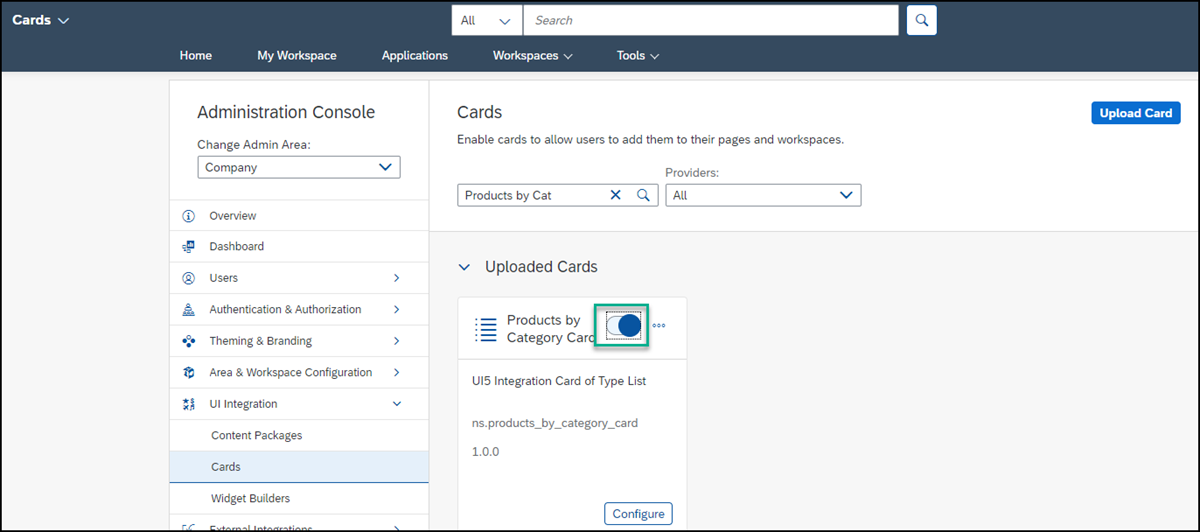
Enable card
The card is now enabled and can be added to the workpage in your workspace.
In this step, for workshops, use your unique identifier
<your unique identifier>_Products by Category.
You can click on Configure to select a different destination for this UI5 integration card. As you used the same ES5 destination in this SAP BTP subaccount and also when you developed the card, this step is not required to complete this tutorial.
Before you add the card to your workspace, let’s configure one of the settings of the card.
On the
Products by Category Card, click Configure.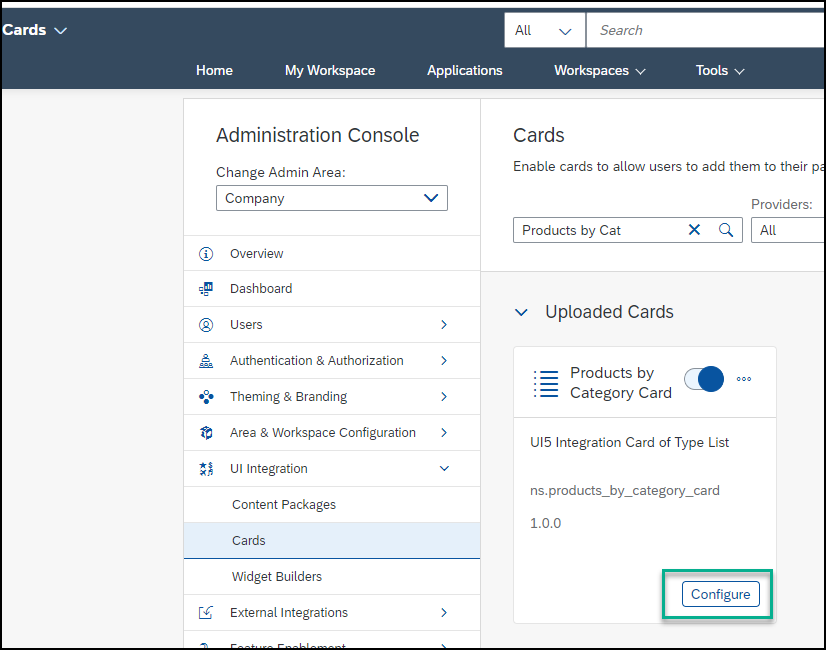
Click Configure Under General Settings, change the Maximum Items to 2 and select the destination. If you’re in a workshop, you can select the destination that you created:
<your unique ID_ES5>. Then click Save.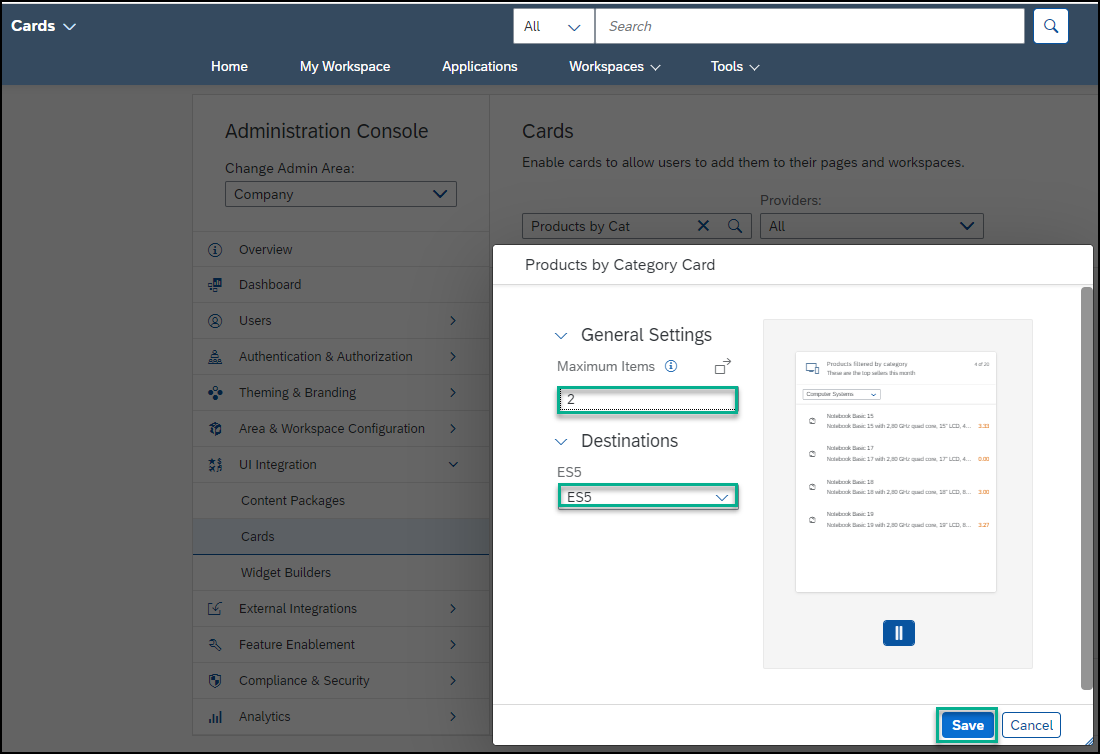
Change setting On the Configure screen, when you click the More settings icon there are more settings that you can configure for the end user.
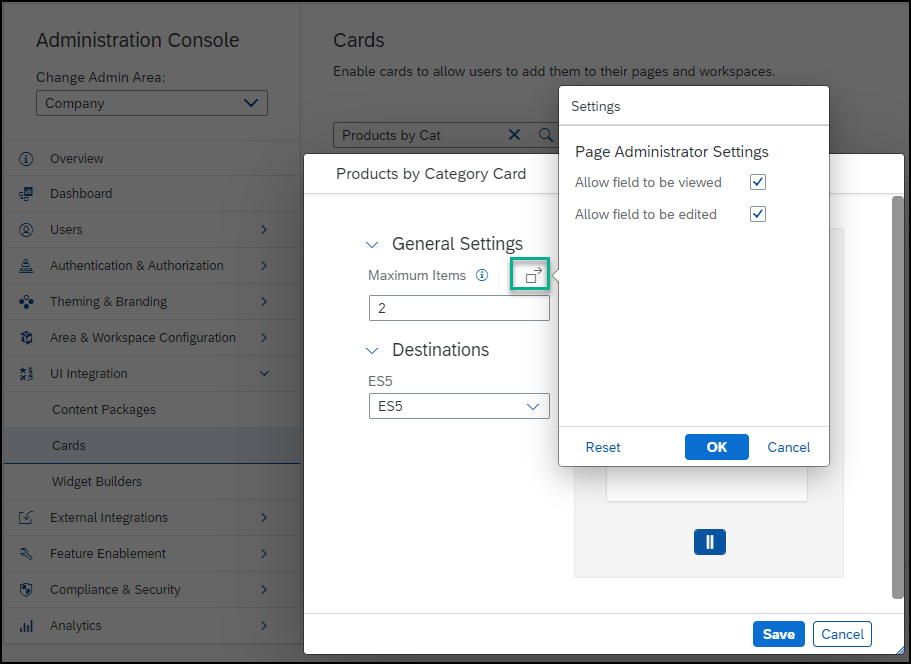
More settings
In the next step you’ll add the card to your workpage in your workspace.
Click the Workspaces menu and select
Sales Managementto navigate to your workspace.
Access workspace Click the pencil icon on the right side of the screen to open the page designer.
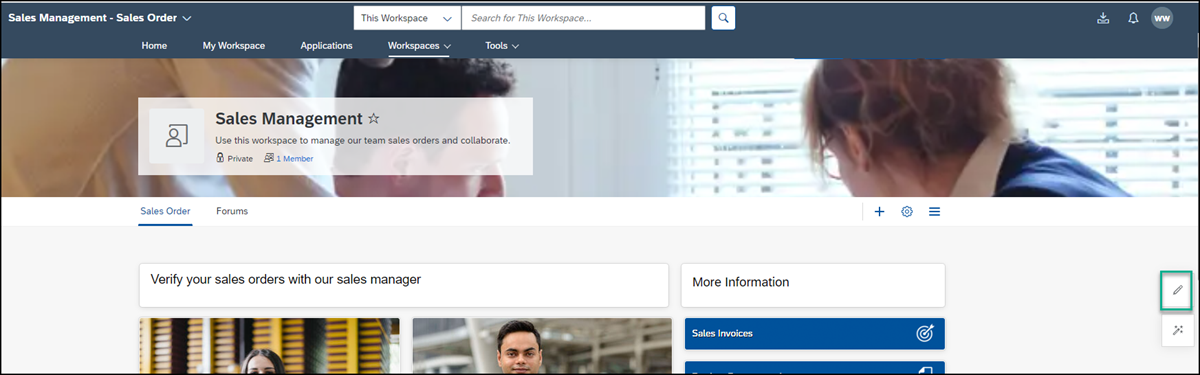
Open in edit mode Click Add Widget.
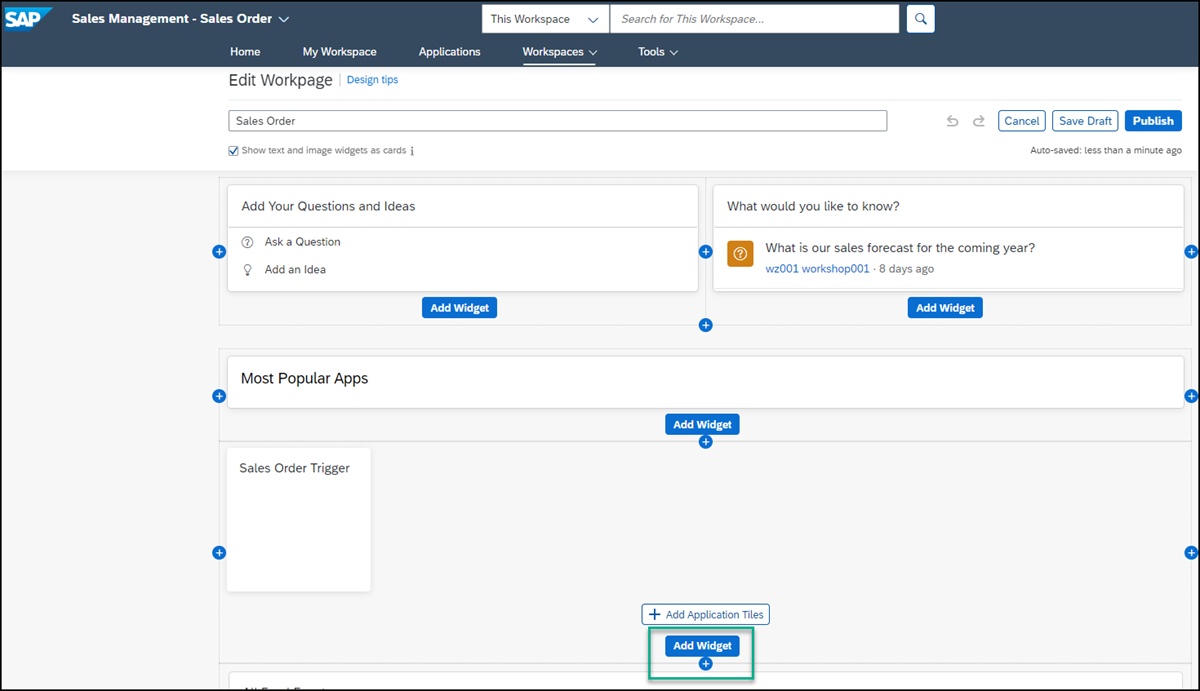
Add widget Click Cards.
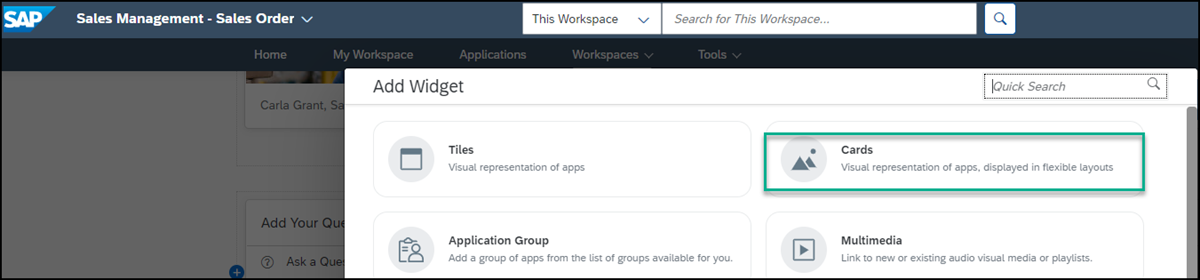
Click cards Select the
Products by Category Cardthat you created. In a workshop, use your unique identifier<your unique identifier>_Products by Category Card.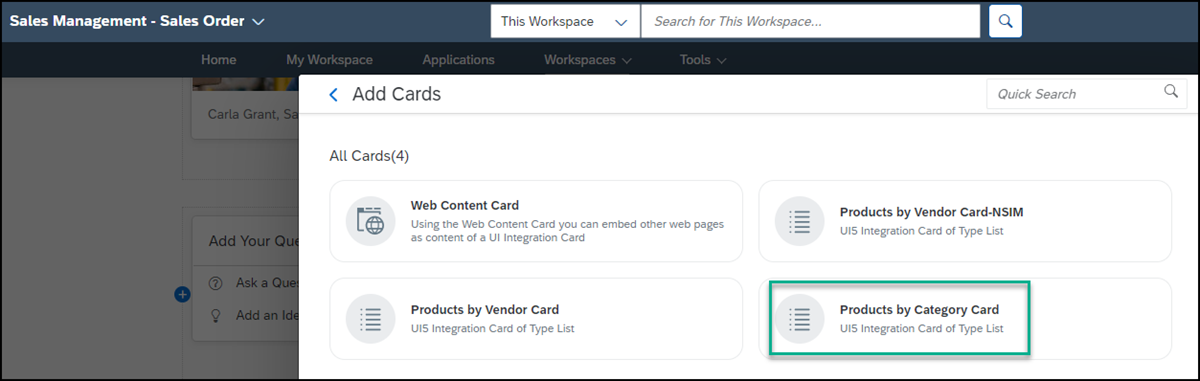
Add the card In the Add Widget screen, click Save.
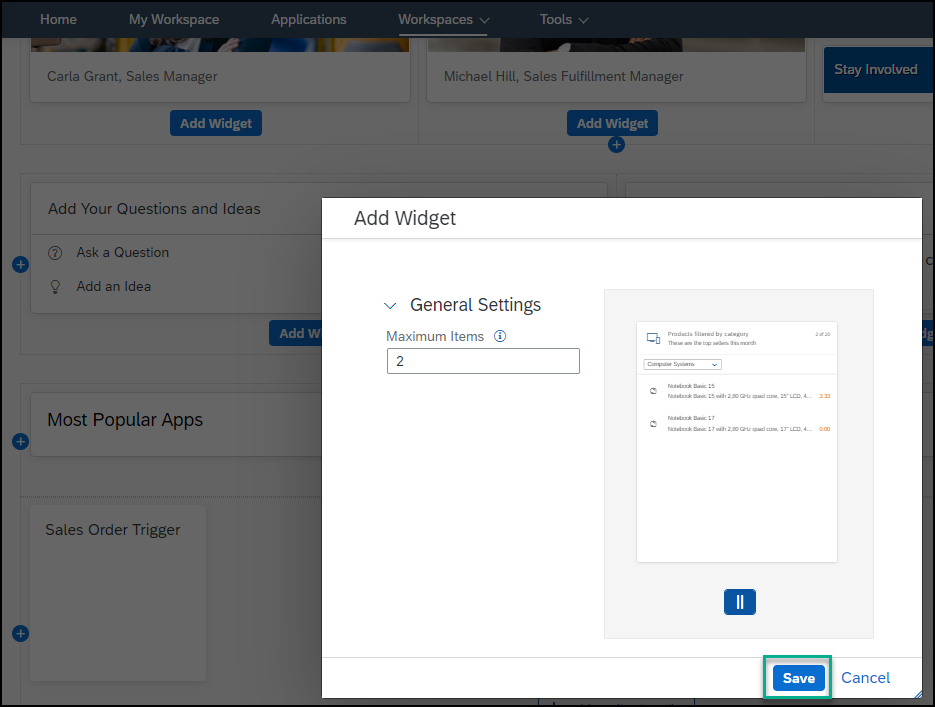
Add card
The card you created is added to the workpage of your workspace.
Now let’s add a title for the card.
Click Add Widget below the card widget you just added.
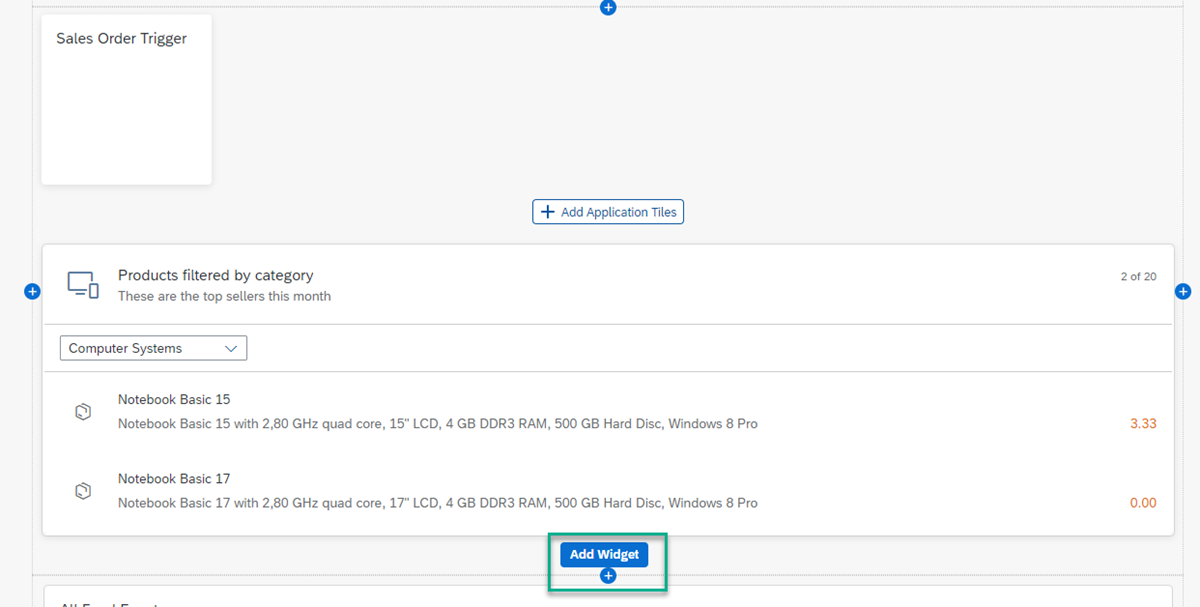
Add another widget Select the Text widget.
Design the Text widget as follows:
| :————- | :————- | Text | Type in the following:
Computer Systems - Best Sellers. | Font | Select the text and change to Arial 14pt. | Color | With the text already selected, choose black from the chart.Click outside of the widget section to see how your workpage looks so far.
Select the text widget you just added, and drag it above the card widget that you added before.
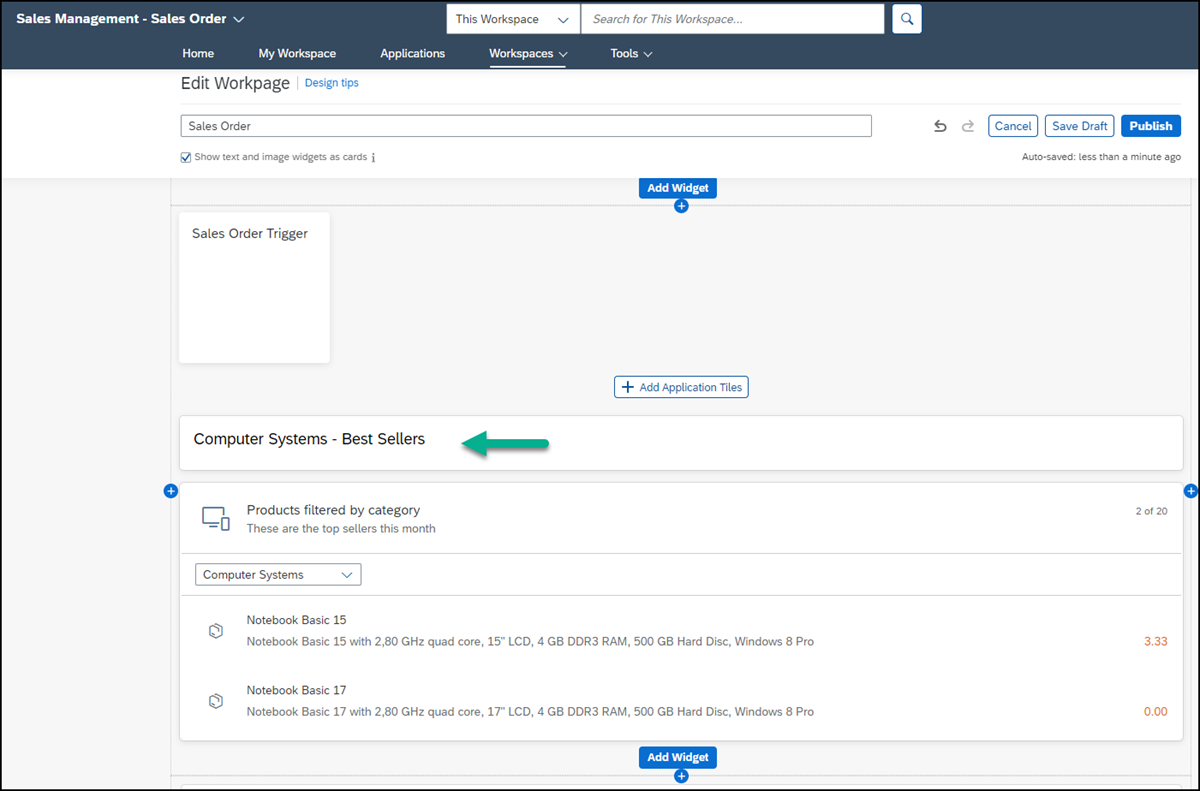
Drag widget Click Publish to publish your workpage.
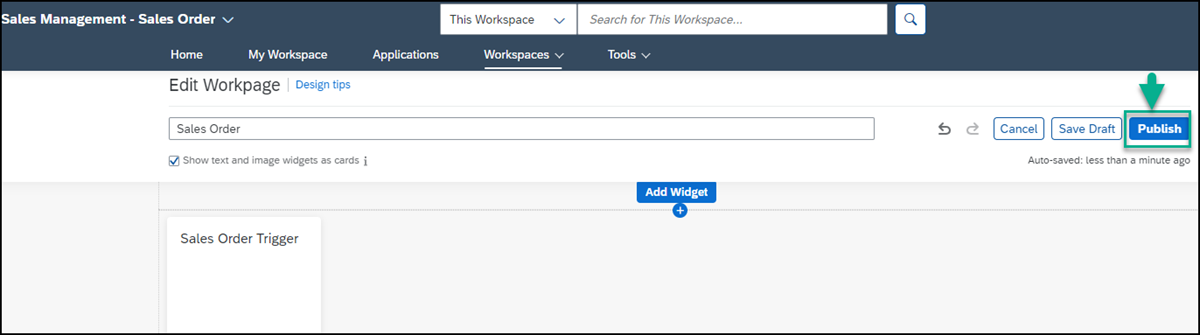
Publish workspace
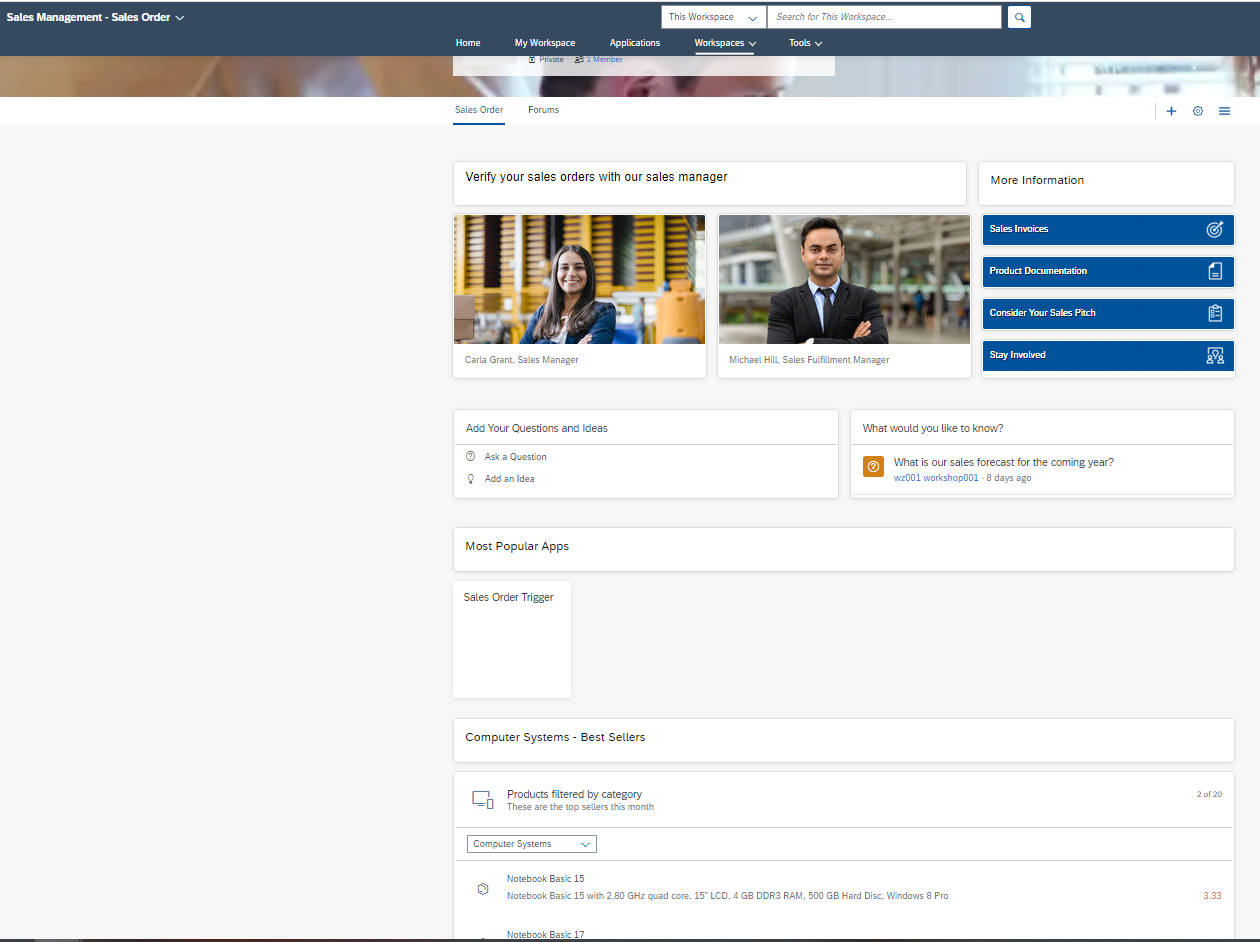
Your workspace should look like this - note that the card is only showing 2 products because you configured it that way.
Resources
Discussion
Share feedback on this tutorial or join the conversation in SAP Community.