
Overview


Prerequisites
Prerequisites
- This tutorial is designed for SAP HANA on premise and SAP HANA, express edition. It is not designed for SAP HANA Cloud.
- You have created a Multi-Target Application as explained in this tutorial: SAP HANA XS Advanced Connect to Web IDE and clone Git Repository
Steps
Time to Complete
15 Min.
What is a Multi-Target Application?: The XS Advanced application platform is based on Cloud Foundry, an open-source platform that provides a layer of abstraction between your application and the underlying infrastructure. This is useful because it allows you to deploy the same application in different cloud providers. Cloud Foundry allows for a micro-service approach. A Multi-Target Application allows you to bundle all the different micro-services conforming
your business application into the same lifecycle. For more information about multi-target applications (MTA), refer to this blog post.
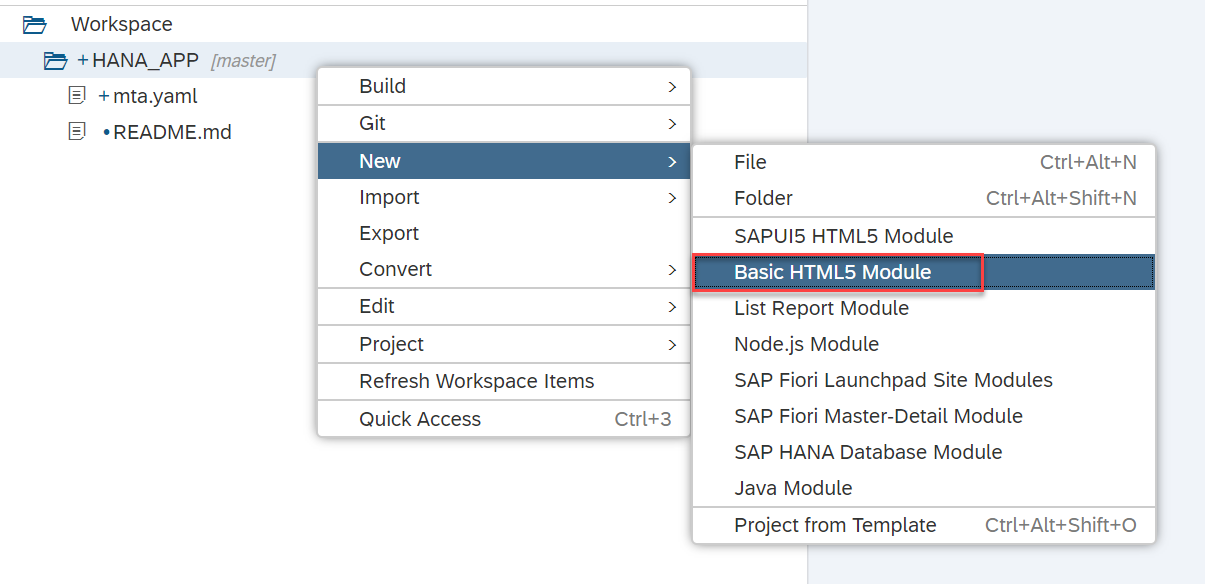
Begin by right-clicking on your project and then choosing New -> HTML5 Module
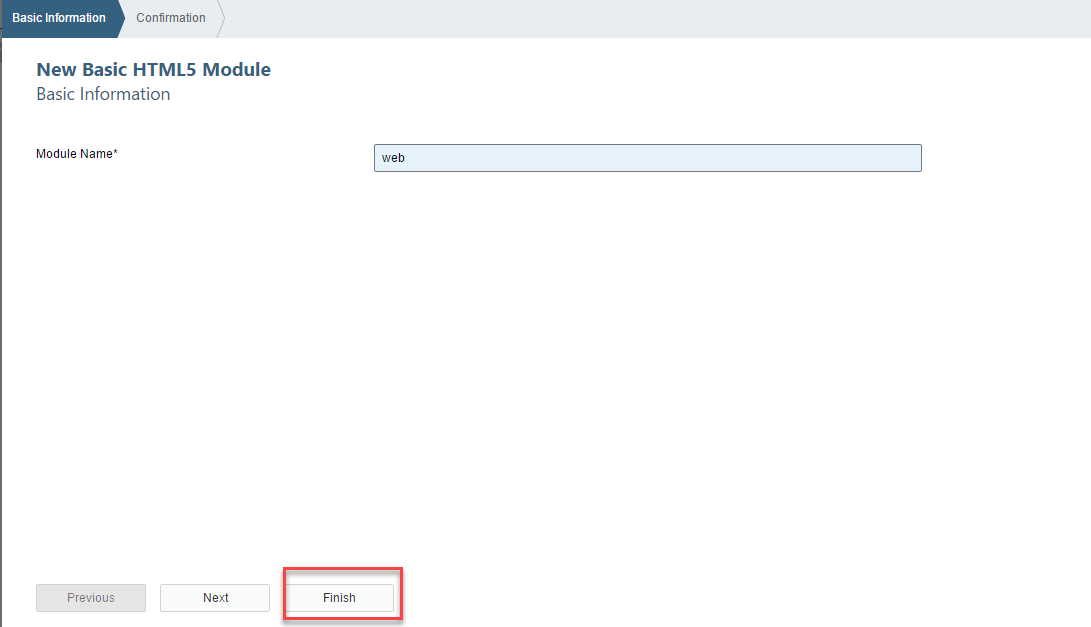
Name the module web. Press Next to see the confirmation. Then press Finish.
You will notice a new folder under the project folder. SAP Web IDE has automatically created the appropriate folder structure for you. Open the resources folder to answer the validation below.
The User Account and Authentication service validates users and their roles and provides them with an authentication token. You can find more information on the UAA service in the developer guide.
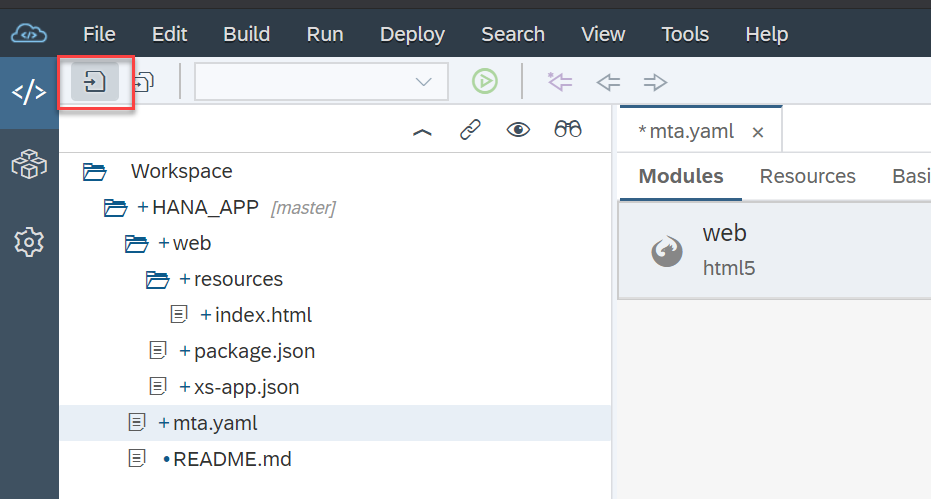
Before you can establish a dependency between your HTML5 module and the UAA service instance, you need to list the UAA service instance as a resource in your applications. Open the mta.yaml file in graphical mode and got to the resources tab. Create a new resource using the + Sign
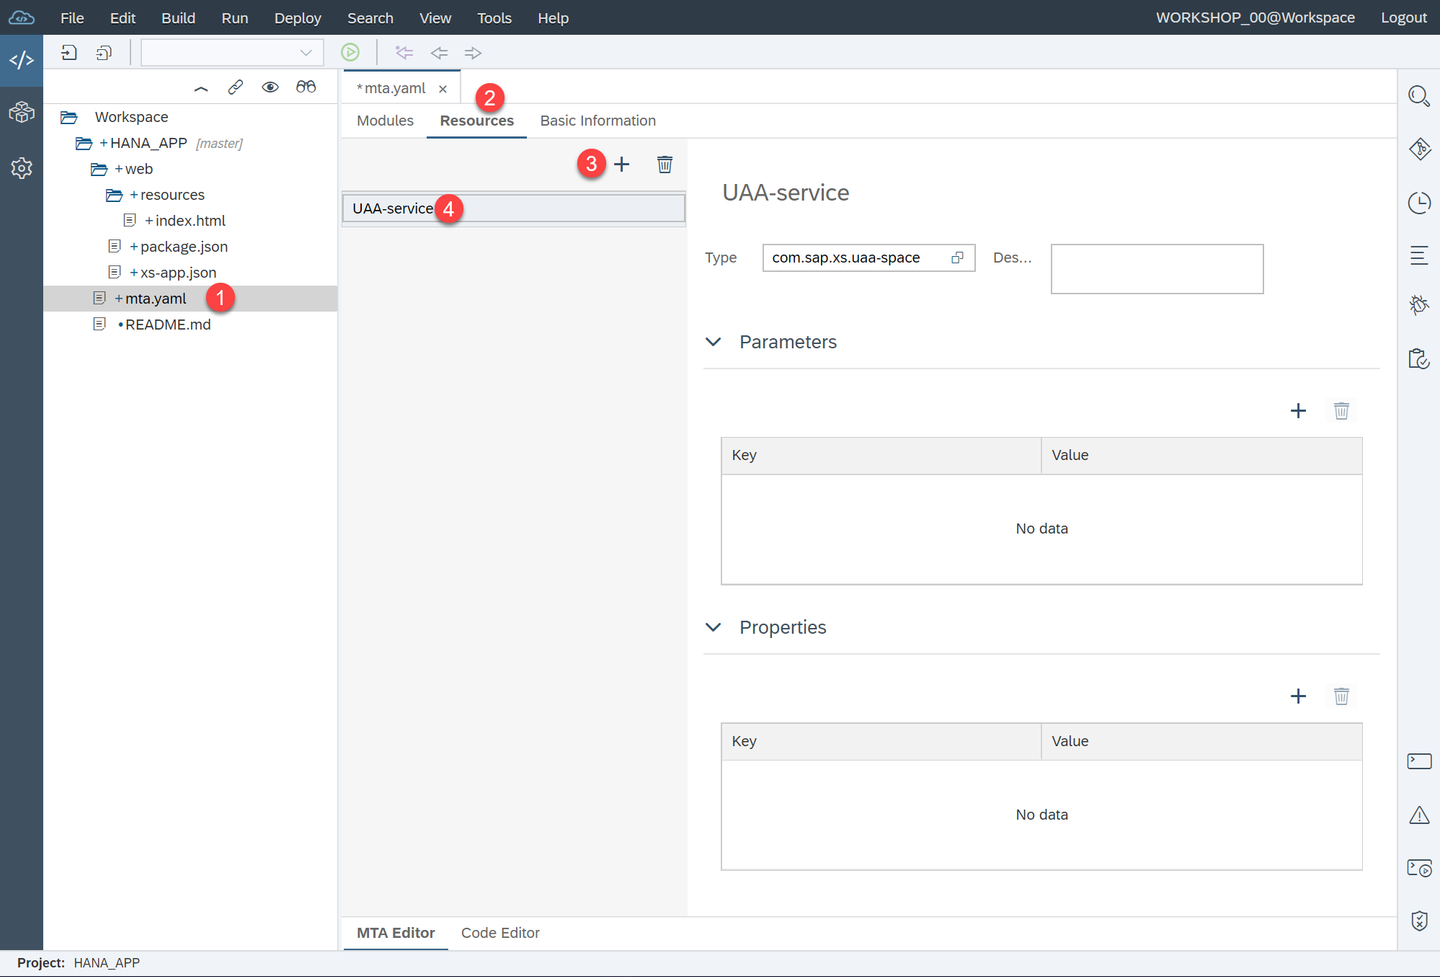
Fill in the name, choose com.sap.xs.uaa-space from the search help.
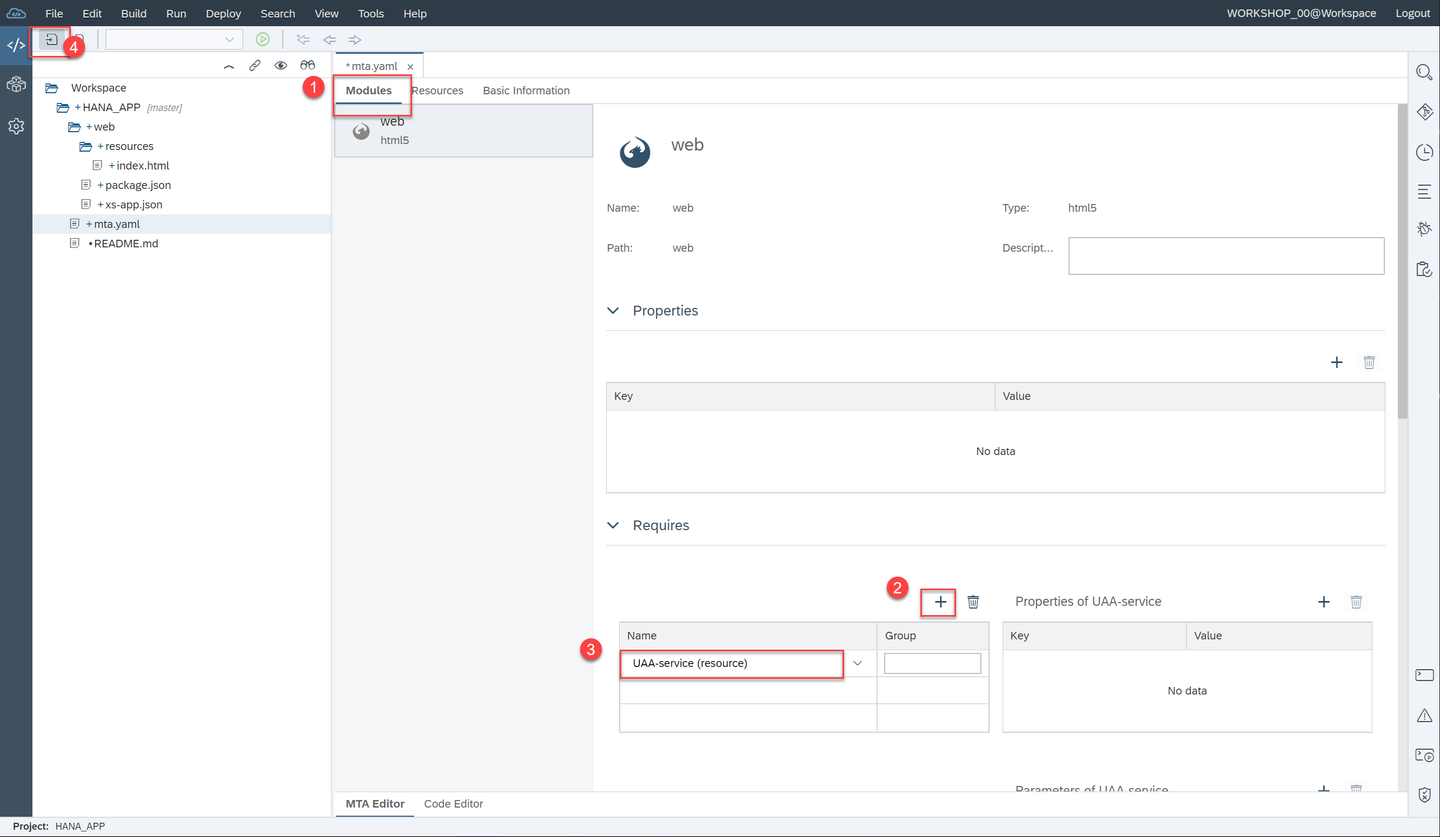
Click Modules to add the dependency to the UAA service in the web module
What is this
mta.yamlfile for? We have so far created a Multi Target Application, that is, an application that will contain different modules, such as an HTML5 module and some database artifacts within a HANA Database Module. This file is a design-time descriptor, that will be used by the platform to create a deployment descriptor. This file contains information related to the application (ID, version, description) as well as resources, modules and parameters that will be deployed and required at runtime.
And click on Save
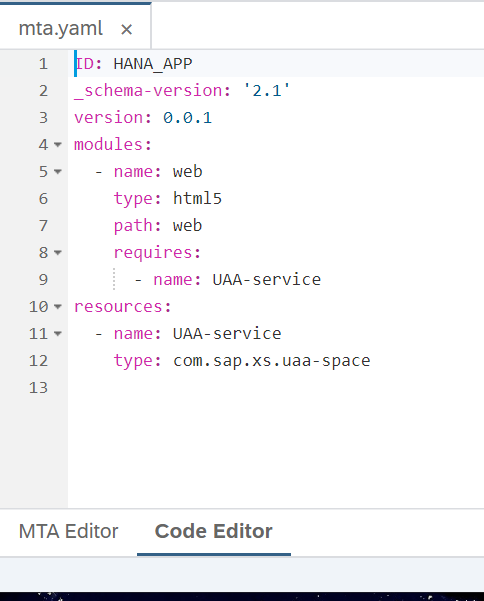
Open the Code Editor tab in the bottom to see the actual contents of the mta.yaml file.
The web folder in your project contains the resources that will be served out by this HTML5 module. This HTML5 module manages all HTML/client side UI resources (in the resources folder) and performs the task of reverse proxy for all other internal services, like a application router. This way you have a single HTTP endpoint and avoid any CORS issues. Among other files, the Basic HTML5 Module wizard created a file called xs-app.json.
In this file you can map the routes to destinations you defined in the mta.yaml. We can also set authentication and other options. Go ahead and change the authenticationMethod to route in the xs-app.json file.
{
	"welcomeFile": "index.html",
	"authenticationMethod": "route",
	"routes": [ ]
}
You will learn how to add routes to backend modules in the next tutorials. You can check this post to learn more about how this works.
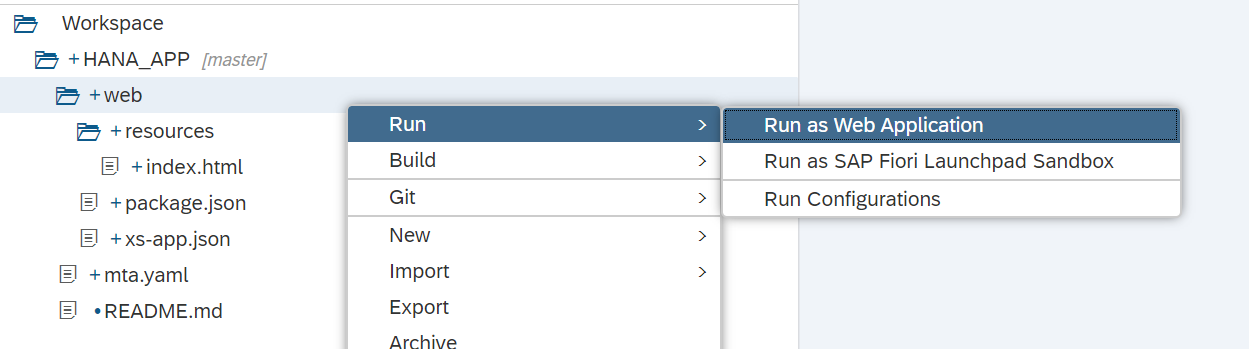
Click on the web folder and click on Run as Web Application. This will open a new browser tab to the default page of this web service.
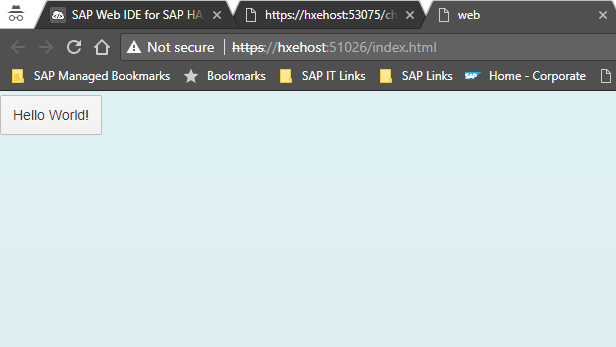
The console will be updated with the status of the service. Notice there is a logs URL that will be of use if something goes wrong. Click the URL link in the Run console to open the application in a new browser tab.

A new tab will open and you will see the default Hello World button has been placed for you:
Resources
Discussion
Share feedback on this tutorial or join the conversation in SAP Community.