
Overview
You will learn
- How to consume an OData service with create option


Prerequisites
Prerequisites
- This tutorial is designed for SAP HANA on premise and SAP HANA, express edition. It is not designed for SAP HANA Cloud.
- Tutorials: Use OData Metadata to dynamically create the columns
Steps
You will begin by making a copy of the previous exercise.
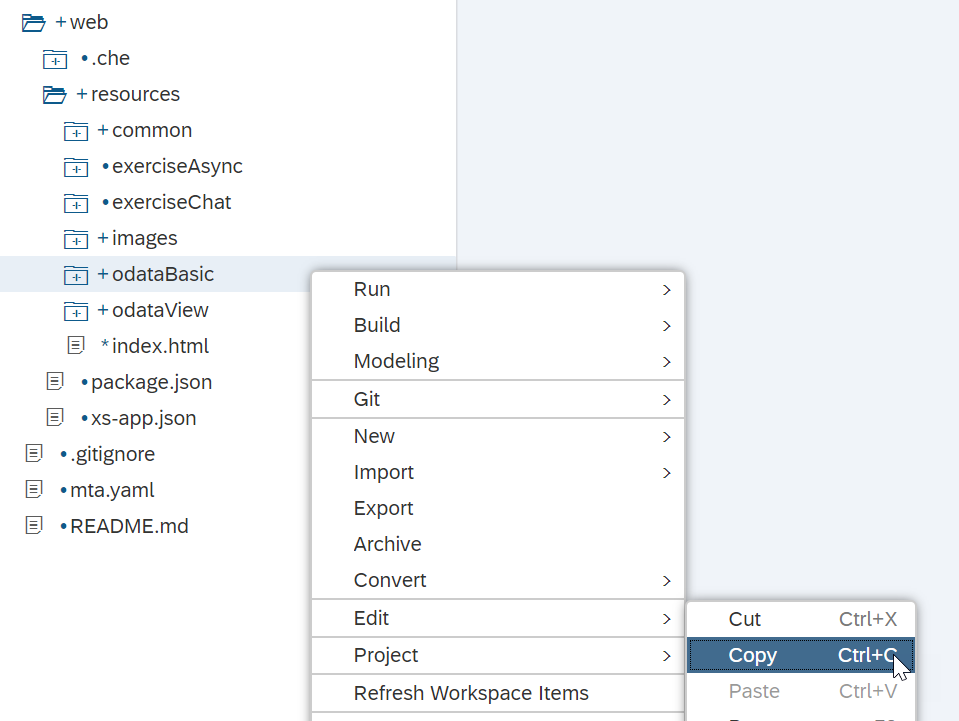
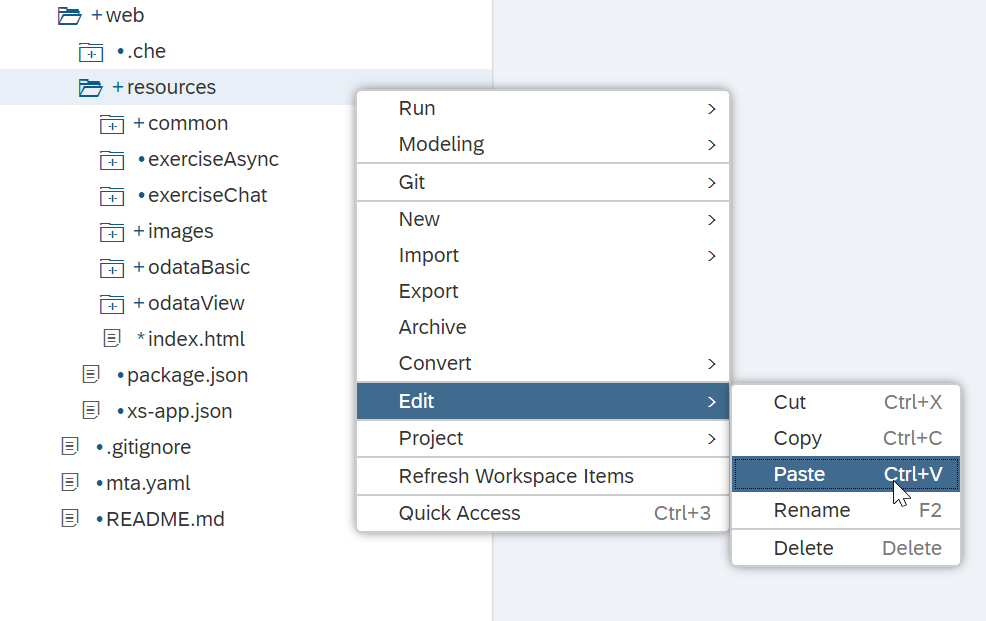
Right-click on the resources folder. Choose Paste.
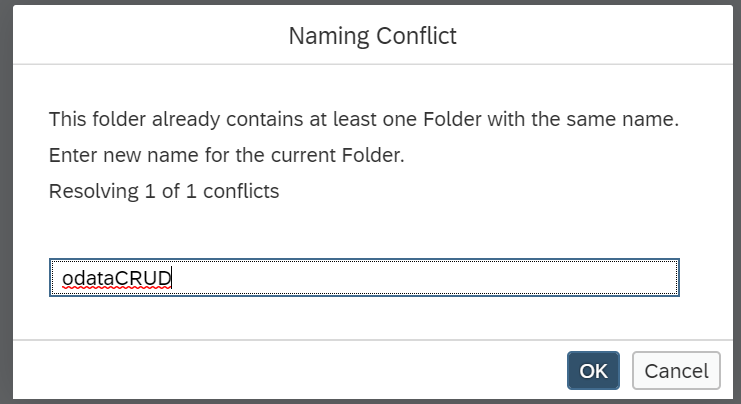
In the copy folder dialog, give the new Name as odataCRUD.
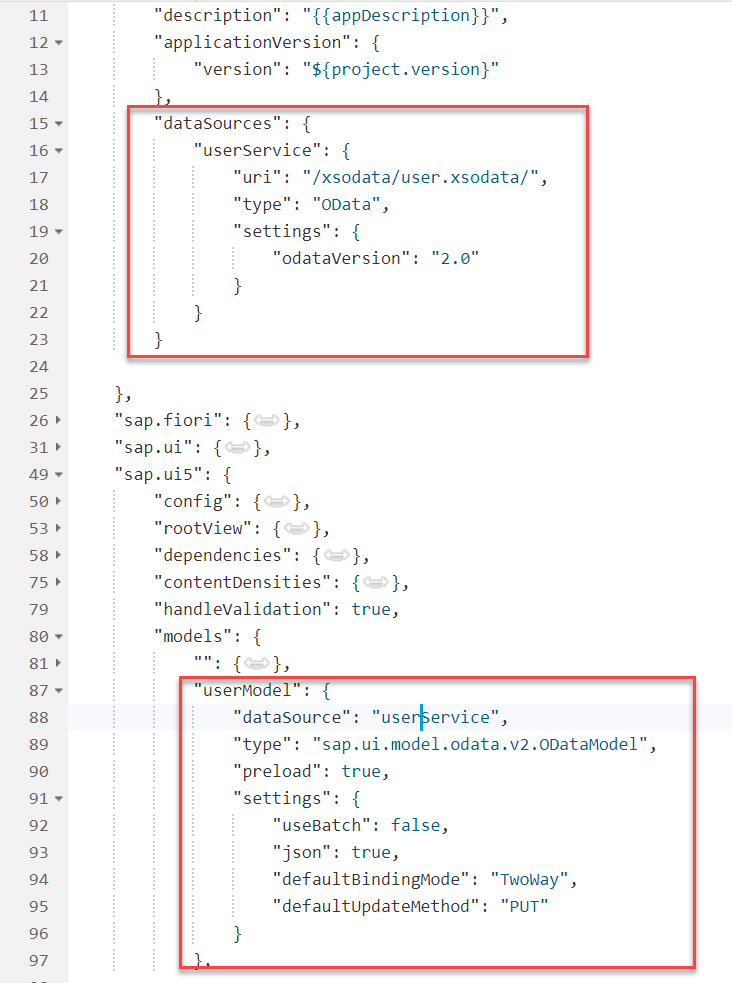
Go into the manifest.json file and switch the service to the existing user.xsodata service. Also adjust the name of the datasource in the model configuration:
Use the following code to replace the existing code for your XML view:
<mvc:View xmlns="sap.m" xmlns:mvc="sap.ui.core.mvc" xmlns:core="sap.ui.core"
	xmlns:smartTable="sap.ui.comp.smarttable" controllerName="opensap.odataBasic.controller.App" height="100%">
	<Page id="mPage" title="{i18n>appTitle}" titleLevel="H1">
		<content>
			<ScrollContainer id="sc1" height="100%" width="100%" horizontal="true" vertical="true">
				<Panel id="panel" headerText="New User Record Details" expandable="true" expanded="true">
					<List id="list" width="400px">
						<InputListItem id="itmFName" label="{i18n>FName}">
							<Input id="fName" value="{/FirstName}"/>
						</InputListItem>
						<InputListItem id="itmLName" label="{i18n>LName}">
							<Input id="lName" value="{/LastName}"/>
						</InputListItem>
						<InputListItem id="itmEmail" label="{i18n>EMail}">
							<Input id="email" value="{/Email}"/>
						</InputListItem>
					</List>
					<Button id="btnCall" text="{i18n>B3}" press="callUserService"/>
					<Button id="btnUpdate" text="{i18n>B4}" press="callUserUpdate"/>
				</Panel>
				<VBox fitContainer="true">
					<smartTable:SmartTable id="userTable" header="{i18n>UList}" editable="false" entitySet="Users" showRowCount="true" enableAutoBinding="true"
						showFullScreenButton="true" tableType="Table">
						<Table>
							<columns>
								<Column id="UserId">
									<customData>
										<core:CustomData key="p13nData" value='\{"columnKey": "UserId", "leadingProperty": "UserId", "sortProperty": "UserId", "columnIndex":"1"}'/>
									</customData>
									<Text text="{i18n>UserId}"/>
								</Column>
								<Column id="FirstName">
									<customData>
										<core:CustomData key="p13nData" value='\{"columnKey": "FirstName", "leadingProperty": "FirstName", "maxLength": "40","columnIndex":"2"}'/>
									</customData>
									<Text text="{i18n>FName}"/>
								</Column>
								<Column id="LastName">
									<customData>
										<core:CustomData key="p13nData" value='\{"columnKey": "LastName", "leadingProperty": "LastName", "maxLength": "40","columnIndex":"3"}'/>
									</customData>
									<Text text="{i18n>LName}"/>
								</Column>
								<Column id="Email">
									<customData>
										<core:CustomData key="p13nData" value='\{"columnKey": "Email", "leadingProperty": "Email", "maxLength": "40","columnIndex":"4"}'/>
									</customData>
									<Text text="{i18n>EMail}"/>
								</Column>
							</columns>
							<items>
								<ColumnListItem>
									<cells>
										<Input value="{UserId}" name="PERS_NO"/>
										<Input value="{FirstName}" name="FIRSTNAME"/>
										<Input value="{LastName}" name="LASTNAME"/>
										<Input value="{Email}" name="E_MAIL"/>
									</cells>
								</ColumnListItem>
							</items>
						</Table>
					</smartTable:SmartTable>
				</VBox>
			</ScrollContainer>
		</content>
	</Page>
</mvc:View>Event handlers are within the controller file for your view. You can delete the implementation of the functions onInit and onErrorCall, as you will implement new logic:
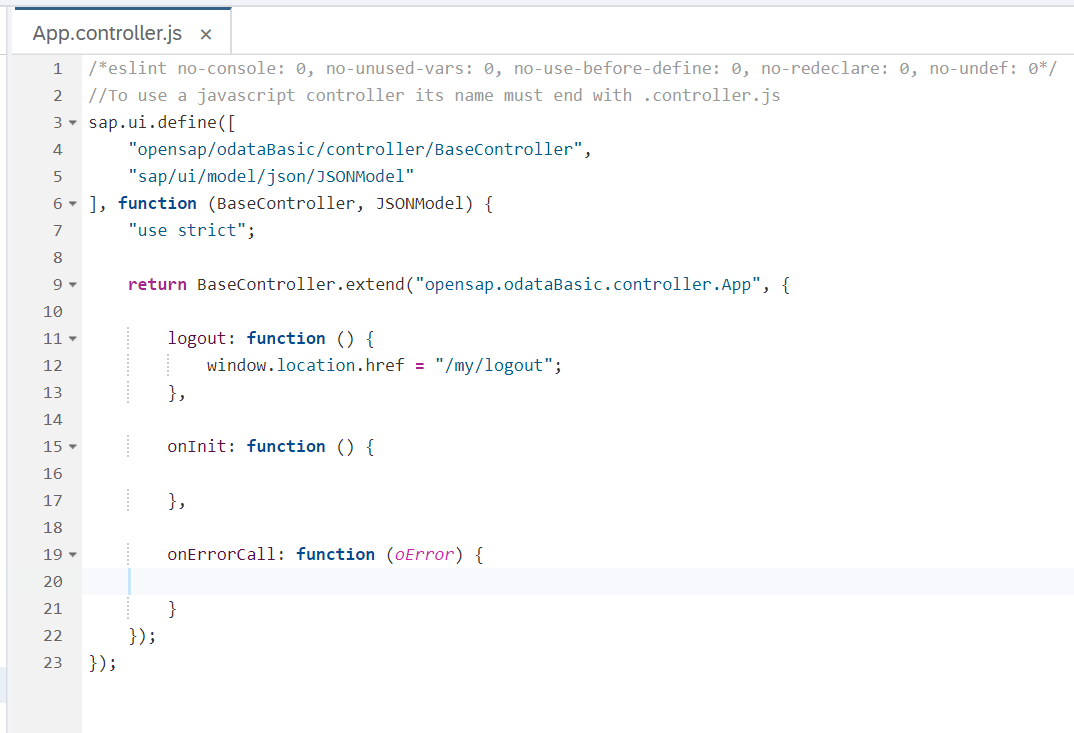
Add the following code to the onInit function:
this.getView().addStyleClass("sapUiSizeCompact"); // make everything inside this View appear in Compact mode
var oConfig = this.getOwnerComponent().getModel("config");
var userName = oConfig.getProperty("/UserName");
var userModel = this.getOwnerComponent().getModel("userModel");
var oTable = this.getView().byId("userTable");
oTable.setModel(userModel);
Add a function called callUserService:
callUserService: function () {
  var oModel = this.getOwnerComponent().getModel("userModel");
  var result = this.getView().getModel().getData();
  var oEntry = {};
  oEntry.UserId = "0000000000";
  oEntry.FirstName = result.FirstName;
  oEntry.LastName = result.LastName;
  oEntry.Email = result.Email;

  oModel.setHeaders({
    "content-type": "application/json;charset=utf-8"
  });
  var mParams = {};
  mParams.success = function () {
    sap.ui.require(["sap/m/MessageToast"], function (MessageToast) {
      MessageToast.show("Create successful");
    });
  };
  mParams.error = onODataError;
  oModel.create("/Users", oEntry, mParams);
},
Take a look at the code you have just added. You can see it is creating a JSON object with the service fields.
Add a new function called callUserUpdate
callUserUpdate: function () {
  var oModel = this.getOwnerComponent().getModel("userModel");
  oModel.setHeaders({
    "content-type": "application/json;charset=utf-8"
  });

  var mParams = {};
  mParams.error = onODataError;
  mParams.success = function () {
    sap.ui.require(["sap/m/MessageToast"], function (MessageToast) {
      MessageToast.show("Update successful");
    });
  };

  oModel.submitChanges(mParams);
}
Finally, delete the error handling function as we will use the reusable function from common/error.js which was created earlier. But we also need add this error.js reference to our index.html
<script type="text/javascript" src="/common/error.js" ></script>
Run the web module. When the new tab opens, adjust the URL to include the /odataCRUD path:
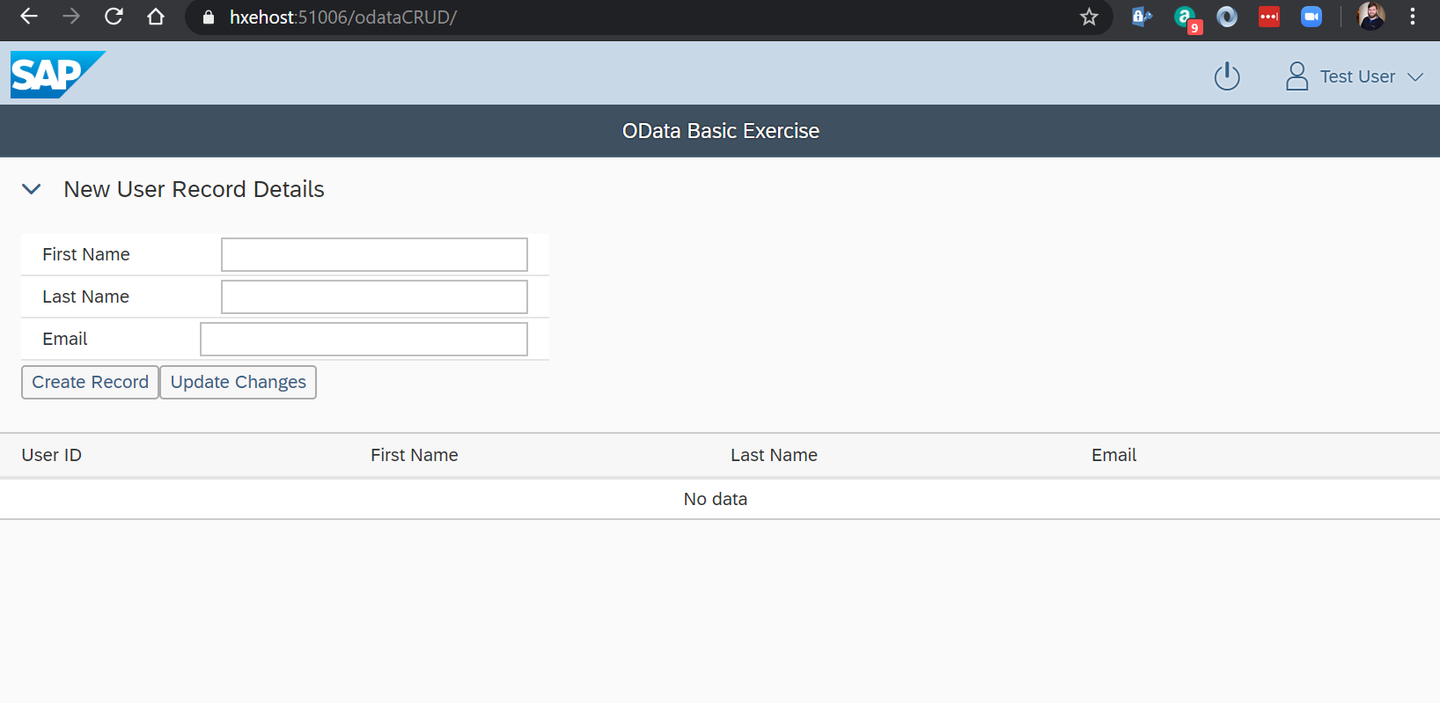
Try creating a new record:
Try both creating a new record and editing existing records. Also try creating a record with an invalid email address.


Resources
Discussion
Share feedback on this tutorial or join the conversation in SAP Community.