
Overview


Prerequisites
Prerequisites
- This tutorial is designed for SAP HANA on premise and SAP HANA, express edition. It is not designed for SAP HANA Cloud.
- Proficiency: beginner
- Tutorials: SAP HANA XS Advanced, Creating an HDI Module
Steps
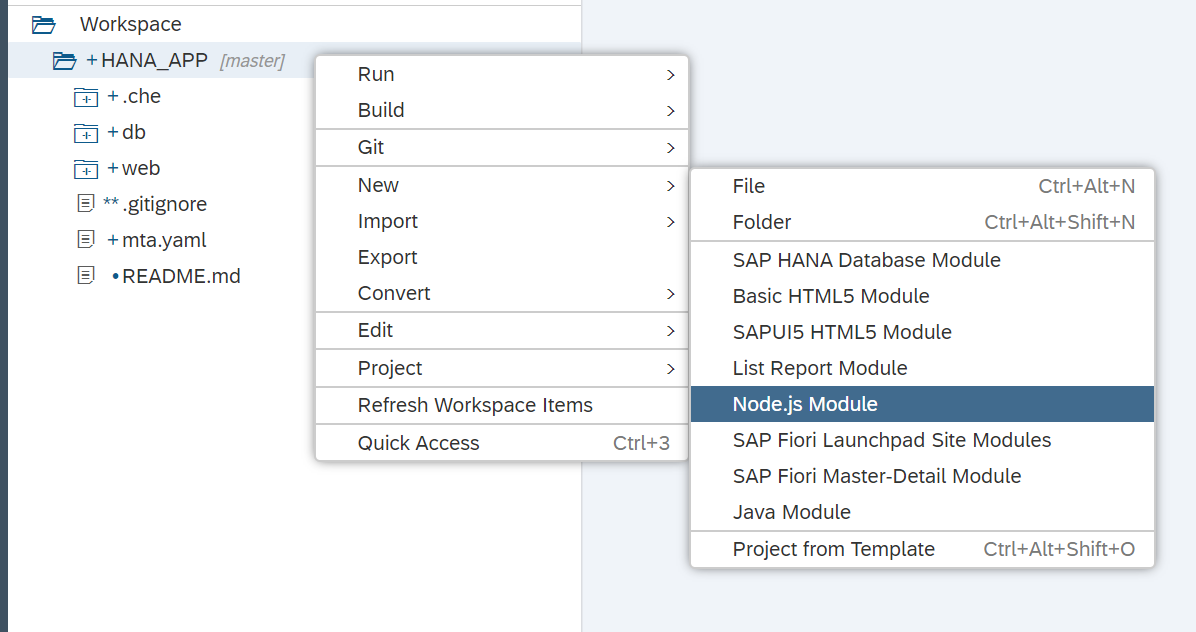
Like the previous exercises, you will start by creating a new module. New->Node.js Module
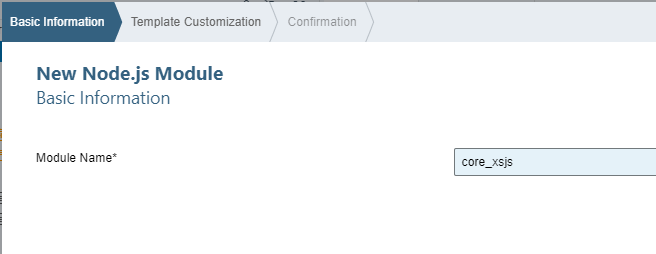
Name the module core_xsjs and press Next.
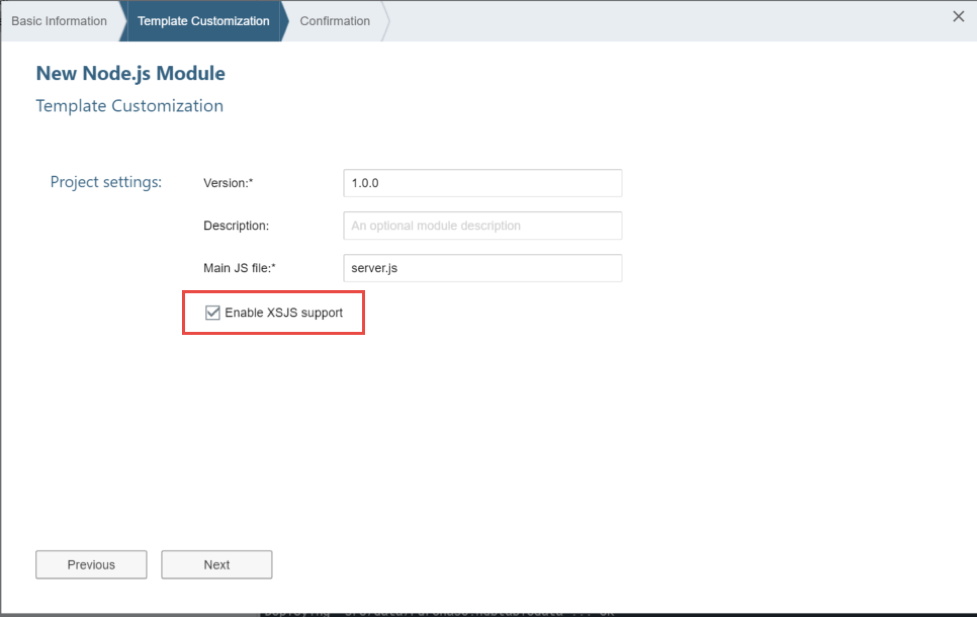
Be sure to check the box Enable XSJS support. Then press Next. Then press Finish.
Once again the mta.yaml file has been extended to add the core_xsjs module.
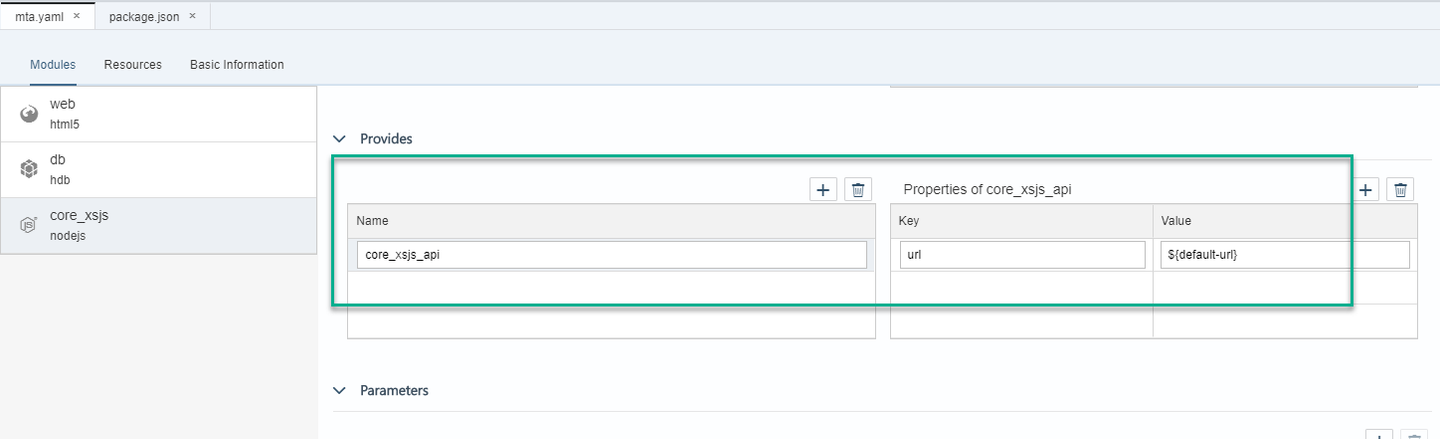
This XSJS module will also need the UAA service for authentication. Additionally, it will need data from the database module and the HDI container behind it. Add those dependencies to the node module

Now you need to add the dependency from the web module to this new Node.js module and a destination route to it as well.
In the Requires section of the web module, add core_xsjs_api
If you are editing this manually, this should match the name of the value under
Providesin the new node module
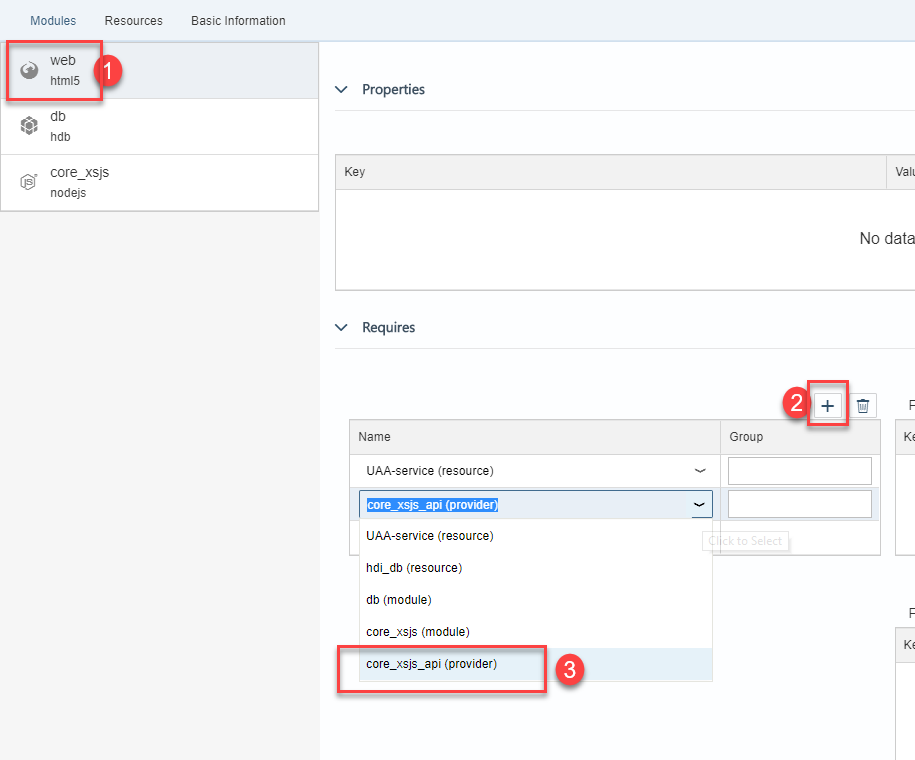
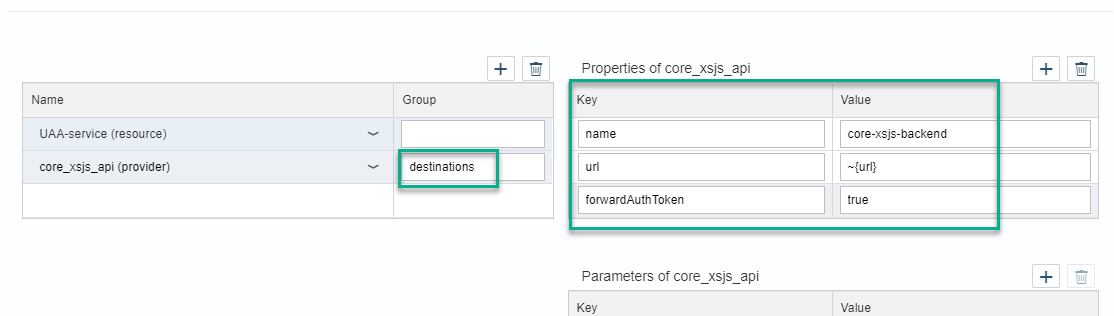
Add destinations in the field group and the following key-value pairs as the properties for the core_xsjs_api module:
name: core-xsjs-backend
url: ~{url}
forwardAuthToken: true
The complete section for the web module should now look like this:
What is this configuration for?
The
approuteris a module that serves as a single point of entry to a Multi-Target Application. In this case, the web module contains the call to this module in thepackage.jsonfile. Theapprouterwill use routes to determine the destination for a request coming from, for example, a web browser. The configuration you have just entered is naming the Node.js destination ascore-xsjs-backend, URL is picking up the value from theprovidesURL, which is in turn taking it from the reserved environment variable,default-url.Later at deploy, the destination routing builds a dependency and navigation ability between the two services without ever having to hard code the URLs or ports. They are assigned at deploy time and all references are automatically updated.
Save the yaml file and go into the code editor. Copy the definition of the node module in the validation below:

You can now add rules for redirecting certain requests to the web module into other modules in this project.
Open the file xs-app.json in the web module and fill in the routes with the following configuration
"routes": [{
  "source": "(.*)(.xsjs)",
  "destination": "core-xsjs-backend",
  "csrfProtection": false,
  "authenticationType": "xsuaa"
}, {
  "source": "(.*)(.xsodata)",
  "destination": "core-xsjs-backend",
  "authenticationType": "xsuaa"

}]
This is where you are configuring that any file request with the extension .xsjs or .xsodata should be rerouted internally to the Node.js destination that you defined in the mta.yaml file.
This is what the section should like:

Return to the core_xsjs folder that you created in this exercise. Like the other applications, this one also starts with a package.json file. Different this time is the fact that the startup script is not an SAP provided central node application, but one that you have created via the module creation wizard. To avoid the “make: g++: Command not found” or “node-gyp exited with code: 1” on the latest versions of XSA; please update the node version from 8.x to 10.x in the package.json. Also update the @sap/xsjs-test package to at least “^3.1.2”. For more details on this compatibility situation, see service note: https://launchpad.support.sap.com/#/notes/2905261
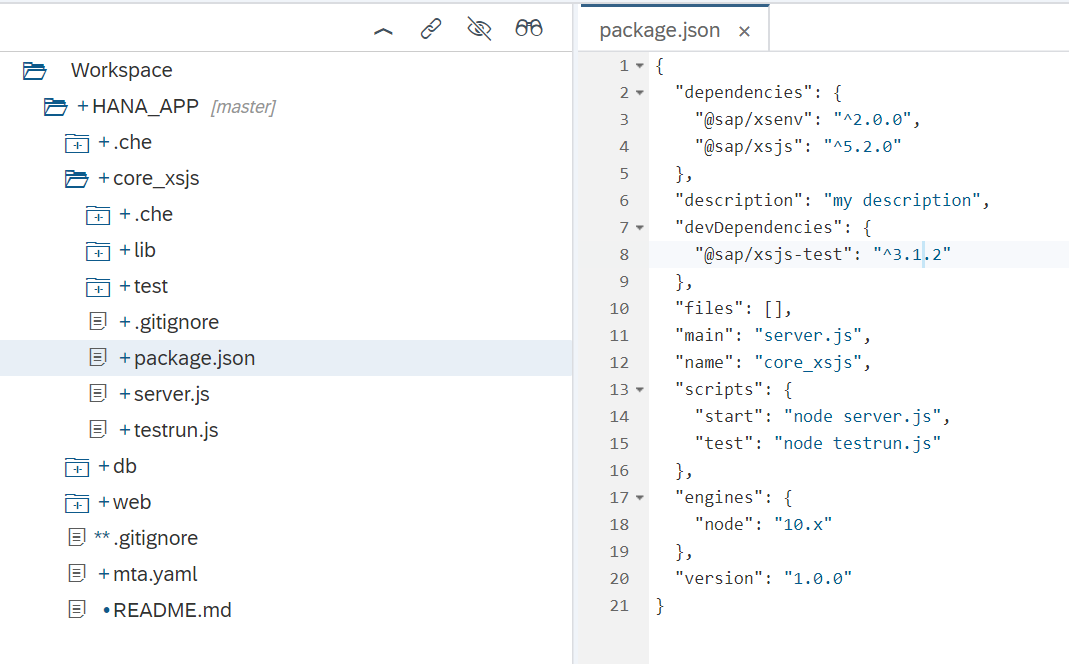
This server.js is the Node.js bootstrap for XSJS compatibility mode. It uses the SAP provided xsjs module and starts it with a few basic parameters. However, remember all the HANA database connectivity options come from the HDI container which you bound to this service via the mta.yaml file. You want to make a few changes to what the wizard has generated. You want authentication on your service, so comment out the anonymous: true line

Remember to Save.
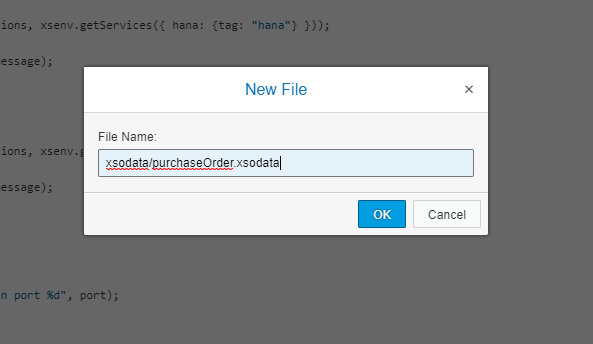
In the lib folder, create a sub-folder called xsodata.
Create a file named purchaseOrder.xsodata. In the latest versions of Web IDE, you can create both objects at the same time using New->File as follows:
Here you expose both the Header and Item tables from your HDI container as separate entities and build a navigation association between the two.
service {
    "PurchaseOrder.Header"
	  as "POHeader" navigates ("Items" as "POItem");

	"PurchaseOrder.Item"
	  as "POItem";

	association "Items" principal  "POHeader"("PURCHASEORDERID")
	multiplicity "1" dependent "POItem"("POHeader.PURCHASEORDERID") multiplicity "*";
}
You can ignore the warning from
XSODataValidatorthis time

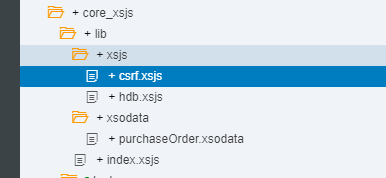
In the lib folder, create a sub-folder called xsjs and a file named hdb.xsjs.

Here is the source code for this file.
/*eslint no-console: 0, no-unused-vars: 0, no-shadow: 0, new-cap: 0*/
/*eslint-env node, es6 */
"use strict";

let conn = $.hdb.getConnection();
let query =
	`SELECT  "POHeader.PURCHASEORDERID" as "PurchaseOrderItemId",
             PRODUCT as "ProductID",
             GROSSAMOUNT as "Amount"
             FROM "PurchaseOrder.Item" `;
let rs = conn.executeQuery(query);

let body = "";
for(let item of rs){
   if(item.Amount >= 500){
	body += item.PurchaseOrderItemId + "\t" +
			item.ProductID + "\t" + item.Amount + "\n";
   }
}
$.response.setBody(body);
$.response.contentType = "application/vnd.ms-excel; charset=utf-16le";
$.response.headers.set("Content-Disposition",
		"attachment; filename=Excel.xls");
$.response.status = $.net.http.OK;
Create a second file named csrf.xsjs. This is an empty file which you can use to request a CSRF token for update/insert/delete operations.
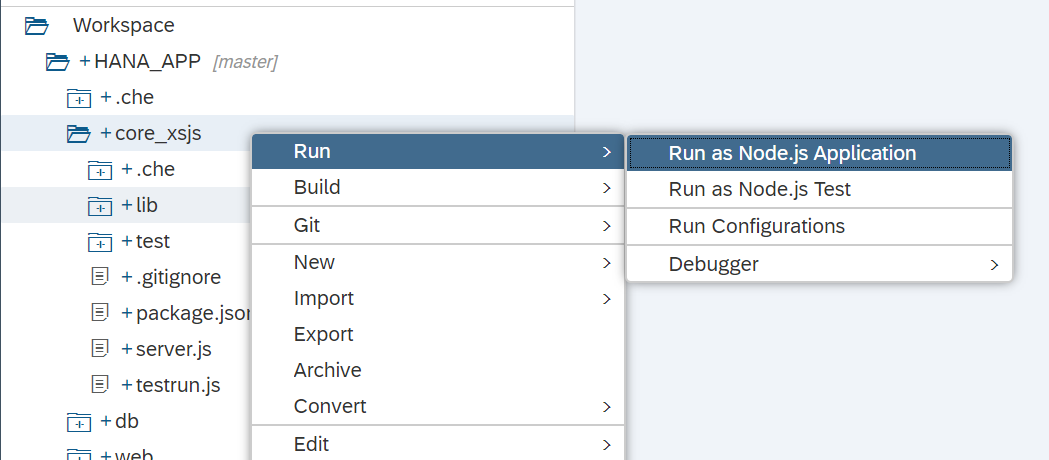
Run the core_xsjs module. It will first build the module so it will take a little longer than usual.
You should see that the build and deploy were successful and the core_xsjs module is running.

So now run the web module. It will need to rebuild and redeploy due to the added dependency to the core_xsjs module.

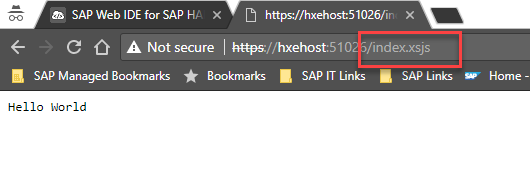
In the running tab, you should see the index.html from earlier. You can add the URL to your xsjs service /index.xsjs in the browser. You will see that your xsjs service is accessible via the HTML5 module runtime. The HTML5 module functions as a proxy and performs the routing to the other service internally.
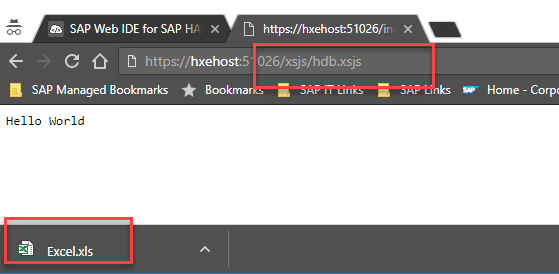
/xsjs/hdb.xsjs reads data from our new Purchase Order table you created in HANA in the previous exercise and exports it as an Excel text file. Feel free to test the other example xsjs files you created in this exercise as well.
/xsodata/purchaseOrder.xsodata/?$format=json shows you the definition for your OData service

Go back into SAP Web IDE for SAP HANA and click the URL for the Node.js service

Paste the result into the validation below. If you get a validation error, you might want to review step 3.
Resources
Discussion
Share feedback on this tutorial or join the conversation in SAP Community.